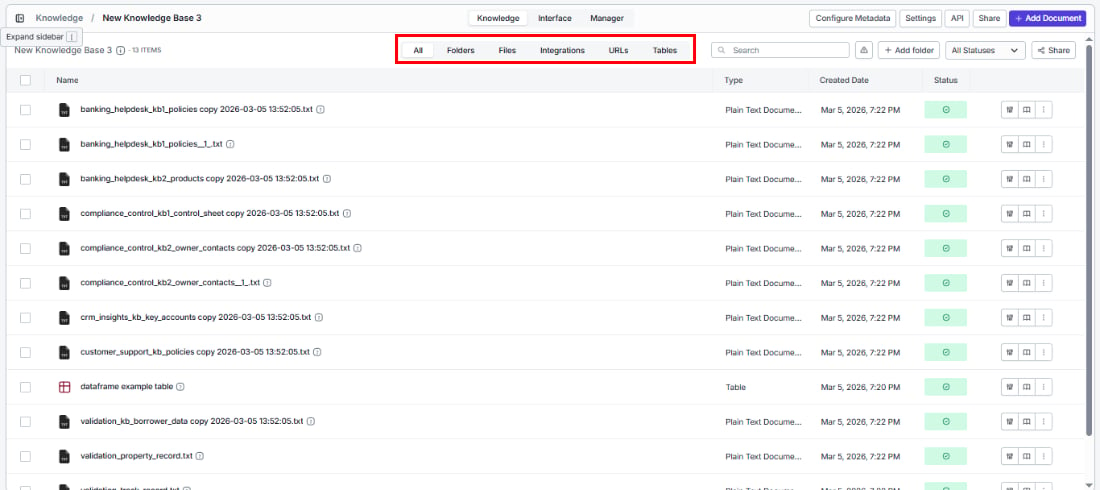
Once your data is indexed, the Knowledge tab becomes your control center. See at a glance which documents are searchable, which are still processing, and which need attention — then organize, reindex, or remove content to keep your search results accurate.

Document list

The document list is organized with filter tabs across the top and a table below.

Filter tabs

Document list with filter tabs (All, Folders, Files, Integrations, URLs, Tables) highlighted Quickly find what you’re looking for by filtering documents by source:
TabWhat you’ll see
AllEvery document regardless of source
FoldersDocuments organized into folders within this knowledge base
FilesDocuments added via file upload
IntegrationsDocuments synced from connected apps
URLsDocuments added via URL scraping
TablesDocuments indexed from VectorShift tables

Columns

ColumnWhat it shows
NameThe document name (auto-generated from the file name and timestamp)
TypeThe file type (e.g., Plain Text Document)
Created DateWhen the document was added
StatusCurrent processing status

Status values

Know exactly where each document stands in the indexing process:
StatusWhat it means
SuccessReady to search — fully processed and indexed
ProcessingIn progress — being chunked, embedded, and indexed (shown as a spinner)
FailedSomething went wrong — click Retry to try again
WarningPartial issues — shown for folders when one or more items inside failed to index
You can filter the list to show only documents with a specific status by clicking the All Statuses dropdown above the table.

Alert banners

In certain situations, the document list displays informational alert banners:
  • “Parent folder already selected to Sync”: A parent folder is already queued for syncing. To customize indexing settings for individual items inside, remove the parent folder sync first.
  • “Items cannot be deleted individually”: Documents inside a recursive URL folder can only be removed by deleting the entire folder.

Other list controls

Document list showing search, add folder, share, and add document controls
  • Search: Find a document by name using the search bar.
  • + Add folder: Create a folder within the knowledge base to organize your documents. Folder names must be at least 3 characters long and can only contain letters, numbers, and underscores.
  • Share: Share documents with other users.
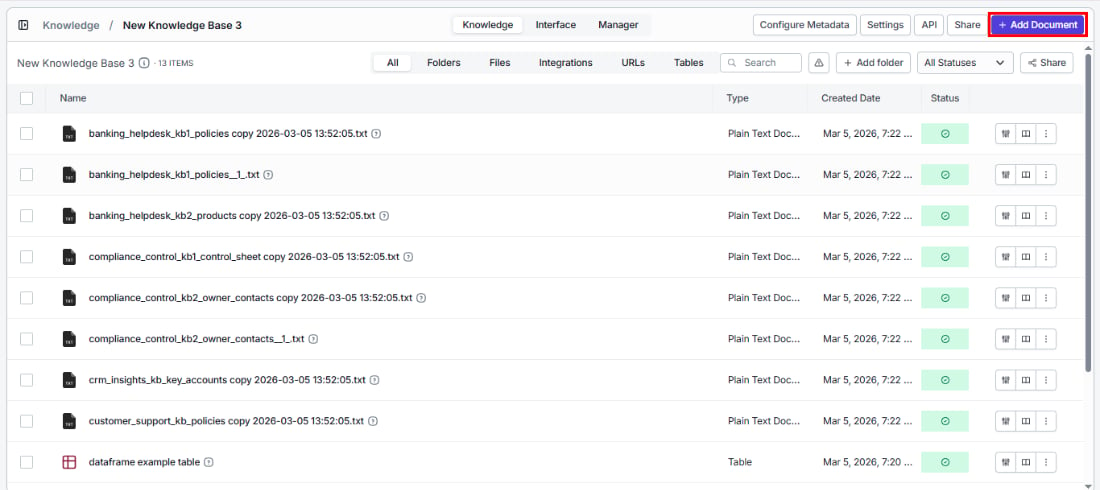
  • + Add Document: Add more content directly — opens a dropdown with all available indexing options (upload files, add integration, scrape URL, etc.).

Bulk actions

Document list with multiple items selected and bulk action buttons (Move, Re-index, Remove) visible Save time by acting on multiple documents at once. Select documents using the checkboxes, then use the bulk action buttons:
ActionWhat it does
ReindexRe-processes all selected documents with the current indexing settings
MoveMoves all selected documents to a folder within the knowledge base
DeletePermanently removes all selected documents
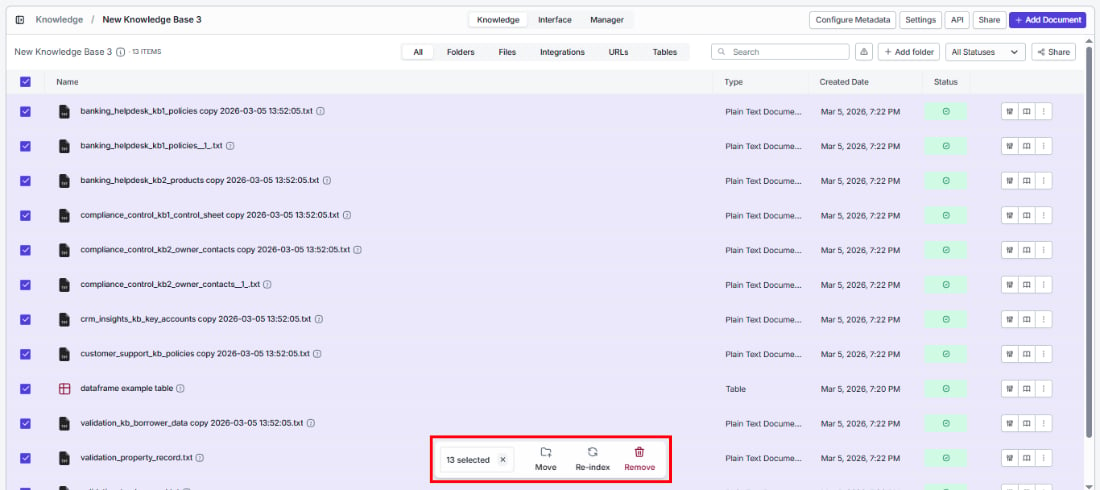
Click Clear Selection to deselect all documents.

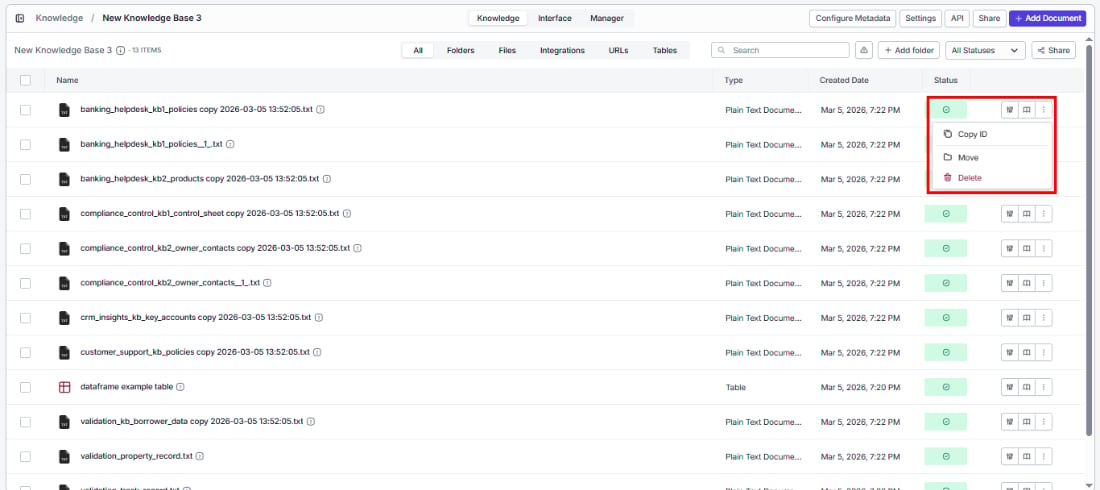
Actions on individual documents

Each document row has action icons on the right side and a three-dot menu. Document list with configure item indexing icon highlighted on a row

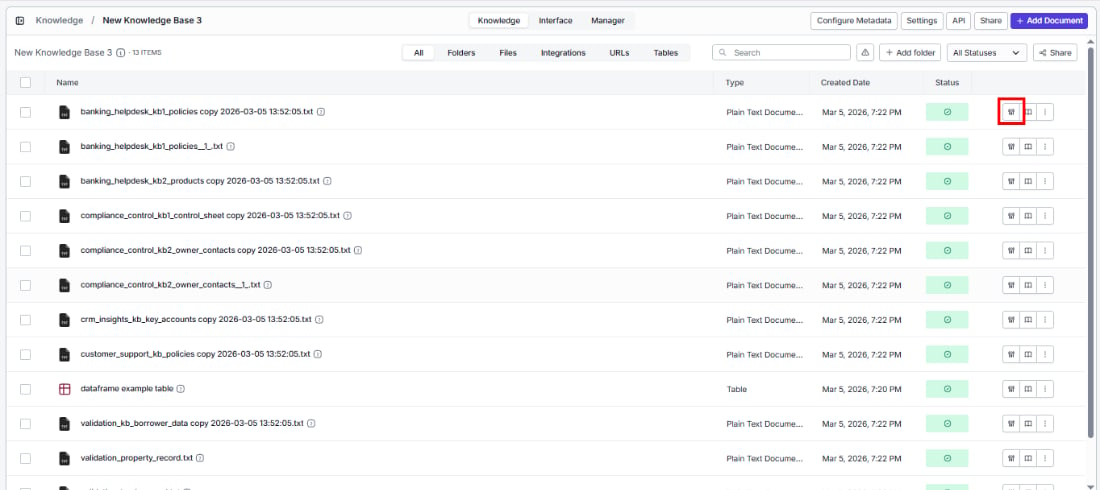
Configure item indexing

Need different processing for a specific document? Click the settings icon (first icon) to override the knowledge base defaults and reindex with custom settings — without affecting any other documents. Configure Item Indexing dialog showing permanent settings and indexing settings The dialog has two sections: Permanent settings These reflect the knowledge base-level settings. Some can be toggled per document:
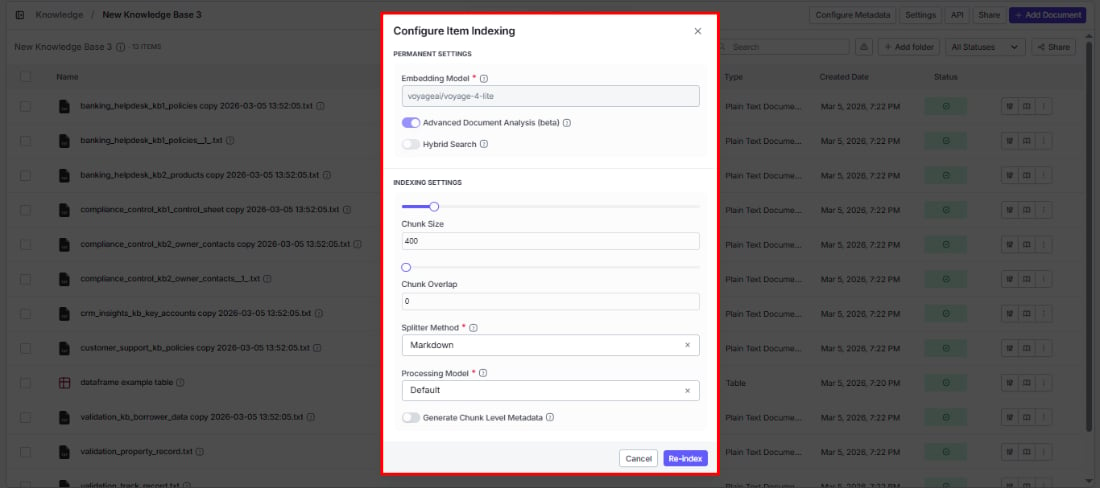
  1. Embedding model: Shows the model selected during knowledge base creation (read-only).
  2. Advanced document analysis (beta): Toggle on or off for this document.
  3. Hybrid search: Toggle on or off for this document.
Indexing settings Customize these for this specific document to improve its search results:
  1. Chunk size: Adjust the slider or enter a value. Overrides the knowledge base default for this document only.
  2. Chunk overlap: Adjust the slider or enter a value. Must be less than the chunk size.
  3. Splitter method: Choose Sentence, Markdown, or Dynamic.
  4. Processing model: Choose the processing model for this document.
Click Re-index to reprocess the document with the new settings, or Cancel to discard.
This is especially useful when one file type needs different handling — for example, a scanned PDF that needs Mistral OCR while your other docs work fine with the Default model.

Item preview

Verify how VectorShift processed your document — inspect chunks, parsed content, and metadata to make sure everything looks right. Open the preview by:
  • Clicking the preview icon (second icon) on the document row
  • Clicking directly on the document name in the list
Both open the same preview drawer with three tabs: Document preview drawer showing Chunks, Parsed, and Metadata tabs
TabHow it helps
ChunksSee how your content was divided — useful for diagnosing why search results may be too broad or too narrow
ParsedView the extracted text as the processing model sees it — verify nothing was missed or misread
MetadataCheck the document’s metadata, including any auto-generated fields — confirm tags are accurate
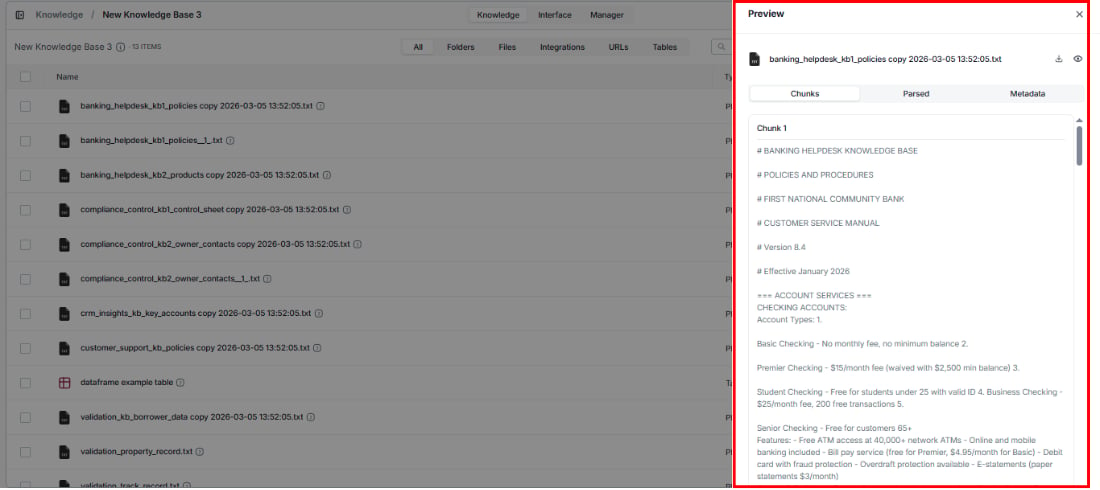
For documents with a Failed status, the preview icon is replaced with a Retry button. Click it to retry indexing.

Three-dot menu

Document list with three-dot menu showing Copy ID, Move, and Delete options Click the three-dot icon (last icon) to access additional options:
OptionWhat you can do
Copy IDCopy the document’s unique identifier to your clipboard — useful for API calls or pipeline configurations
MoveOrganize by moving the document to a folder within this knowledge base
DeletePermanently remove the document from the knowledge base