Use this node from the SDK
Add it in Python with
pipeline.add(name="...").create_workspace(...). See the SDK reference.Core Functionality
- Create a new workspace within an existing portal
- Upload files to the workspace at creation time
- Share the workspace with users by email
- Return workspace metadata for downstream reference
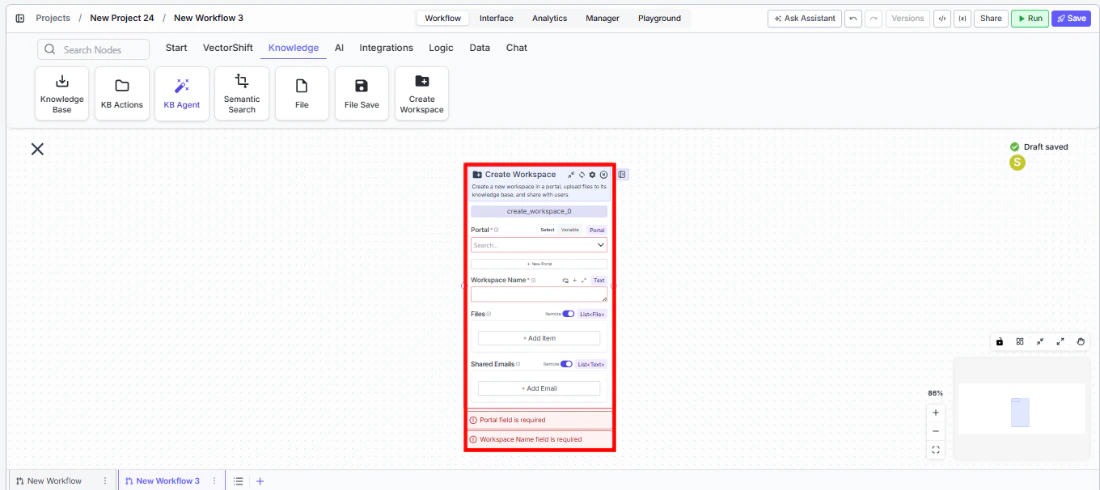
Tool Inputs
Portal* — Required · Portal selector · The portal to create the workspace in.Workspace Name* — Required · Text · The name of the new workspace.Files— File list · Optional · Files to upload to the workspace. Use + Add Item to add multiple files.Shared Emails— Text list · Optional · Email addresses of users to share the workspace with. Use + Add Item to add multiple emails.
Tool Outputs
- Workspace metadata outputs including workspace identifiers and configuration details are available via the Outputs panel.
- Workflows
Overview
In workflows, the Create Workspace node provisions a new portal workspace as a workflow step. You can pre-load it with files and share it with users — all in a single automated operation. This is ideal for client onboarding workflows, project setup automations, or any workflow that needs to create isolated workspaces within a portal.Use Cases
- Client onboarding — A workflow creates a dedicated workspace for a new client, uploads their initial documents, and shares access with the client’s email address.
- Project provisioning — A workflow creates a workspace per project, pre-loaded with templates and shared with team members.
- Automated workspace setup — A triggered workflow creates workspaces on a schedule or in response to form submissions, with pre-configured files and access.
- Multi-tenant content delivery — A workflow creates isolated workspaces for different users or teams, each with their own set of documents and permissions.
How It Works
- Add the node — On the workflow canvas, open the node panel and navigate to the Knowledge category. Drag Create Workspace onto the canvas.
- Select the portal — Use the
Portalselector to choose the portal where the workspace will be created. This field is required. - Set the workspace name — Enter a name in the
Workspace Namefield or connect an upstream text node. This field is required. - Add files (optional) — Use + Add Item to add files that should be uploaded to the workspace at creation time, or connect upstream file outputs.
- Add shared emails (optional) — Use + Add Item to specify email addresses of users who should receive access to the workspace.
- Configure dependencies (optional) — Use the Dependencies tab if this node depends on other nodes completing first.
- Connect outputs — Wire workspace outputs to downstream nodes if needed.
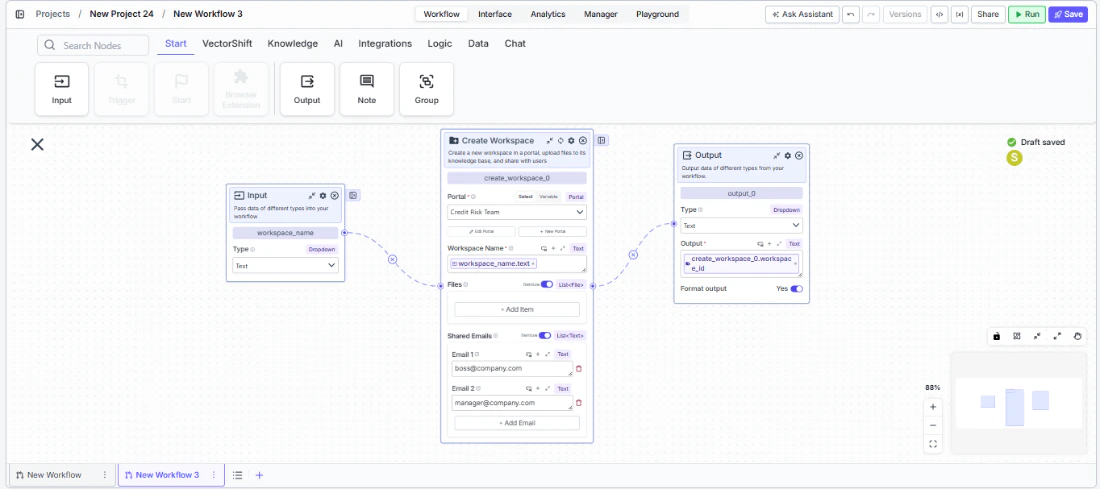
- Run the workflow — Execute the workflow. The node creates the workspace, uploads files, and shares access.
Settings
Portal— Portal selector · Required · The target portal.Workspace Name— Text · Required · The name for the new workspace.Files— File list · Optional · Files to upload to the workspace.Shared Emails— Text list · Optional · Email addresses for sharing access.
Best Practices
- Use dynamic workspace names — Connect upstream text nodes to generate unique workspace names that include client names, project IDs, or dates.
- Pre-load essential files — Upload onboarding documents, templates, or reference materials at workspace creation time so users have everything they need immediately.
- Validate email addresses — Ensure shared email addresses are valid before passing them to the node to avoid failed sharing operations.
- Use dependencies for ordered execution — If the files to upload come from upstream processing steps, use the Dependencies tab to ensure those steps complete before workspace creation.
Related Templates
Customer Support Chatbot
Handles common customer inquiries and support tickets through conversational AI.
Company Policy Compliance Chatbot
Answers employee questions about internal policies and flags potential compliance issues.
Investor Helpdesk
Handles investor inquiries related to portfolios, statements, and fund performance.
Banking Helpdesk
Assists banking customers with account inquiries, transactions, and product questions.