Configuration
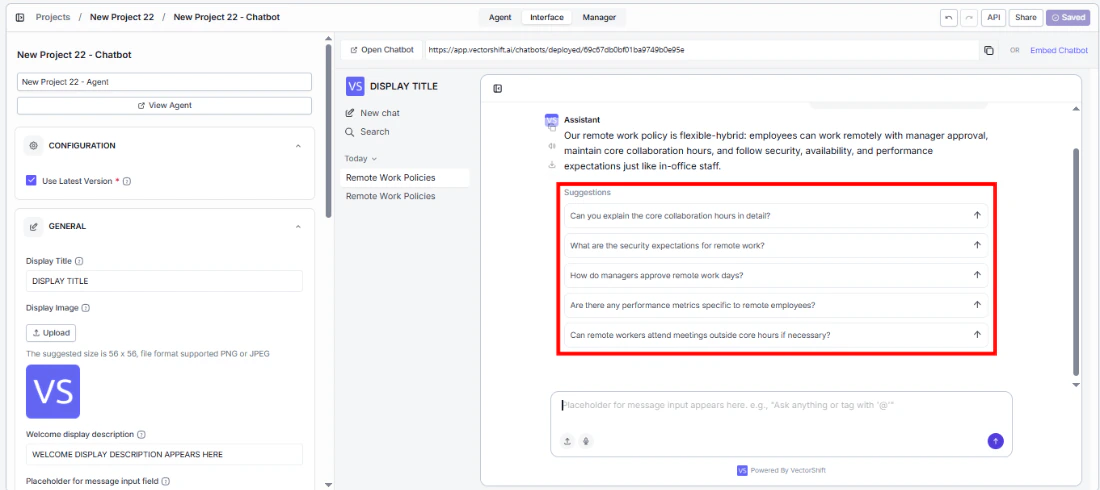
Use Latest Version (enabled by default) ensures your deployed chatbot always runs the most recently saved version of your Agent.The builder preview always reflects your latest changes — including unsaved edits — so you can test instantly. However, the deployed chatbot your end users see only updates when you click Save. In Projects, saving is all you need — no separate deploy step required.
General
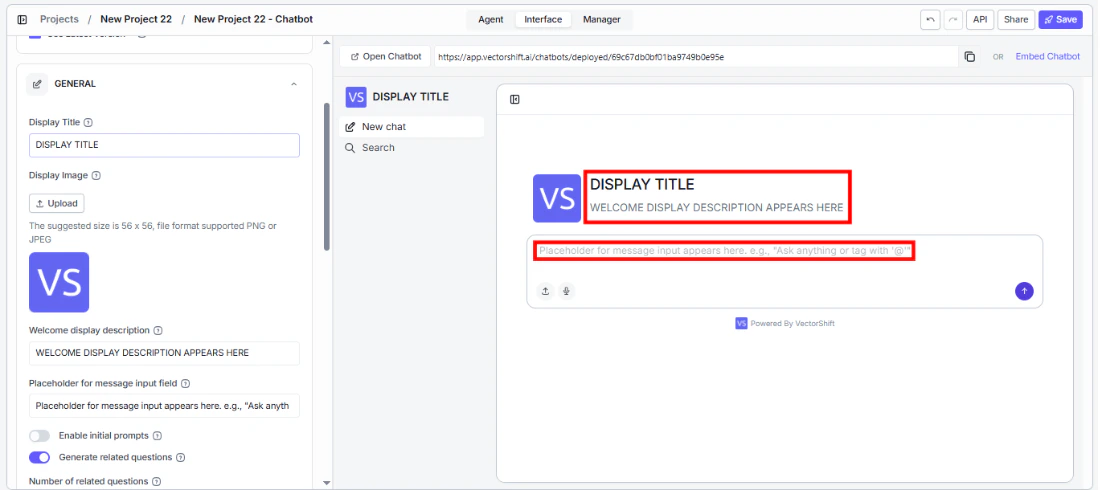
Brand your chatbot and shape the first impression users get when they open it.- Display Title and Display Image — set the name and logo users see at the top of the chatbot.
- Welcome display description — write a greeting that appears when the chatbot loads (e.g., “Hi, how can I assist you today?”).
- Placeholder for message input field — guide users on what to type (e.g., “Ask anything or tag with ’@’”).
- Enable initial prompts — show clickable prompt suggestions so users can get started with one click.
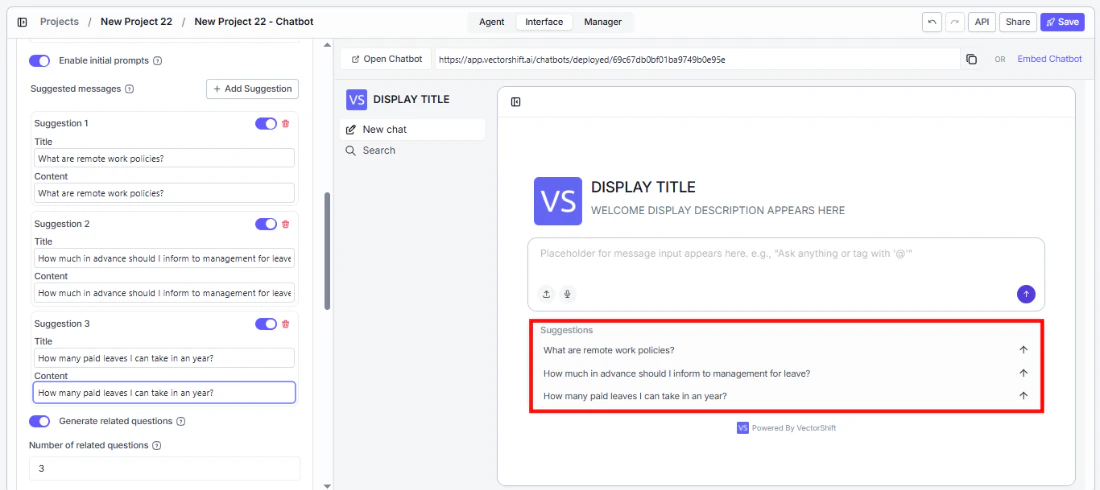
- Generate related questions — automatically suggest follow-up questions after each response to keep the conversation going. You can control how many suggestions appear and add guidelines for what types of questions to suggest.
- Processing message and icon — customize what users see while the Agent is thinking (e.g., “Understanding your request…”).
- User and bot message names — label who’s speaking in the chat (defaults: “User” and “Assistant”).
- Powered by VectorShift — toggle the branding badge on or off.
Style
Match the chatbot’s look to your brand.- Avatar Image — give your Agent a recognizable face next to its messages.
- Accent color — apply your brand color across buttons, highlights, and UI elements.
- Messages font — choose a typeface that fits your brand’s tone (e.g., Inter).
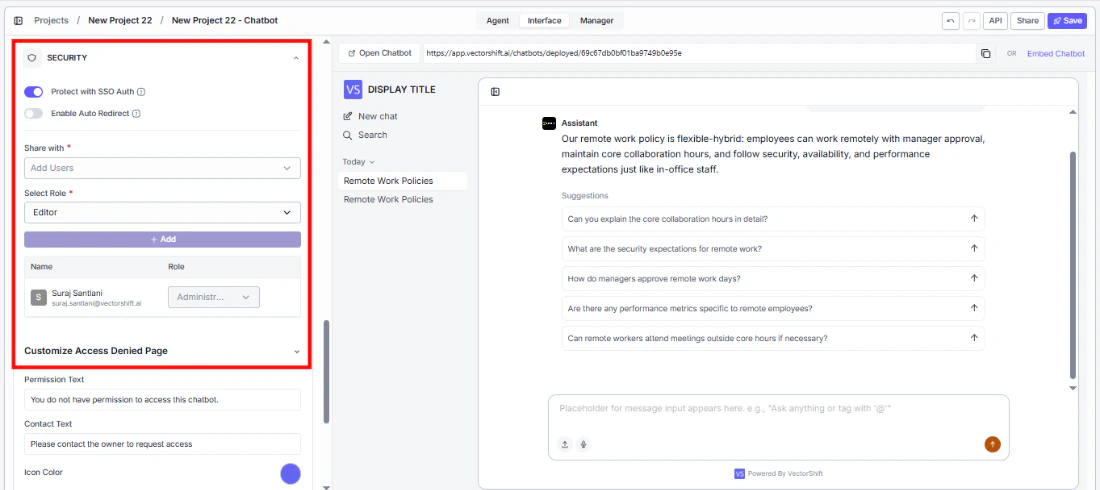
Security
Control who can access your deployed chatbot and what unauthorized users see.Protect with SSO Auth
Require Single Sign-On authentication so only authorized users in your organization can access the chatbot. When enabled, you can:- Enable Auto Redirect — automatically send users to your SSO login instead of showing the access denied page.
- Share with — invite specific users by email and assign them a role (e.g., Editor) to control who can access the chatbot.
Customize Access Denied Page
Tailor the message unauthorized users see when they don’t have access:- Permission Text — the main message displayed (e.g., “You do not have permission to access this chatbot.”).
- Contact Text — instructions for requesting access (e.g., “Please contact the owner to request access”).
- Icon Color — match the access denied page icon to your brand.
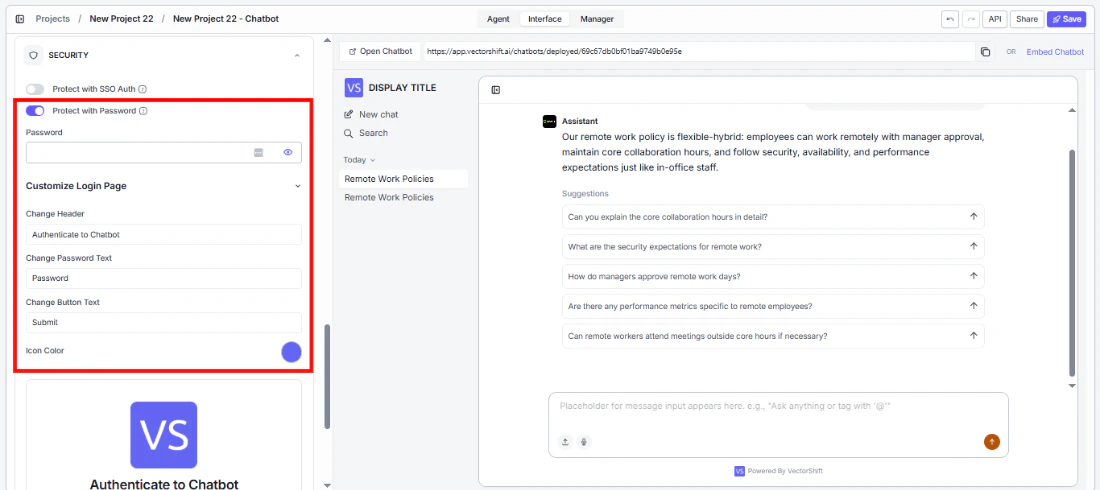
Protect with Password
Gate access behind a password so only users with the credentials can interact with the chatbot.- Password — set the password users must enter to access the chatbot.
Customize Login Page
Brand the authentication screen users see before entering the chatbot:- Change Header — set the page title (e.g., “Authenticate to Chatbot”).
- Change Password Text — customize the label for the password field.
- Change Button Text — customize the submit button text.
- Icon Color — match the login page icon to your brand.