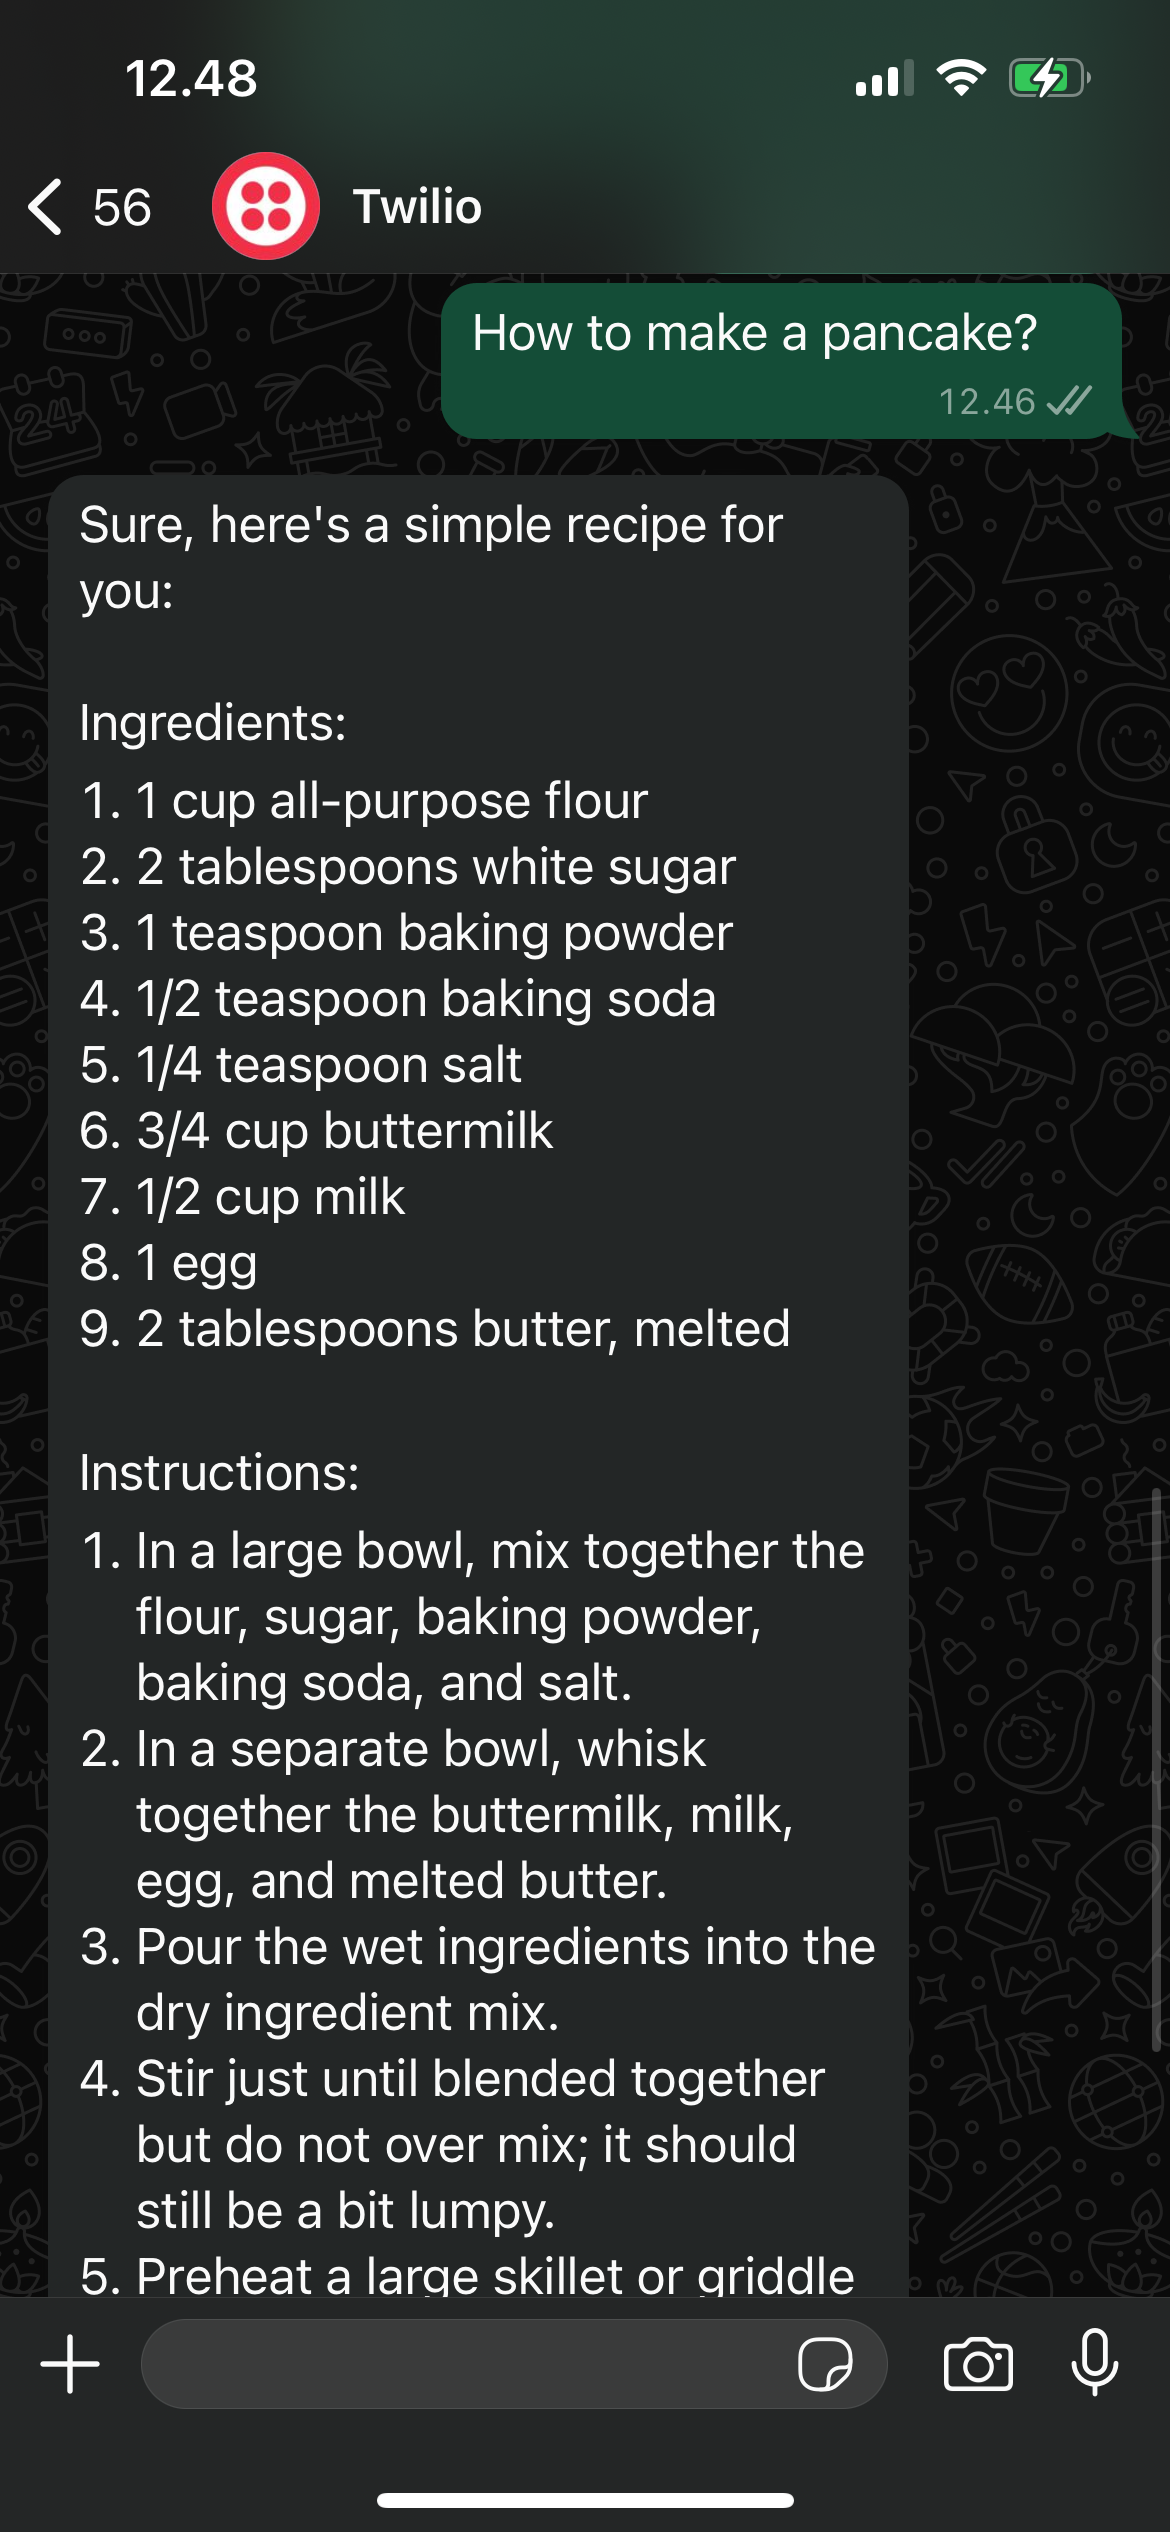
Step 1: Prepare your Chatbot
First, on the export page, ensure the chatbot is deployed (if the button says “Undeploy”). Next, on the “Export” tab in the chatbot wizard, navigate to the “WhatsApp / SMS” sub-tab. On this page, we provide a Twilio Webhook URL. Additionally, we provide fields to input your Twilio Account SID and Twilio Auth Token (instructions later on how to find this on the Twilio website).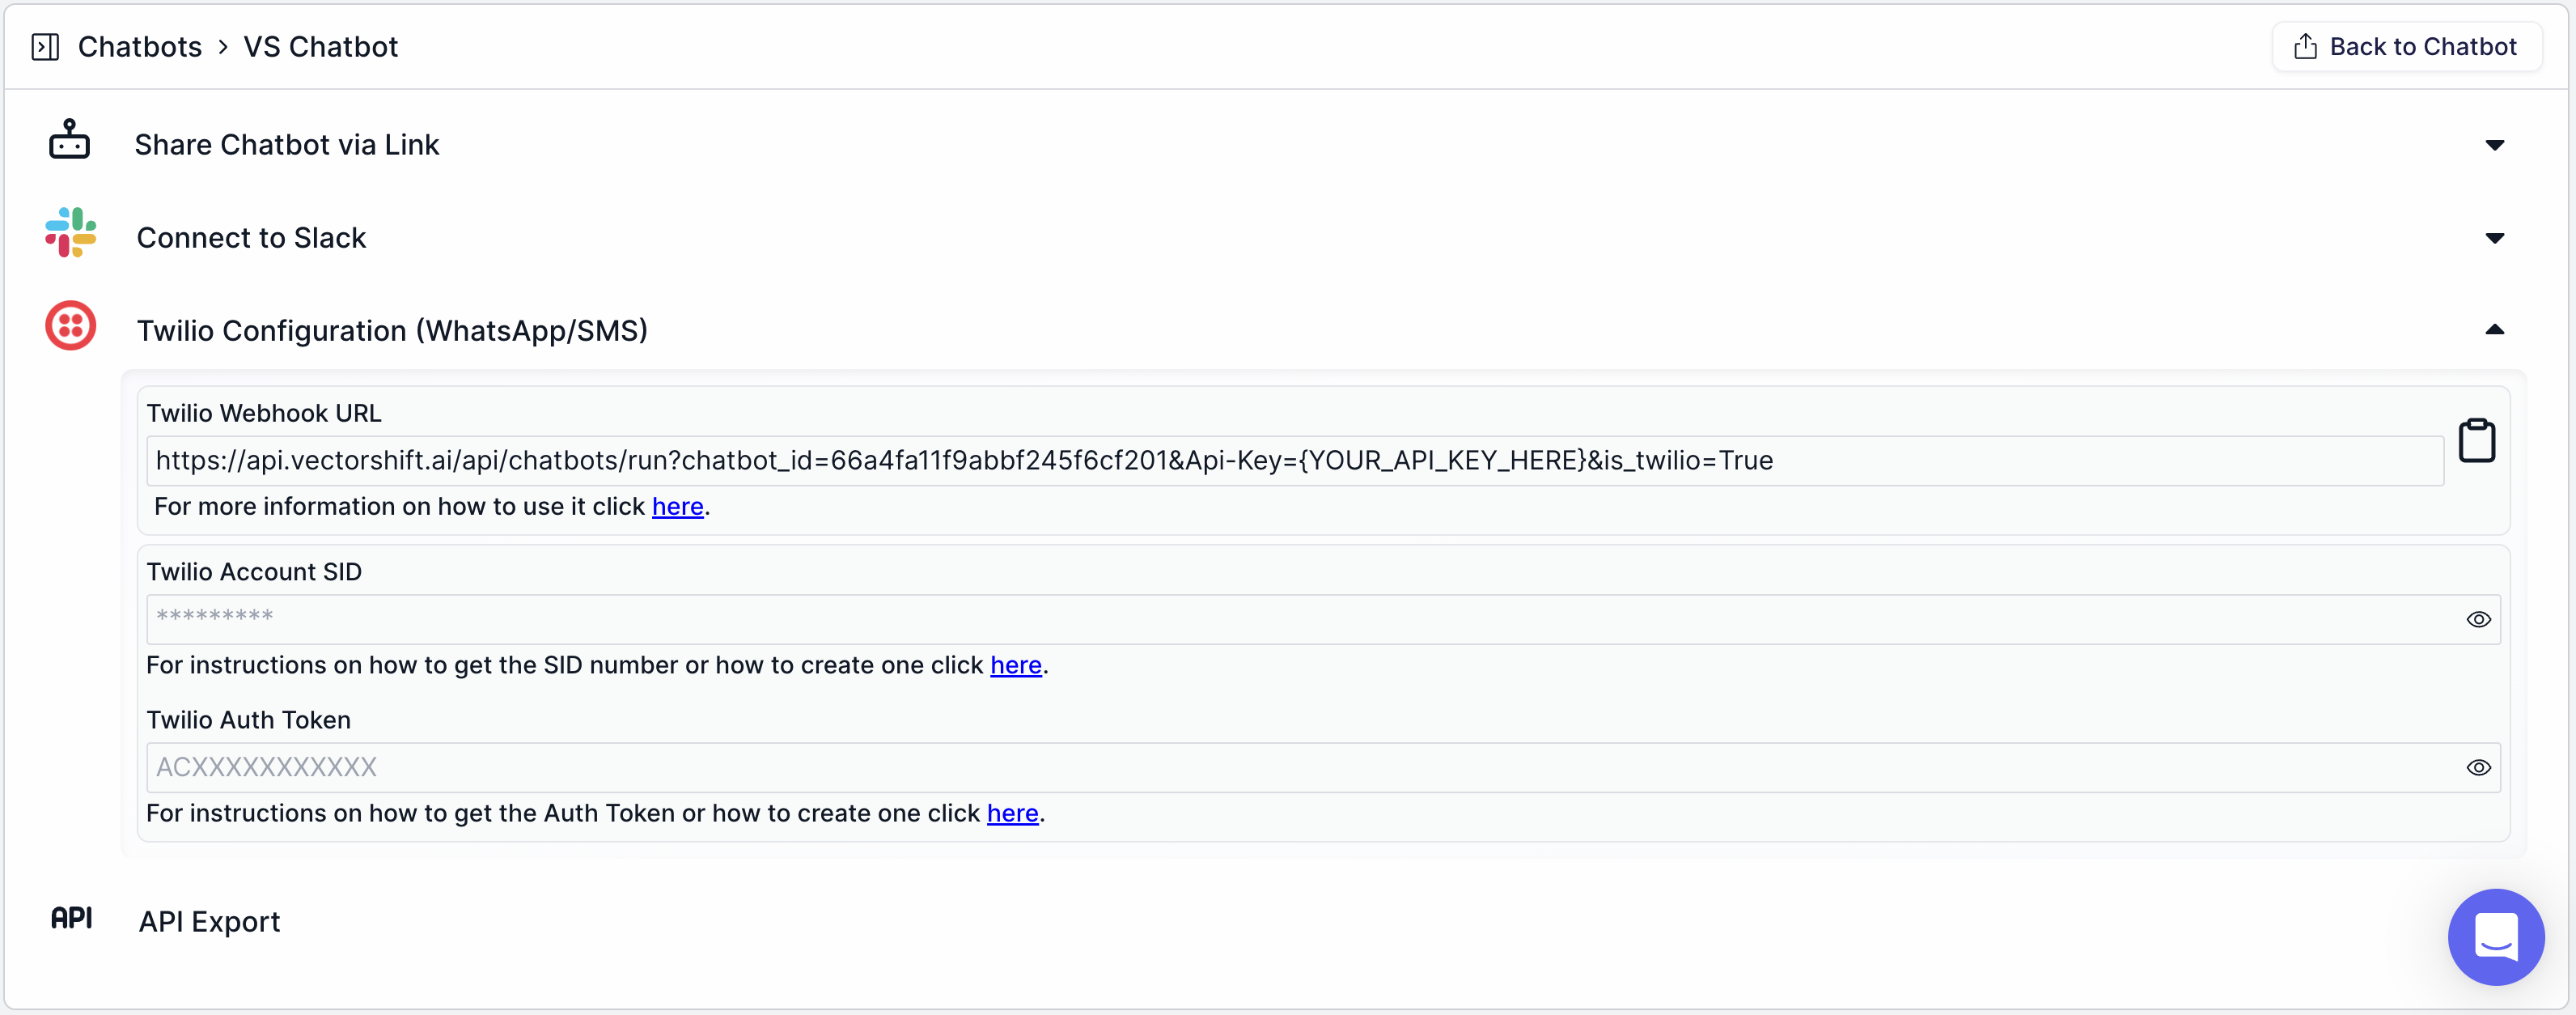
Step 2: Set up Twilio
We will use WhatsApp as an example.Step 2.1: Navigate to Twilio and make an account
We will first set up the WhatsApp / SMS chatbot in a sandboxed environment before connecting to an official business profile (discussed at the end of this article).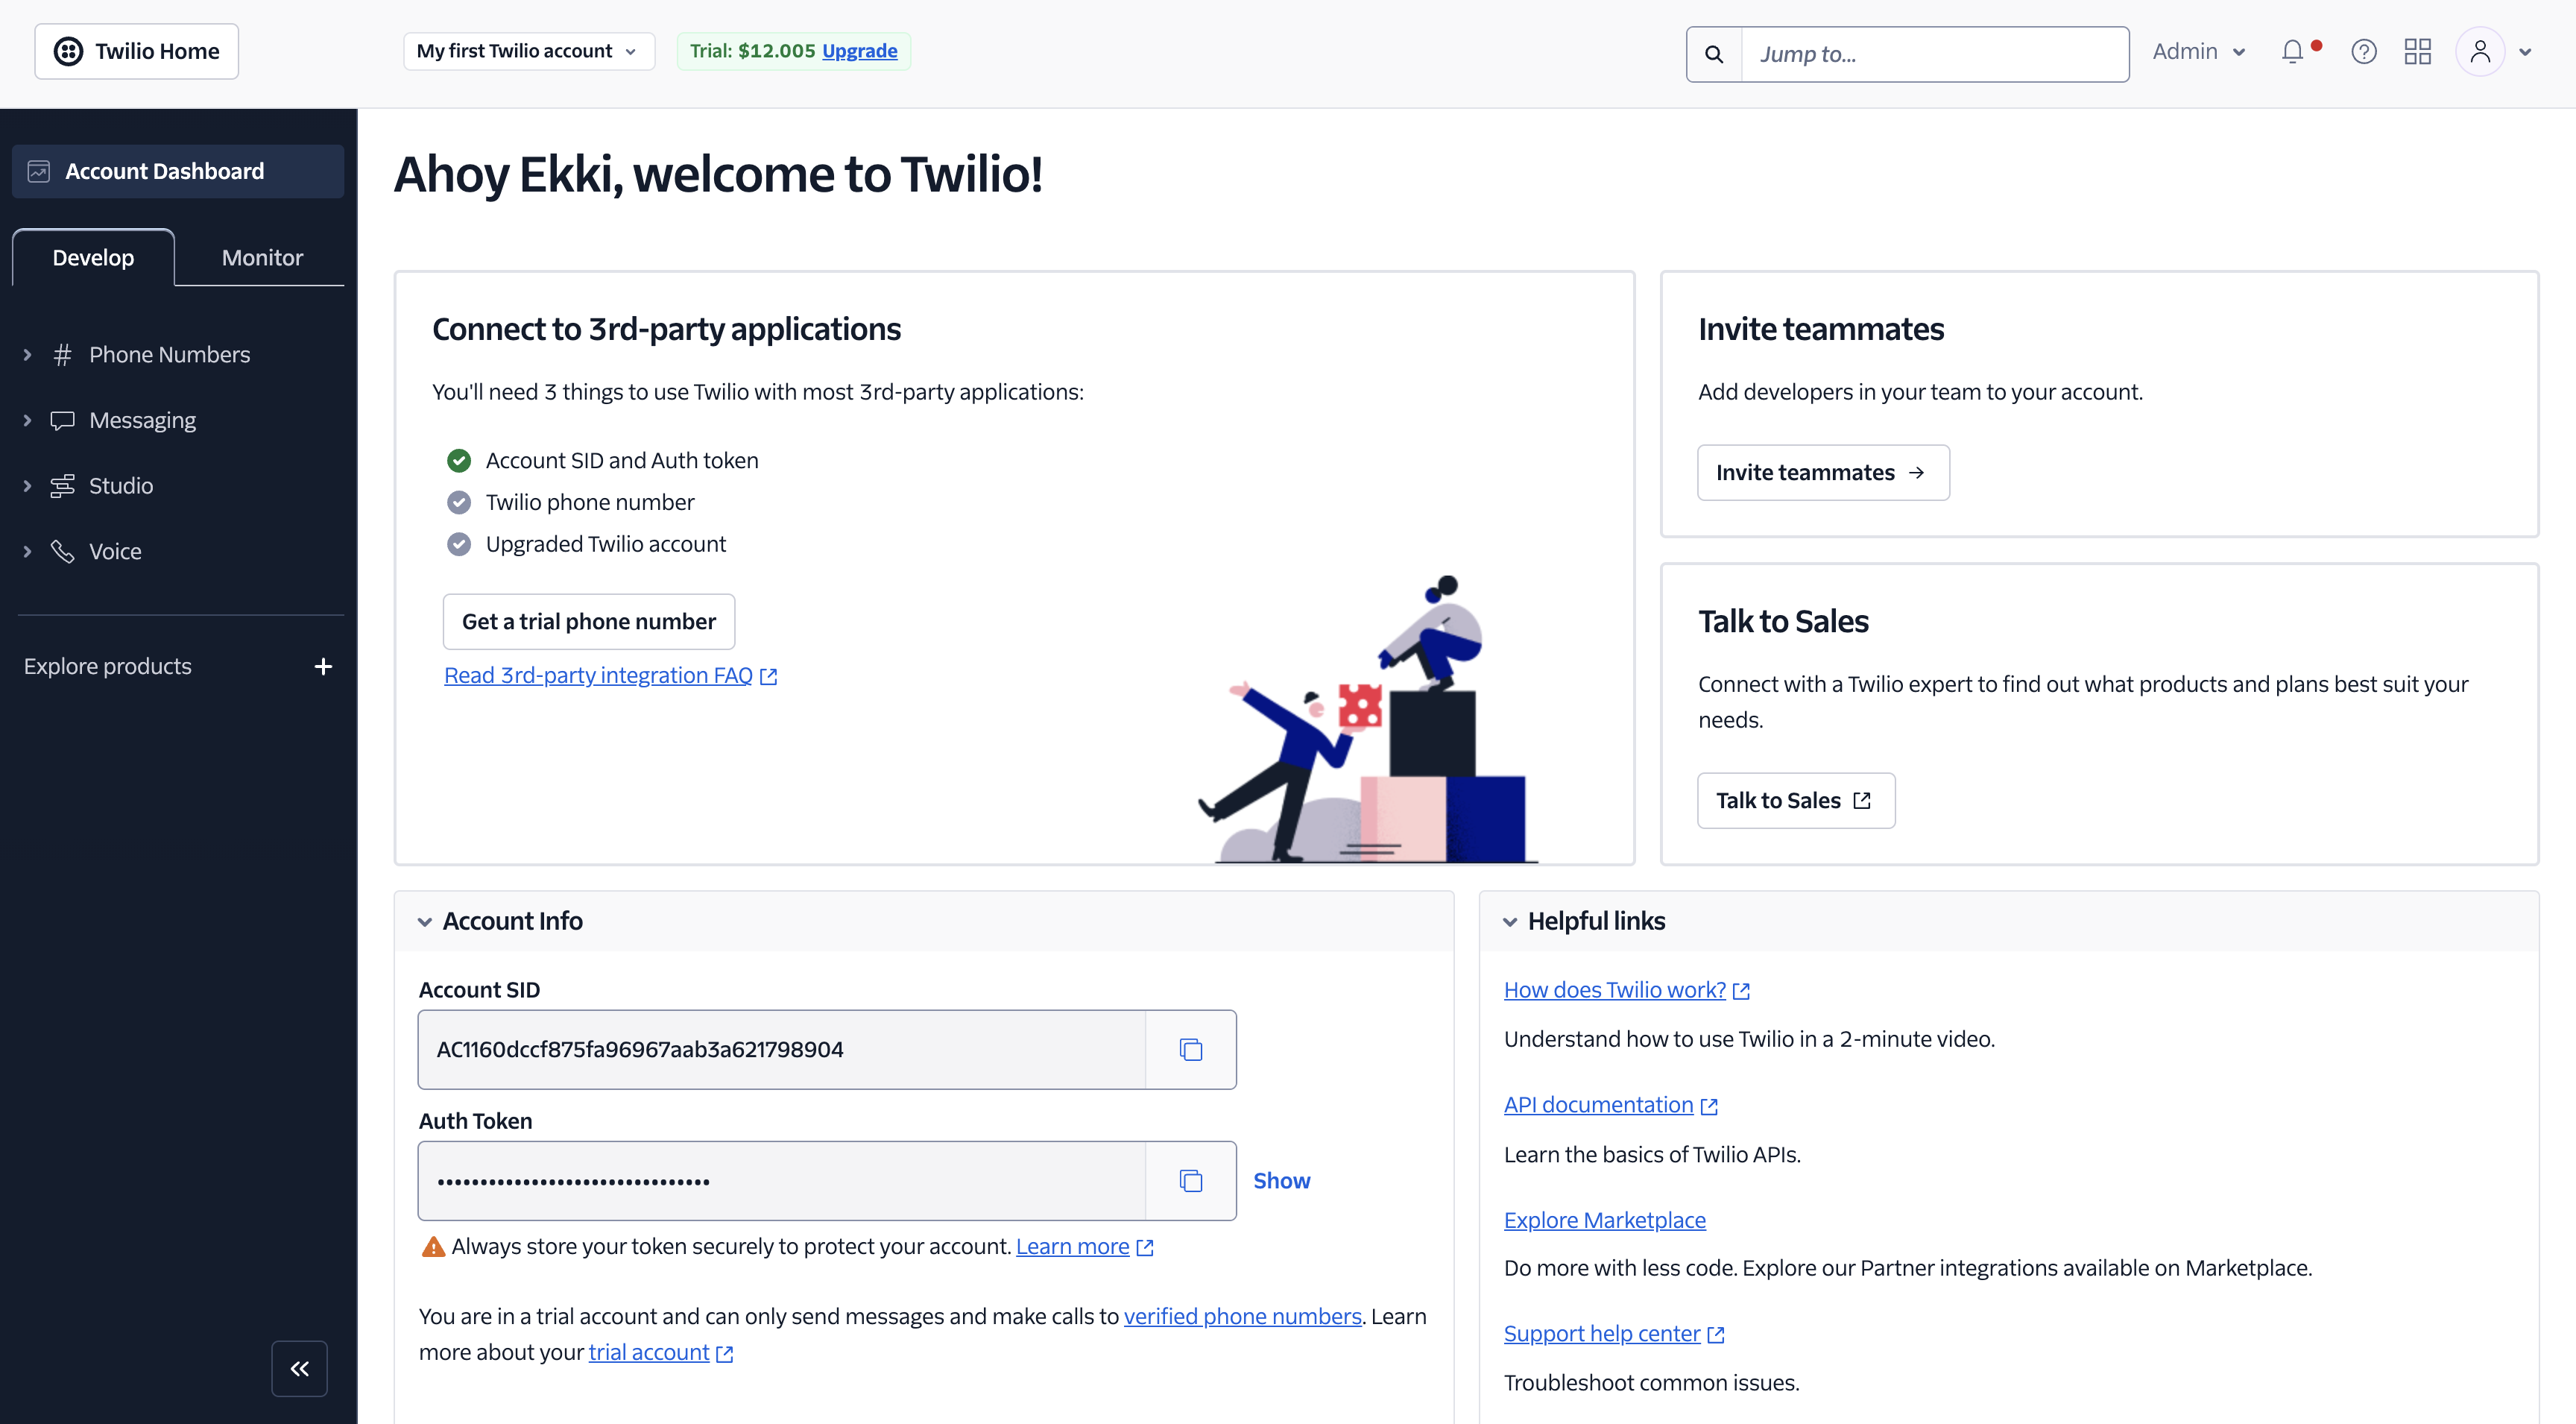
Step 2.2: Create your API Key using the “Manage account” page

Step 2.3: Give a name and region for your API key
You can leave the “Key type” to “Standard.”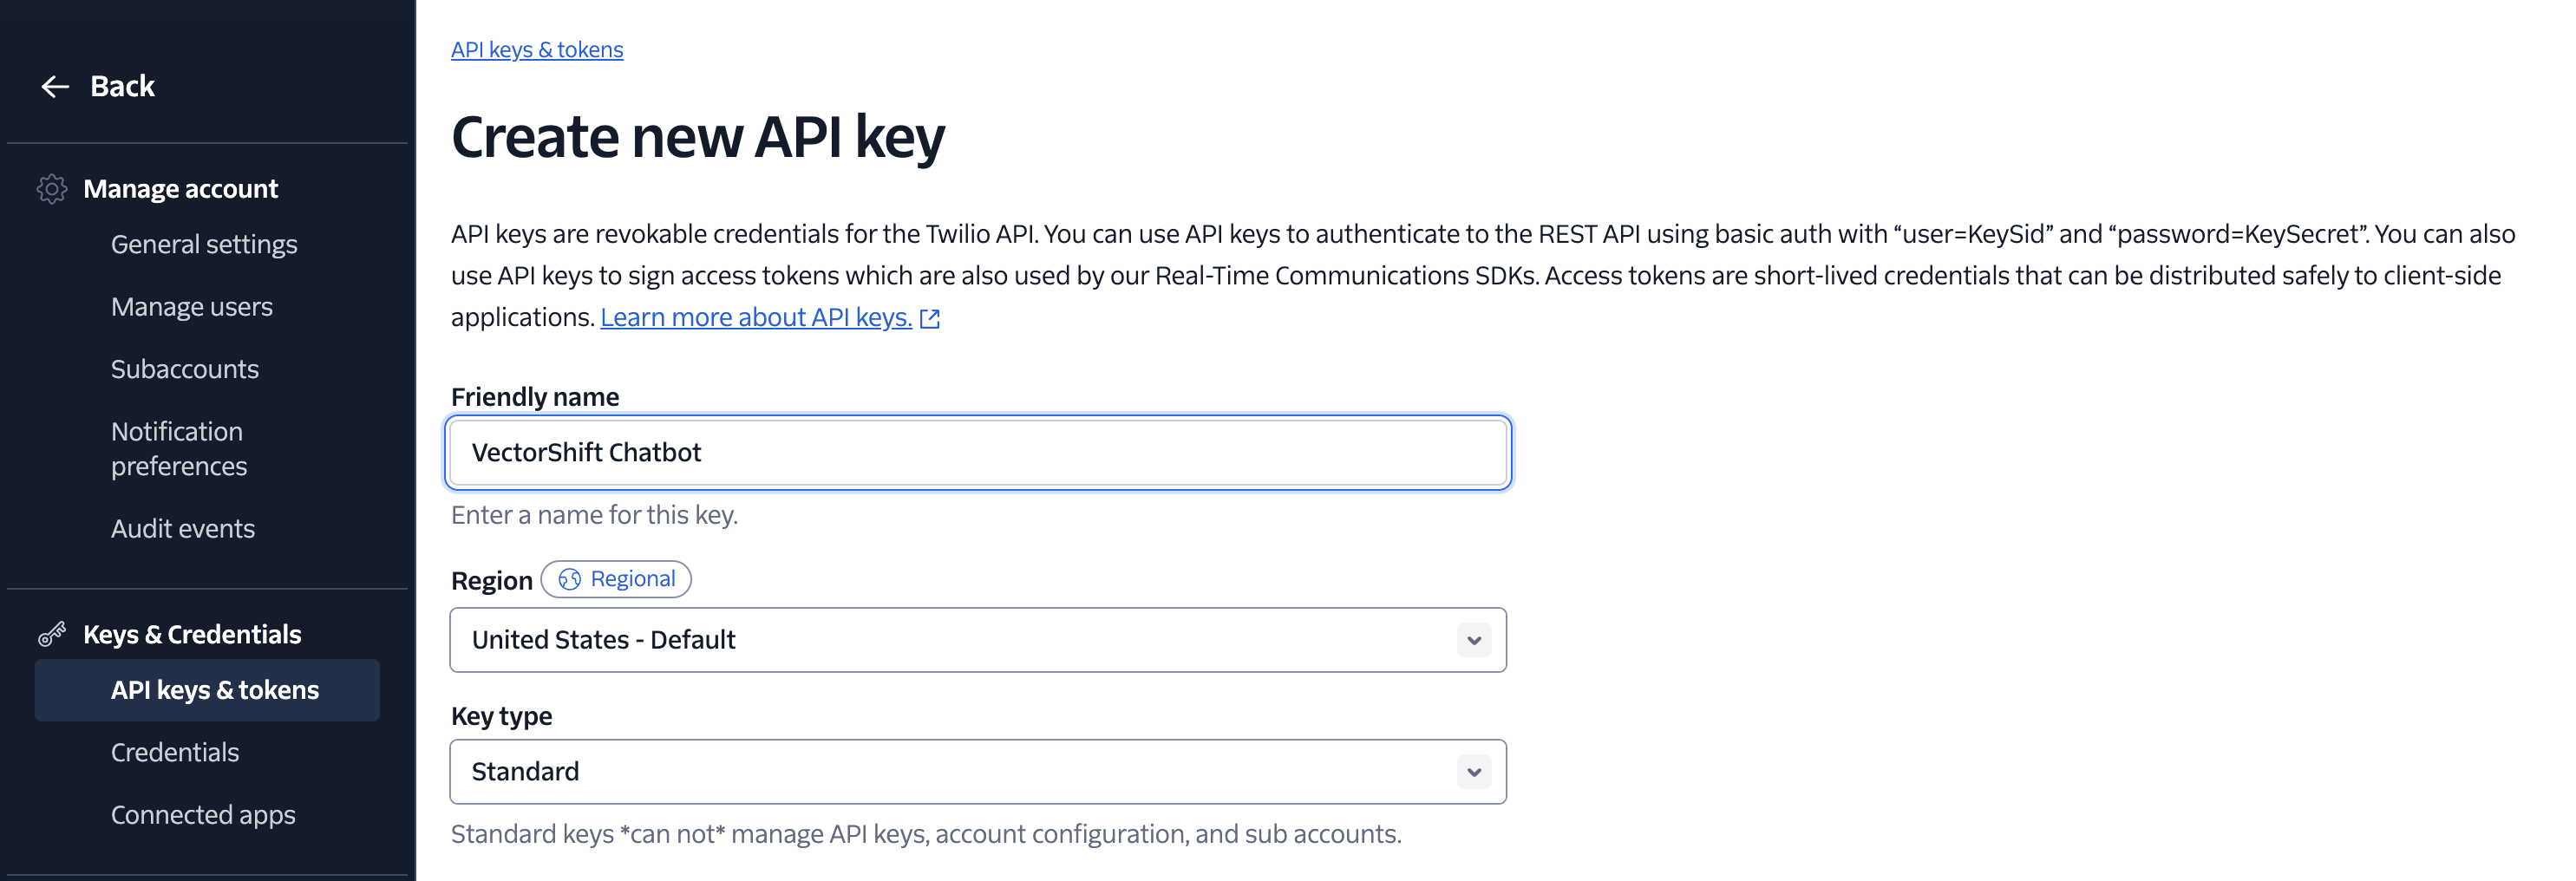
Step 2.4: Paste the Account SID and Auth Token into VectorShift

Step 3: Sandbox with Twilio
Step 3.1: Copy the “Twilio Webhook URL”
It allows Twillio to interact with our deployed chatbot.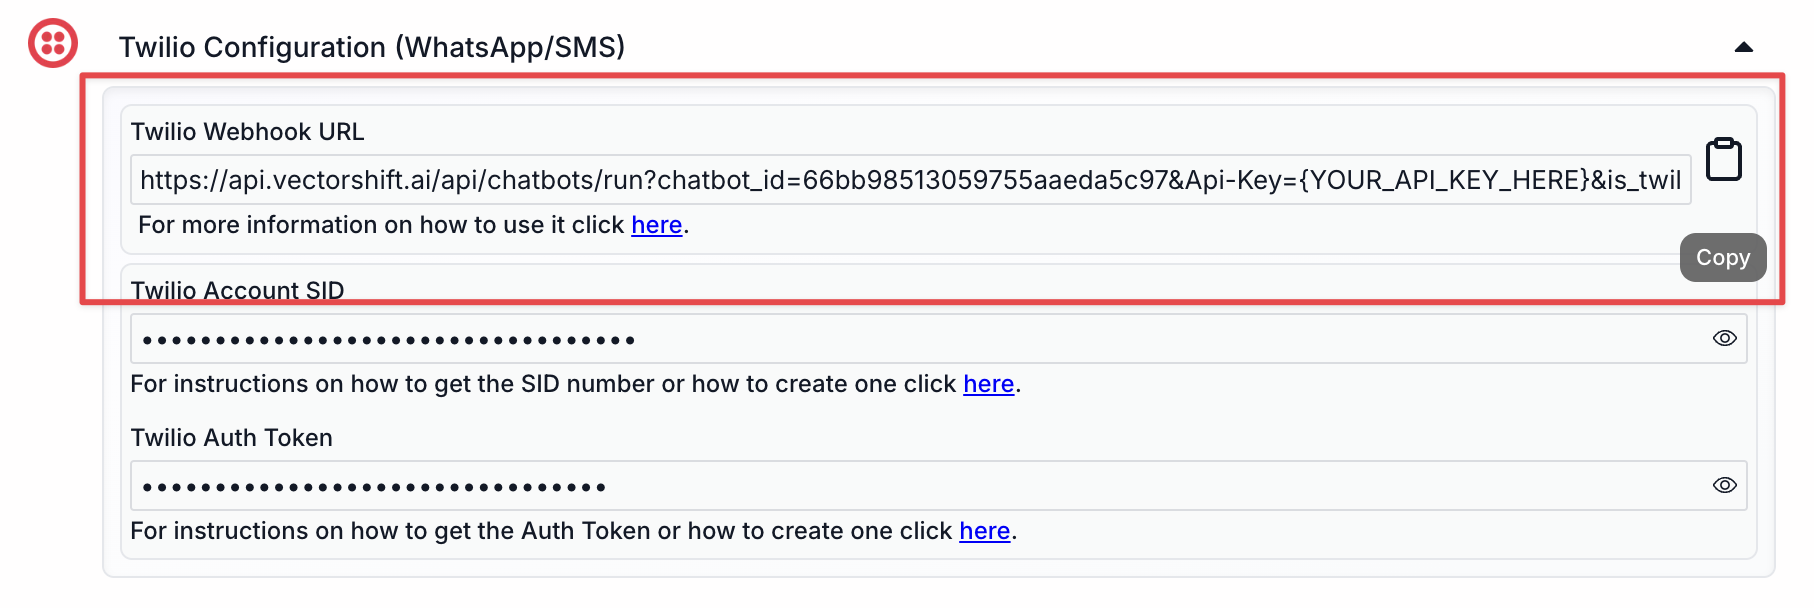
Step 3.2: Paste the Webhook URL into the Sandbox Configuration
Paste the “Twilio Webhook URL” into the “When a message comes in” field. Let the “Status callback” empty.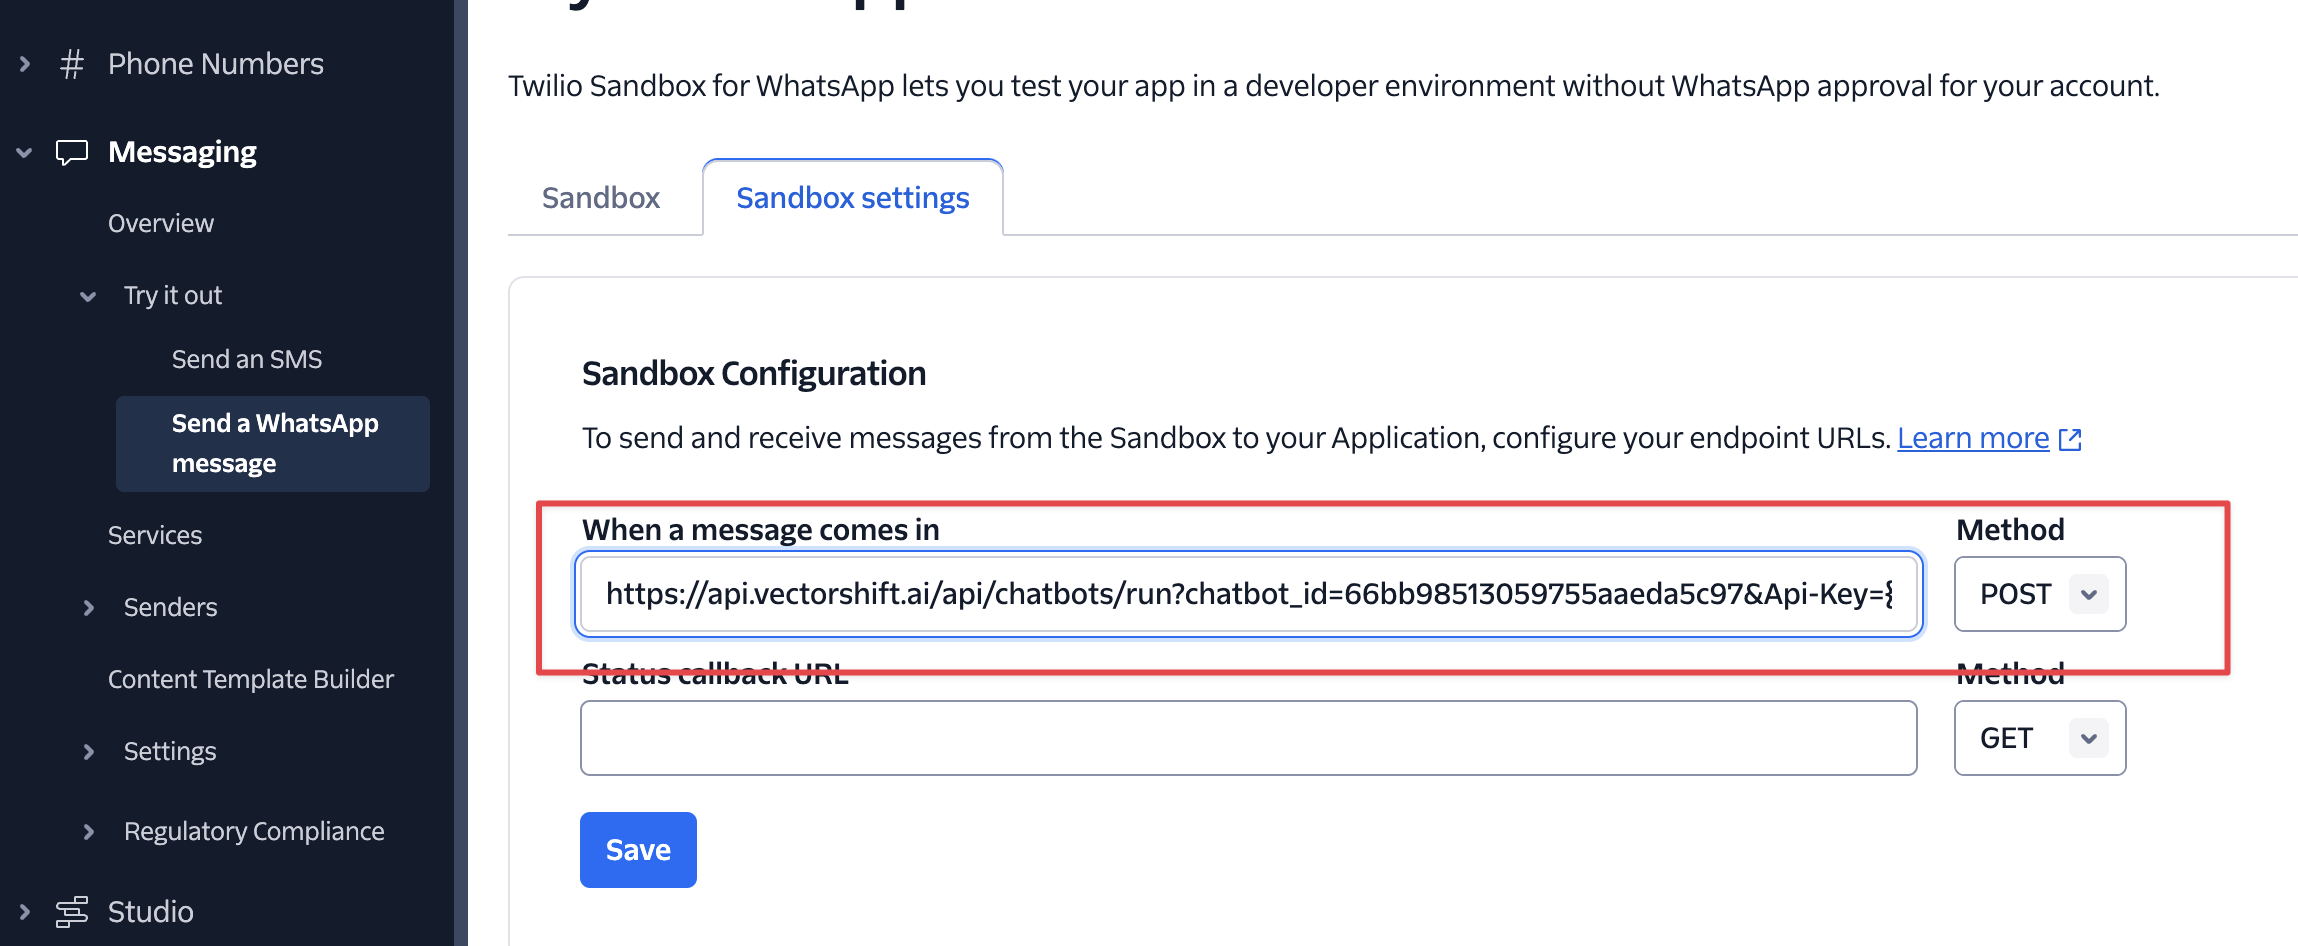
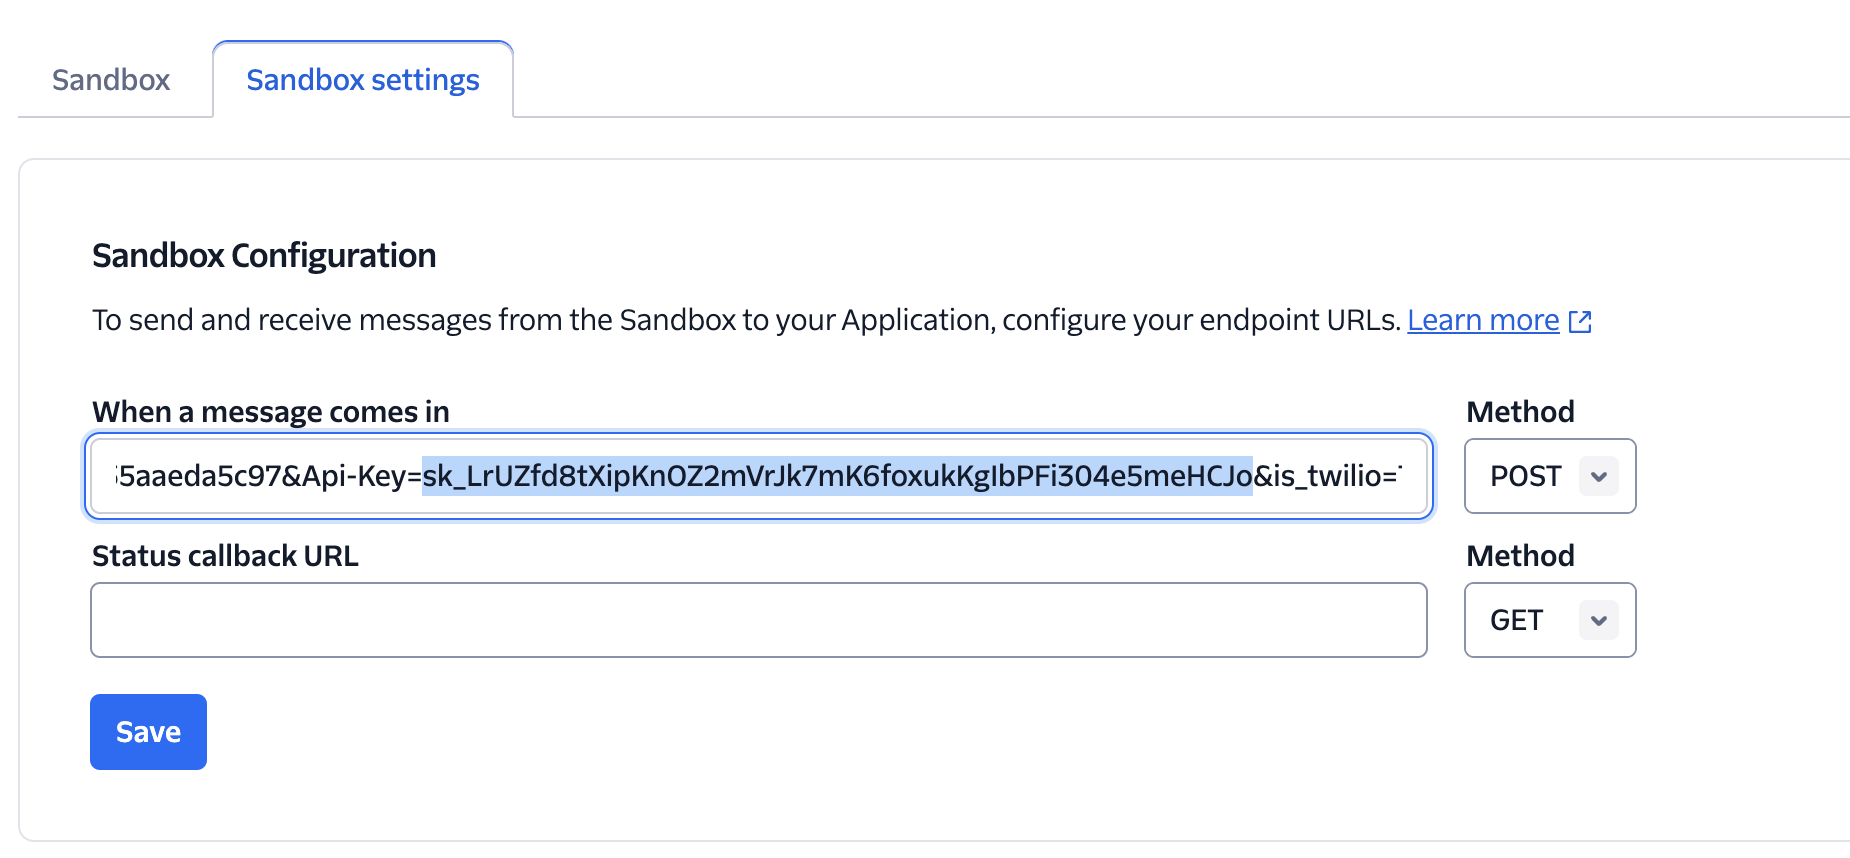
Step 3.3: Add your API Key to the URL
Replace{YOUR_API_KEY_HERE} with your VectorShift API Key, and click save.
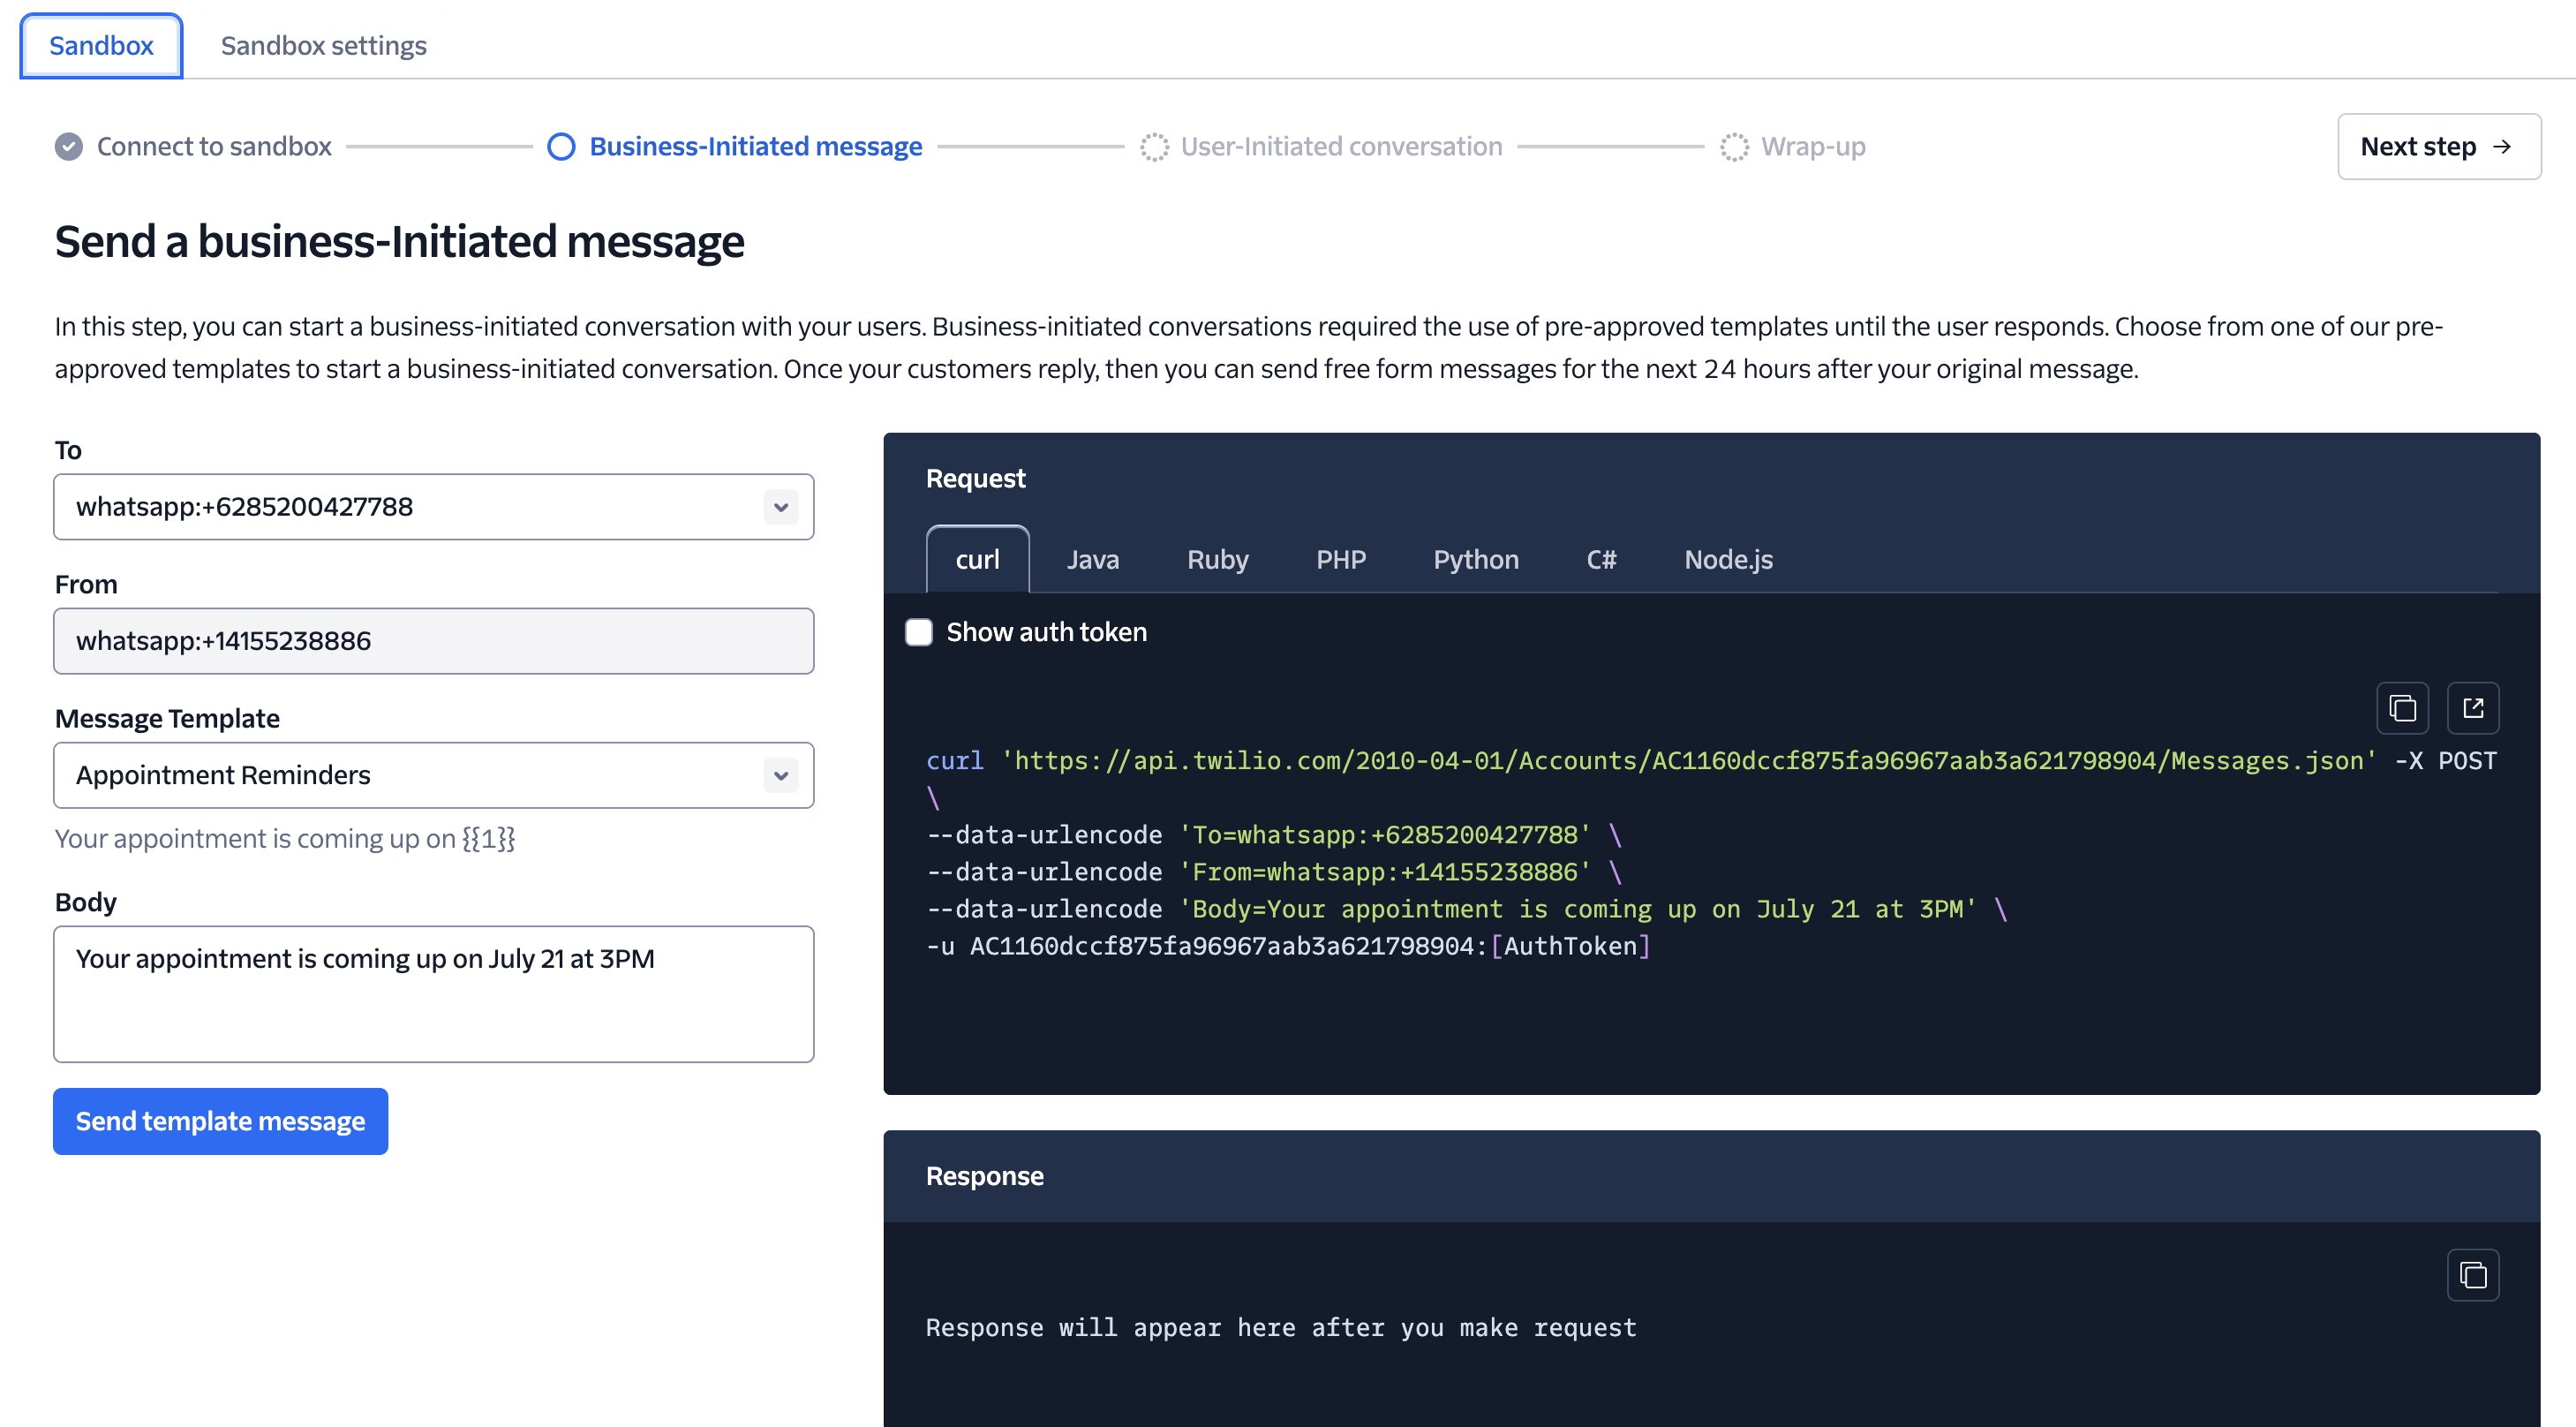
Step 3.4: Go back to the Sandbox and follow the instructions to connect with your WhatsApp
Step 3.5: Chat with your Chatbot
