Prerequisites
Two embed methods
In the Export tab of the chatbot builder, you will find two code snippets:Script tag (preferred)
The script tag creates a collapsible chat widget that floats in the corner of the page. Users can open and close it without it blocking your website content. The snippet includes your chatbot ID and optional width/height attributes.iFrame fallback
The iFrame method works with any website builder, including platforms like the Wix free plan that restrict external scripts. The iFrame renders the chatbot inline on the page rather than as a floating widget.WordPress
Step 1. Open your WordPress Admin and create a post (or page)
Navigate to your WordPress dashboard and create a new post or open an existing one where you want the chatbot to appear.
Step 2. Add a Custom HTML block
In the block editor, click the + button and search for Custom HTML. Add the block to your post.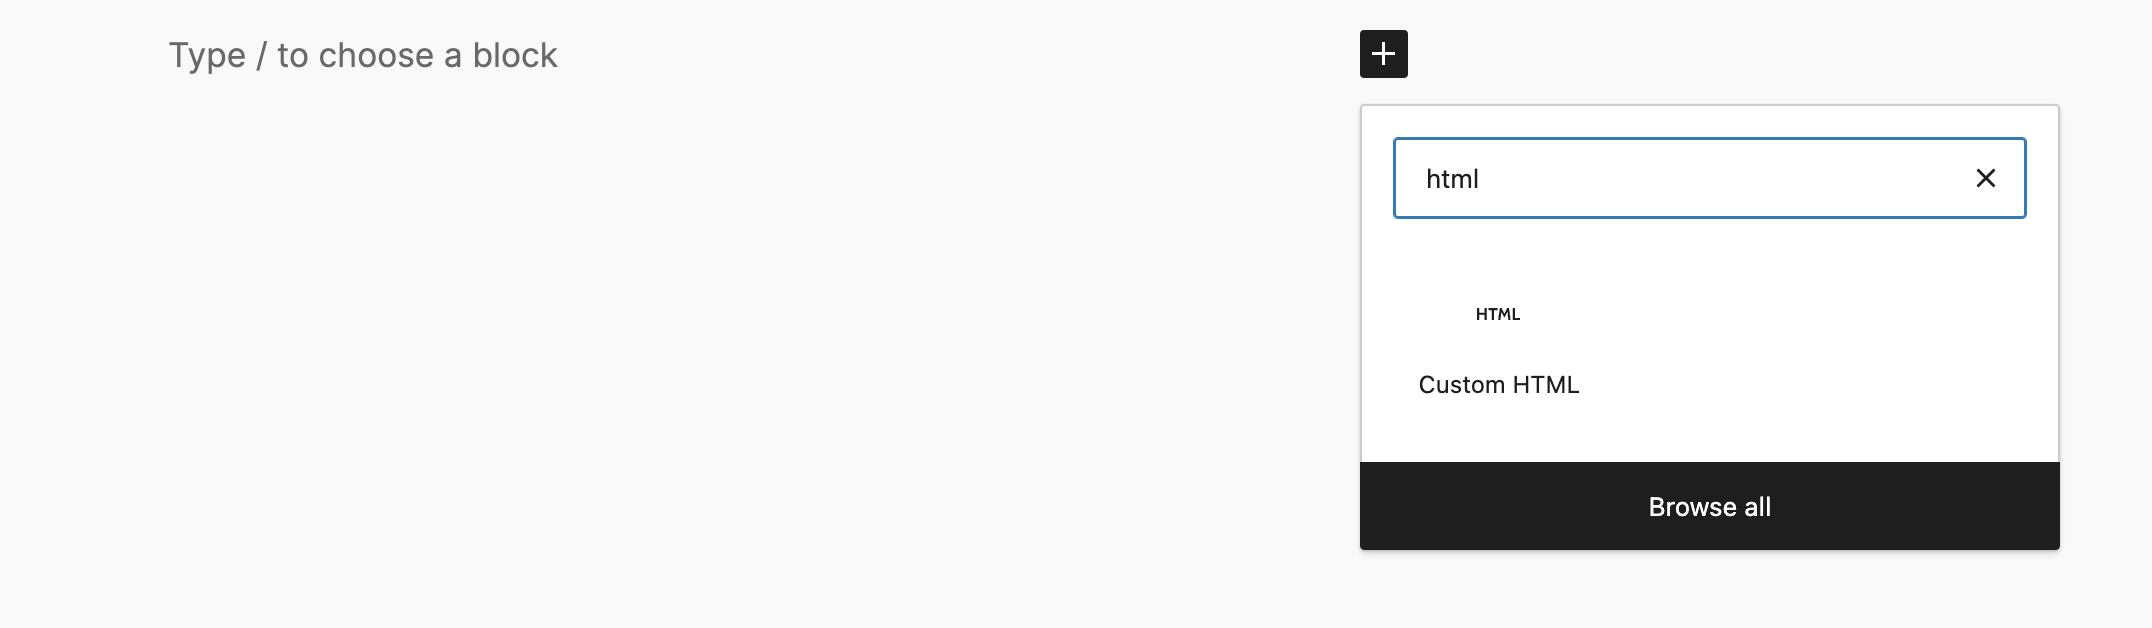
Step 3. Copy the script embed code from VectorShift
In the chatbot builder’s Export tab, copy the first embed snippet (the script tag). This creates a collapsible widget that will not block your website content.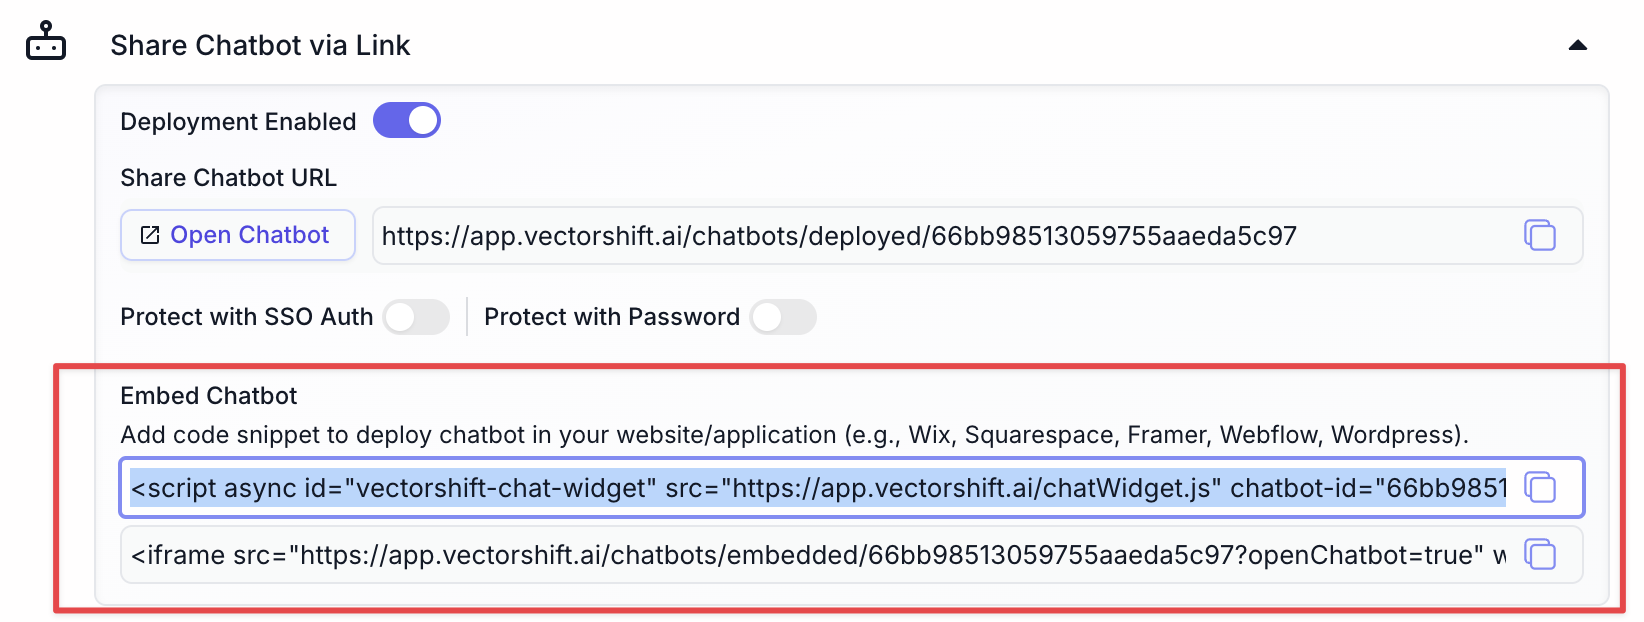
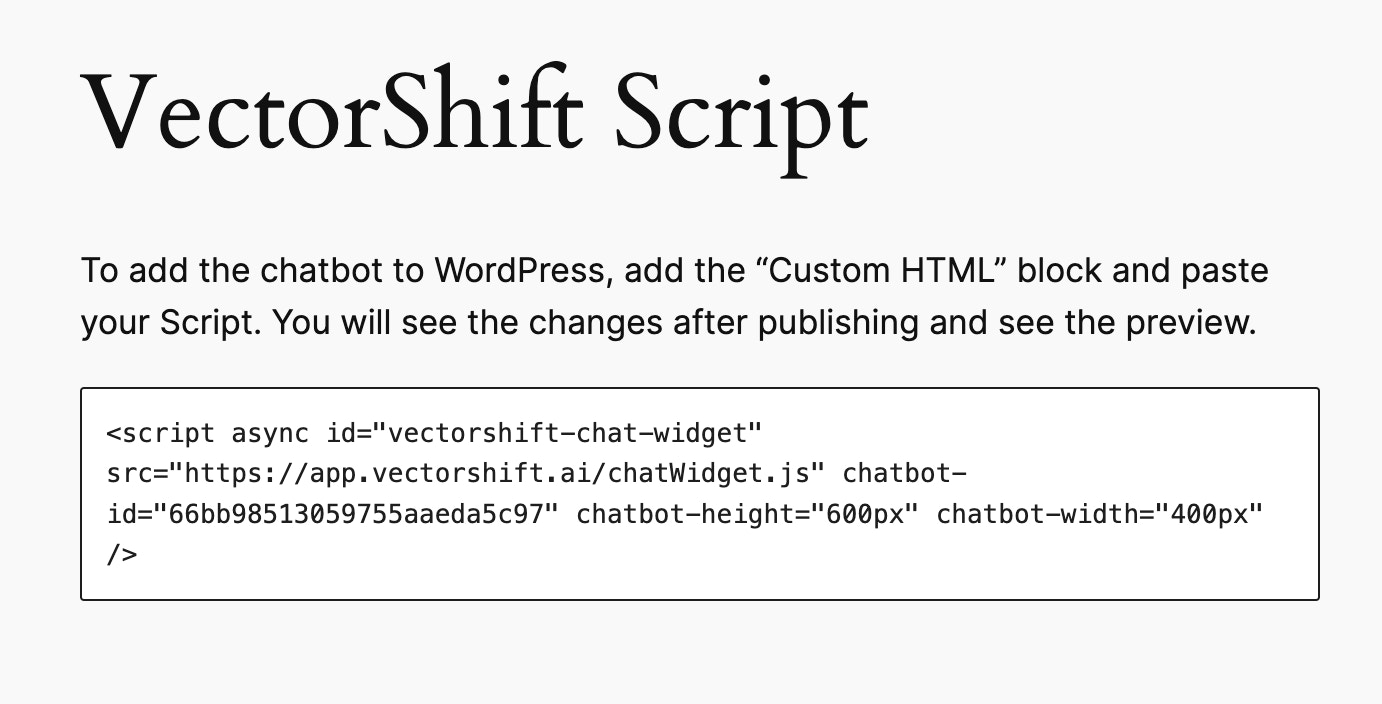
Step 4. Paste the code into the Custom HTML block
Step 5. Publish and test
Publish the post and view it in your browser. You should see the chatbot launcher in the corner of the page.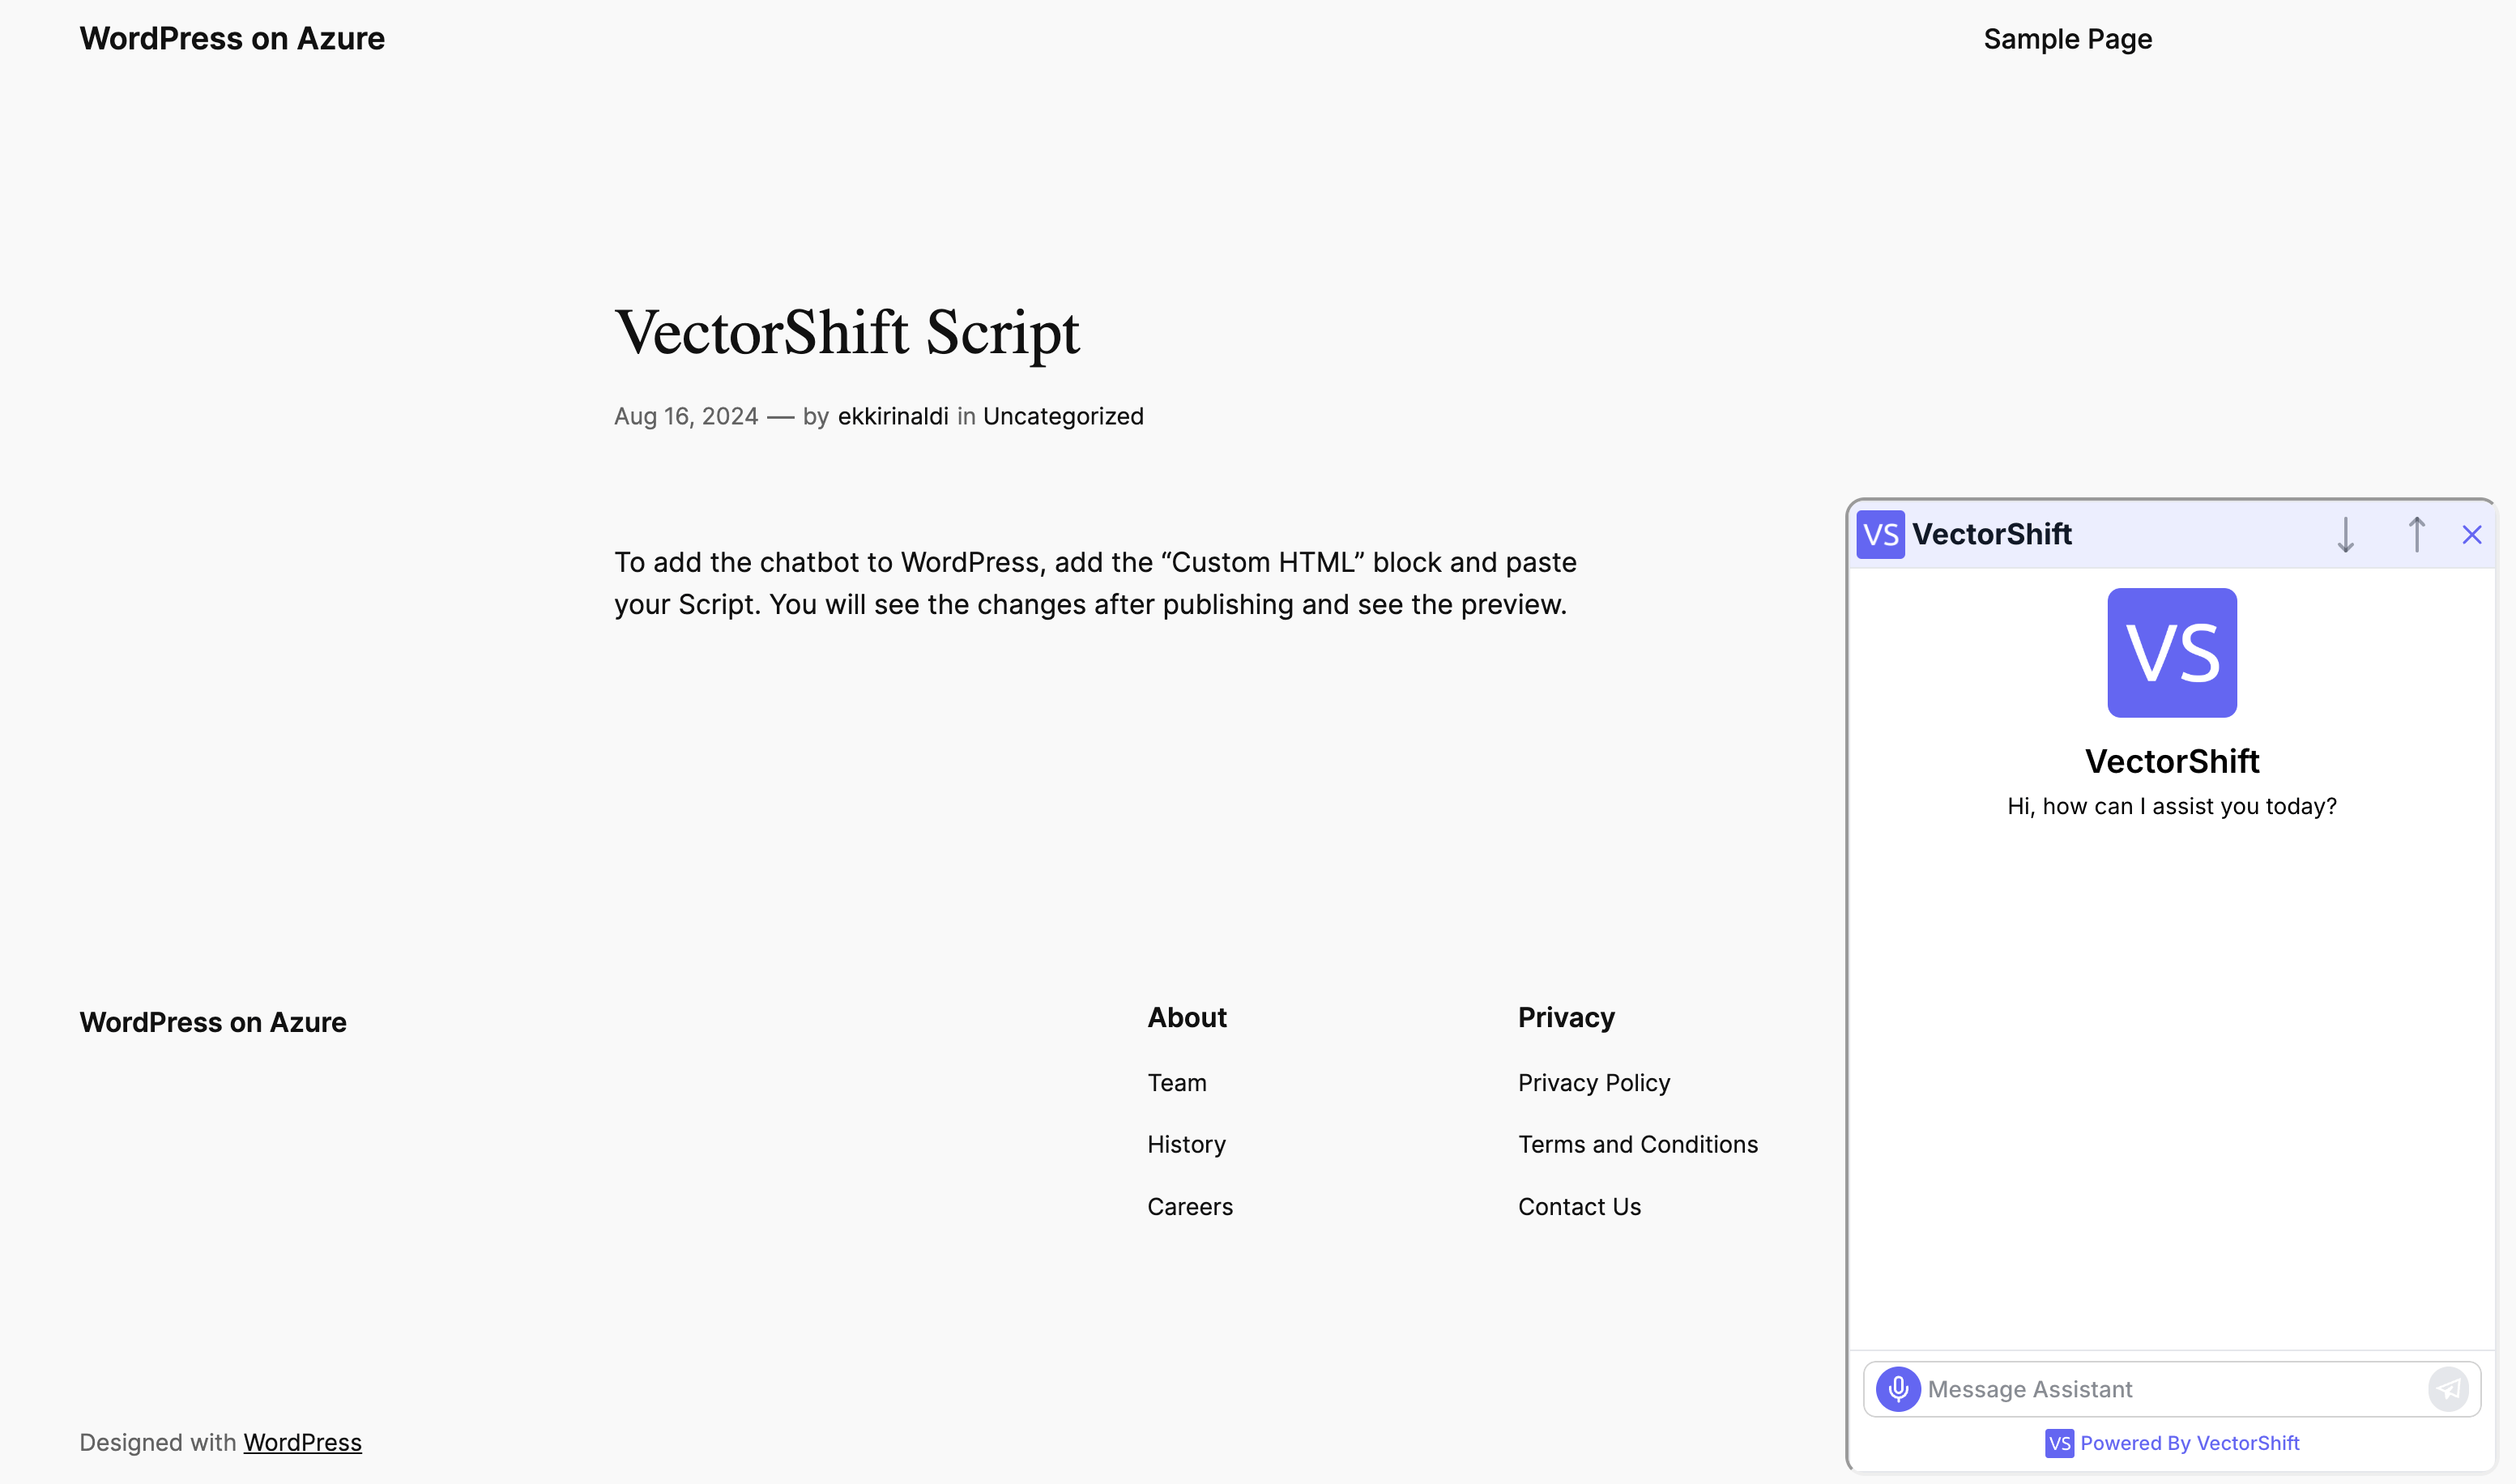
Step 6. Embed in the site footer (optional)
To make the chatbot available on every page of your website, paste the script tag into your theme’s footer widget or footer HTML section instead of a single post.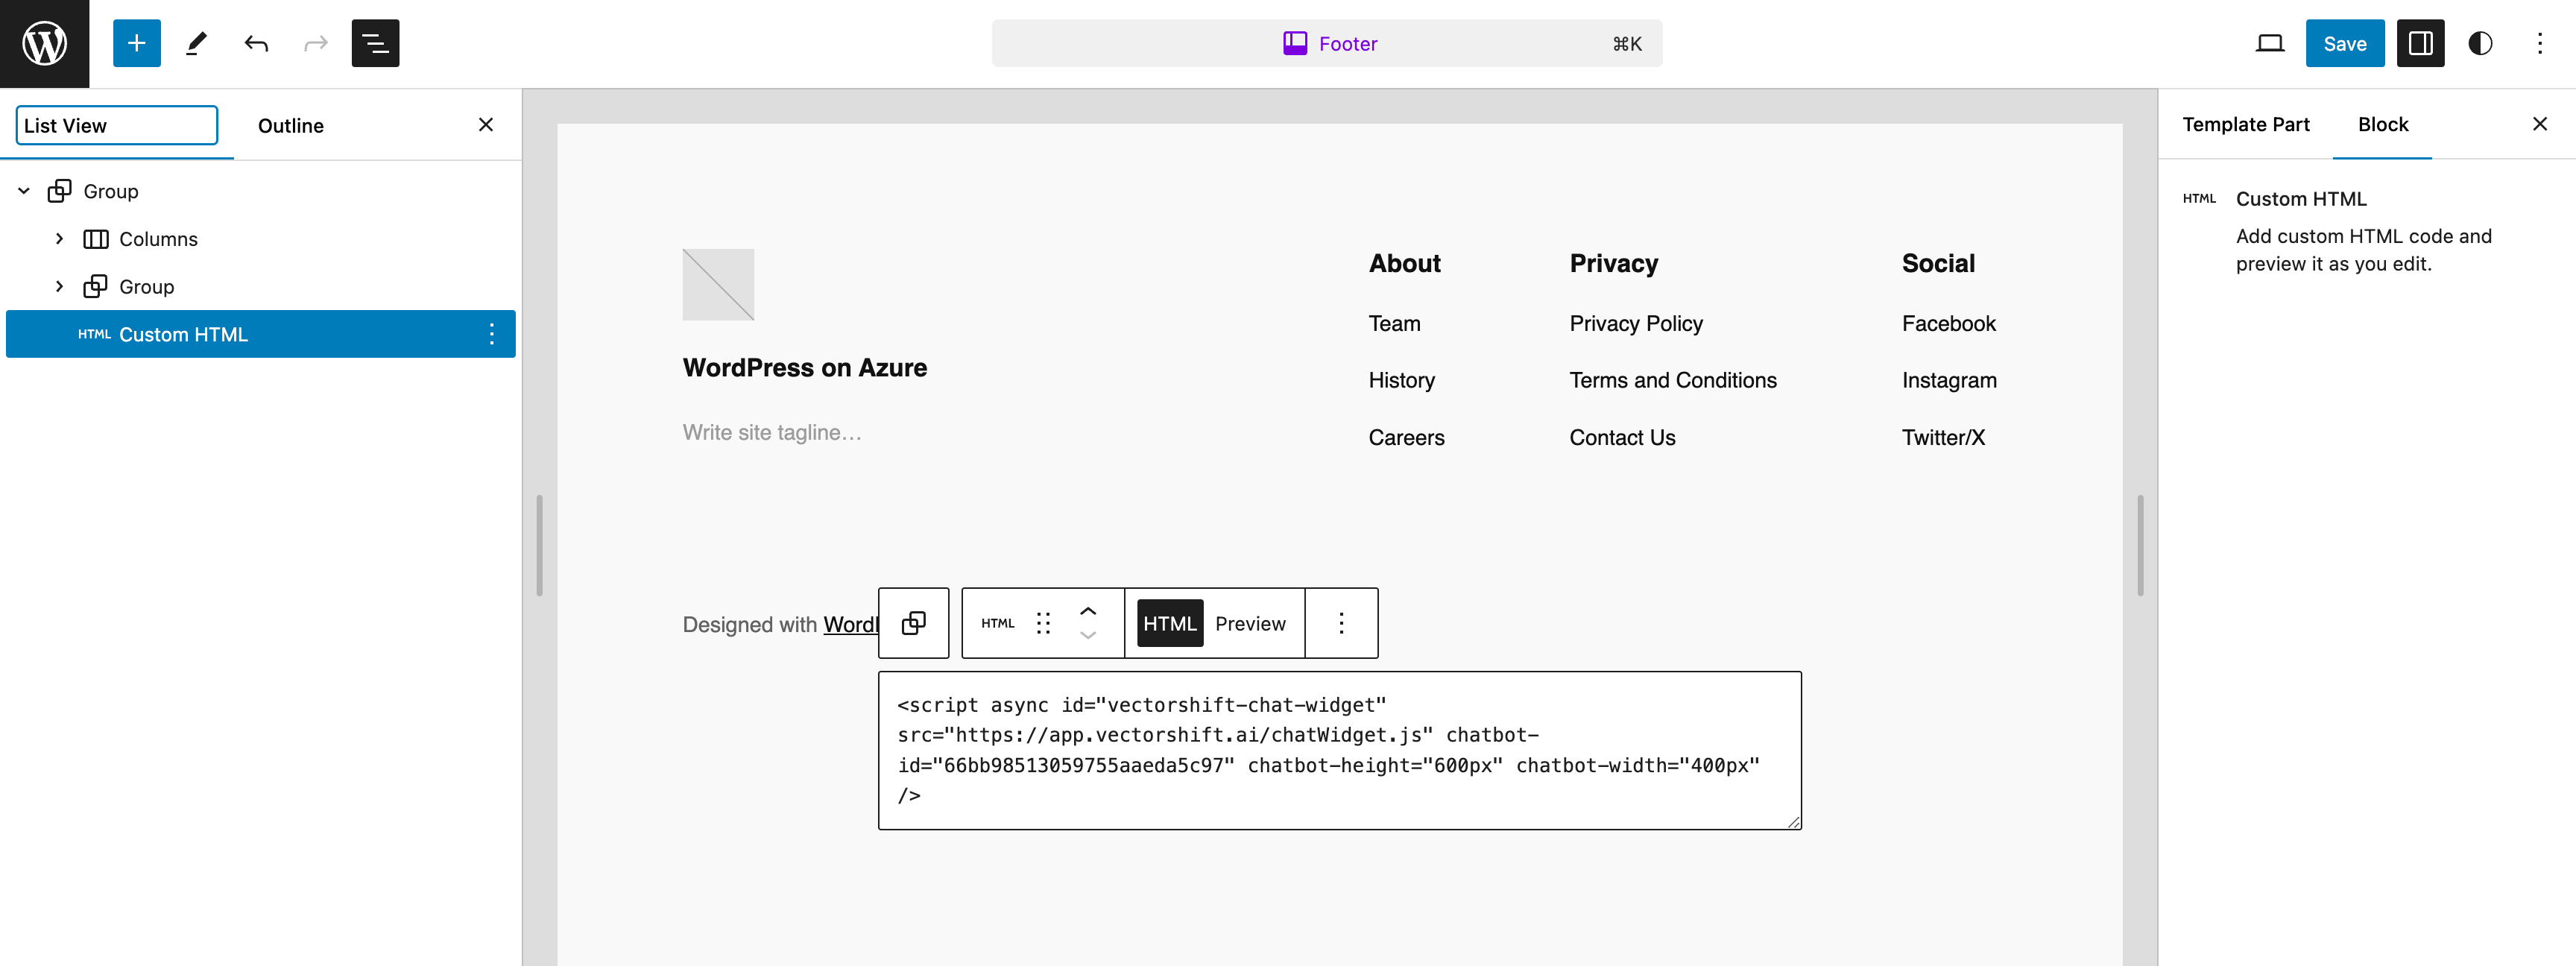
Wix
Step 1. Open the Wix Editor
Log into your Wix account and click Edit Site to open the drag-and-drop editor.
Step 2. Add an Embed HTML element
Click Add in the left panel, then search for and add an Embed HTML element to your page.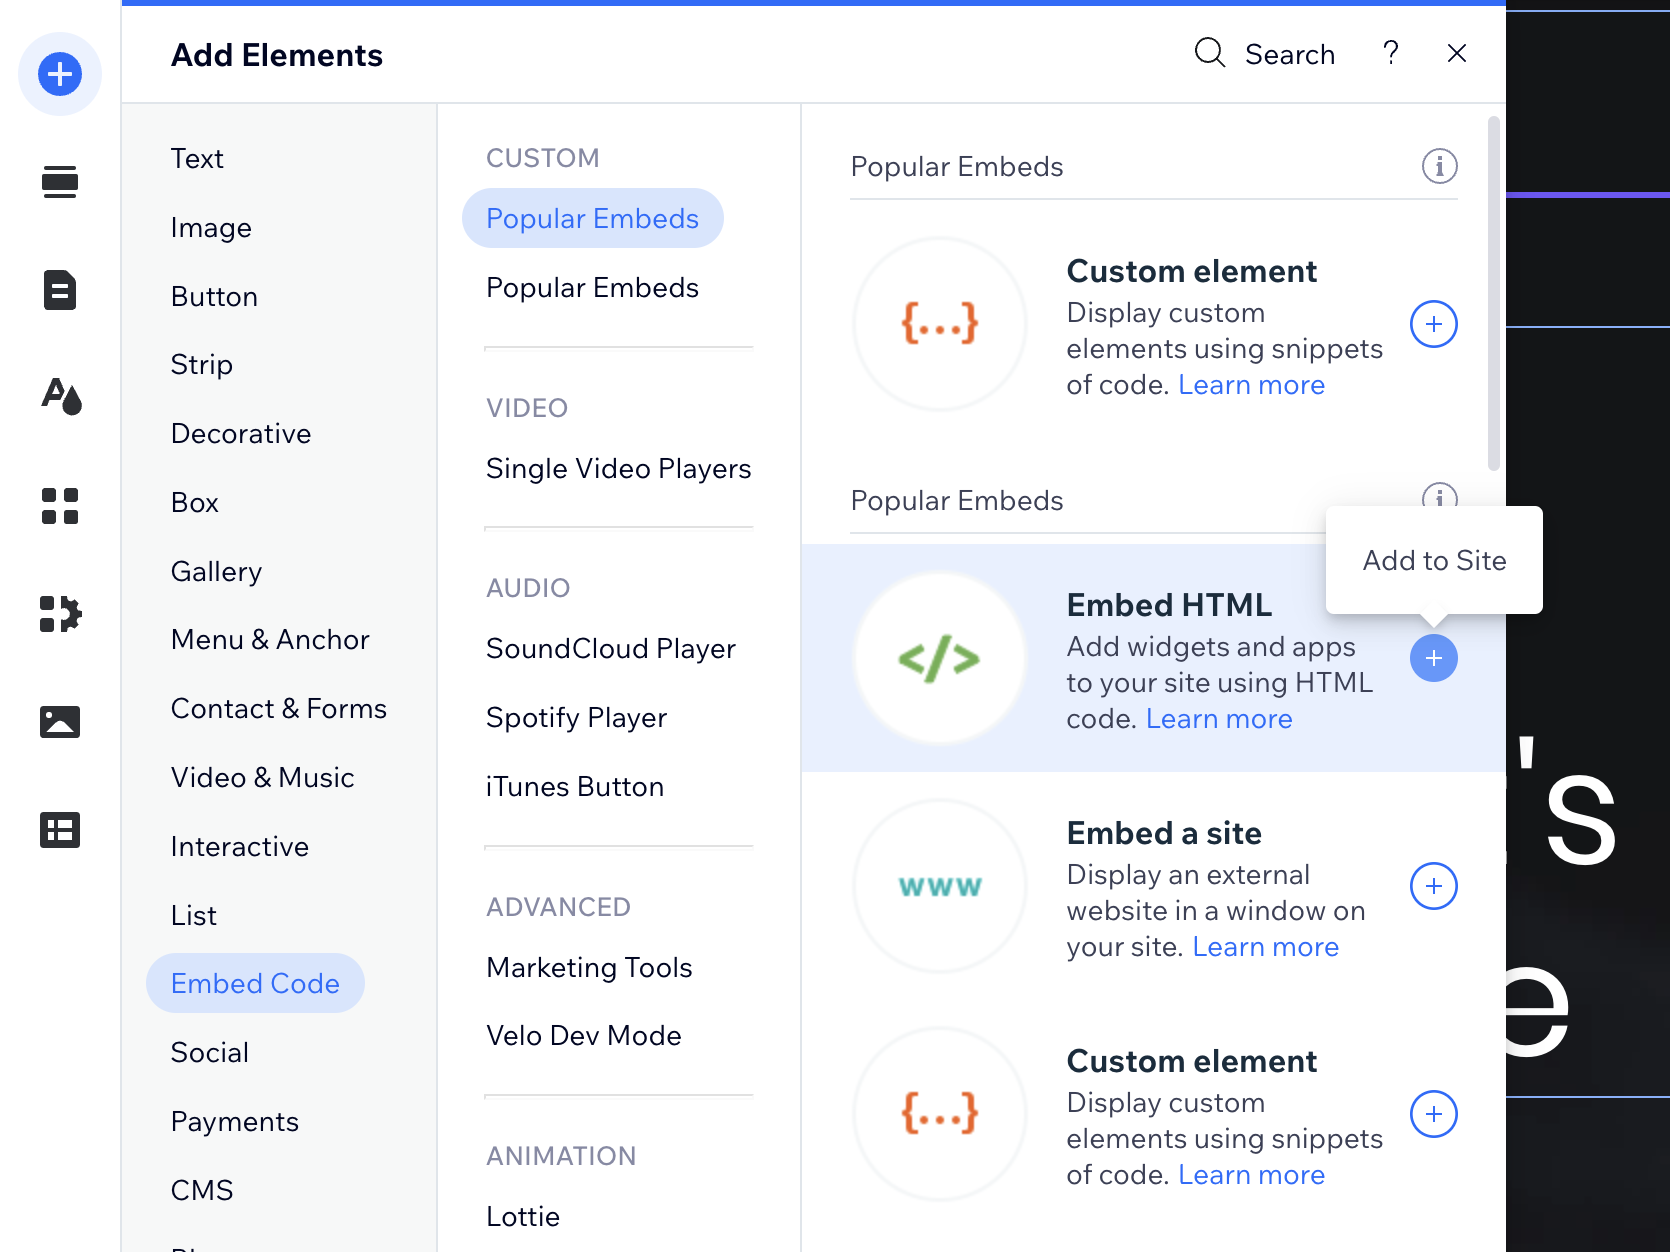
Step 3. Copy the iFrame embed code
For Wix, use the iFrame snippet (the second option in the Export tab). The Wix free plan does not support external script tags, so the iFrame method is the most reliable choice.
Step 4. Paste and resize
Paste the iFrame code into the Embed HTML element. Drag the element’s handles to make the chatbot fully visible on the page.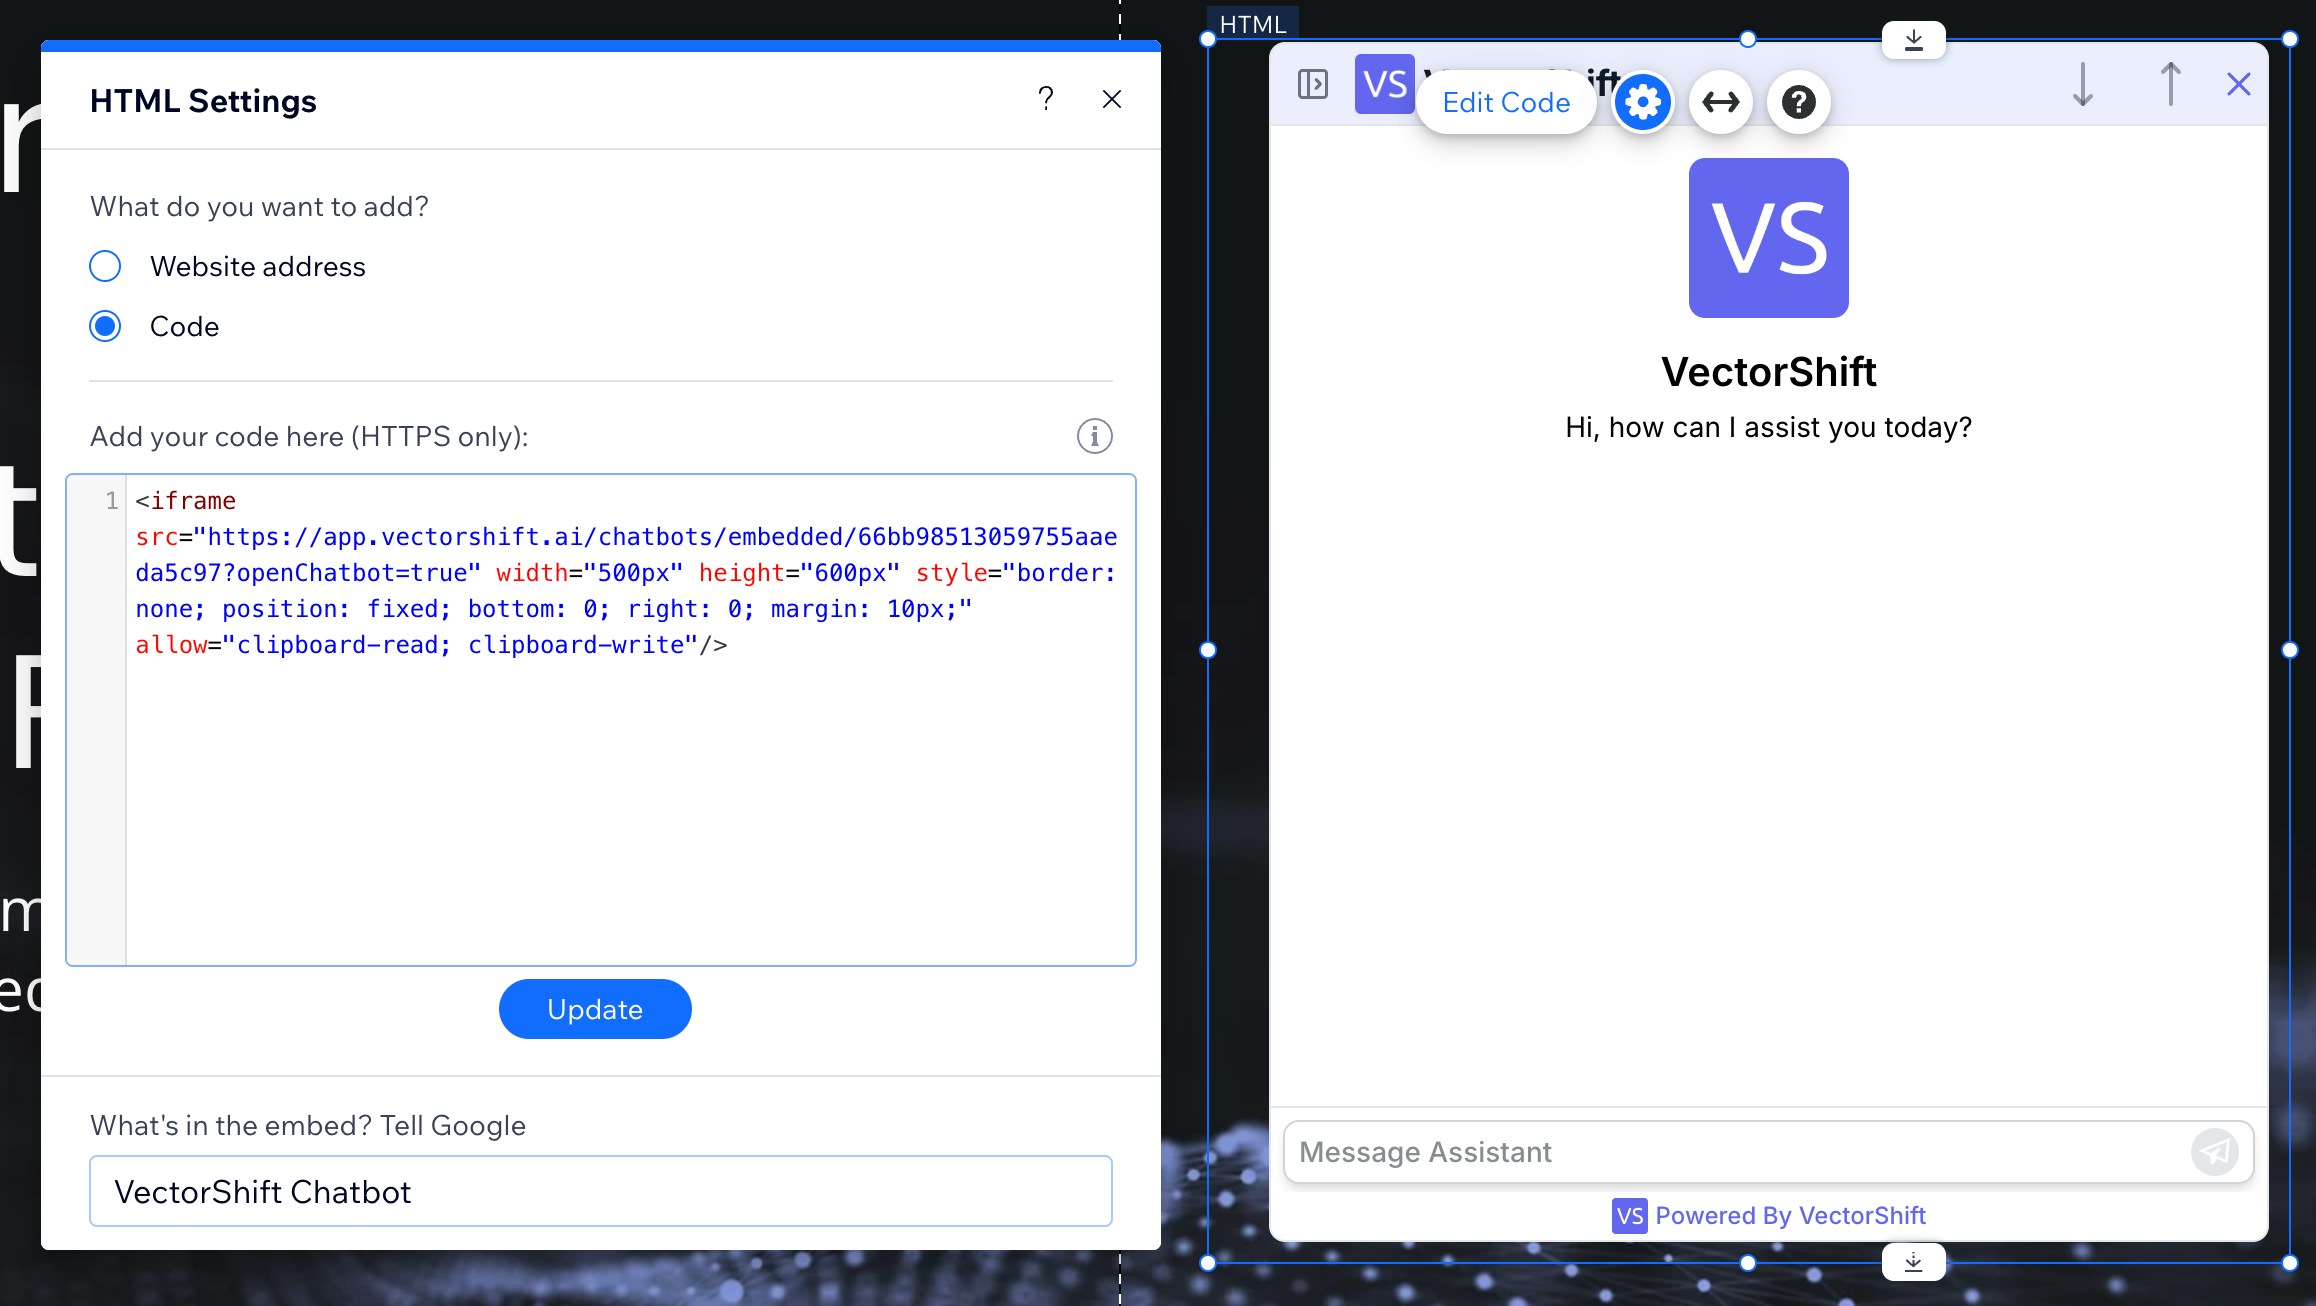
Step 5. Publish and test
Click Publish and open your live site. The chatbot should appear inline where you placed the embed element.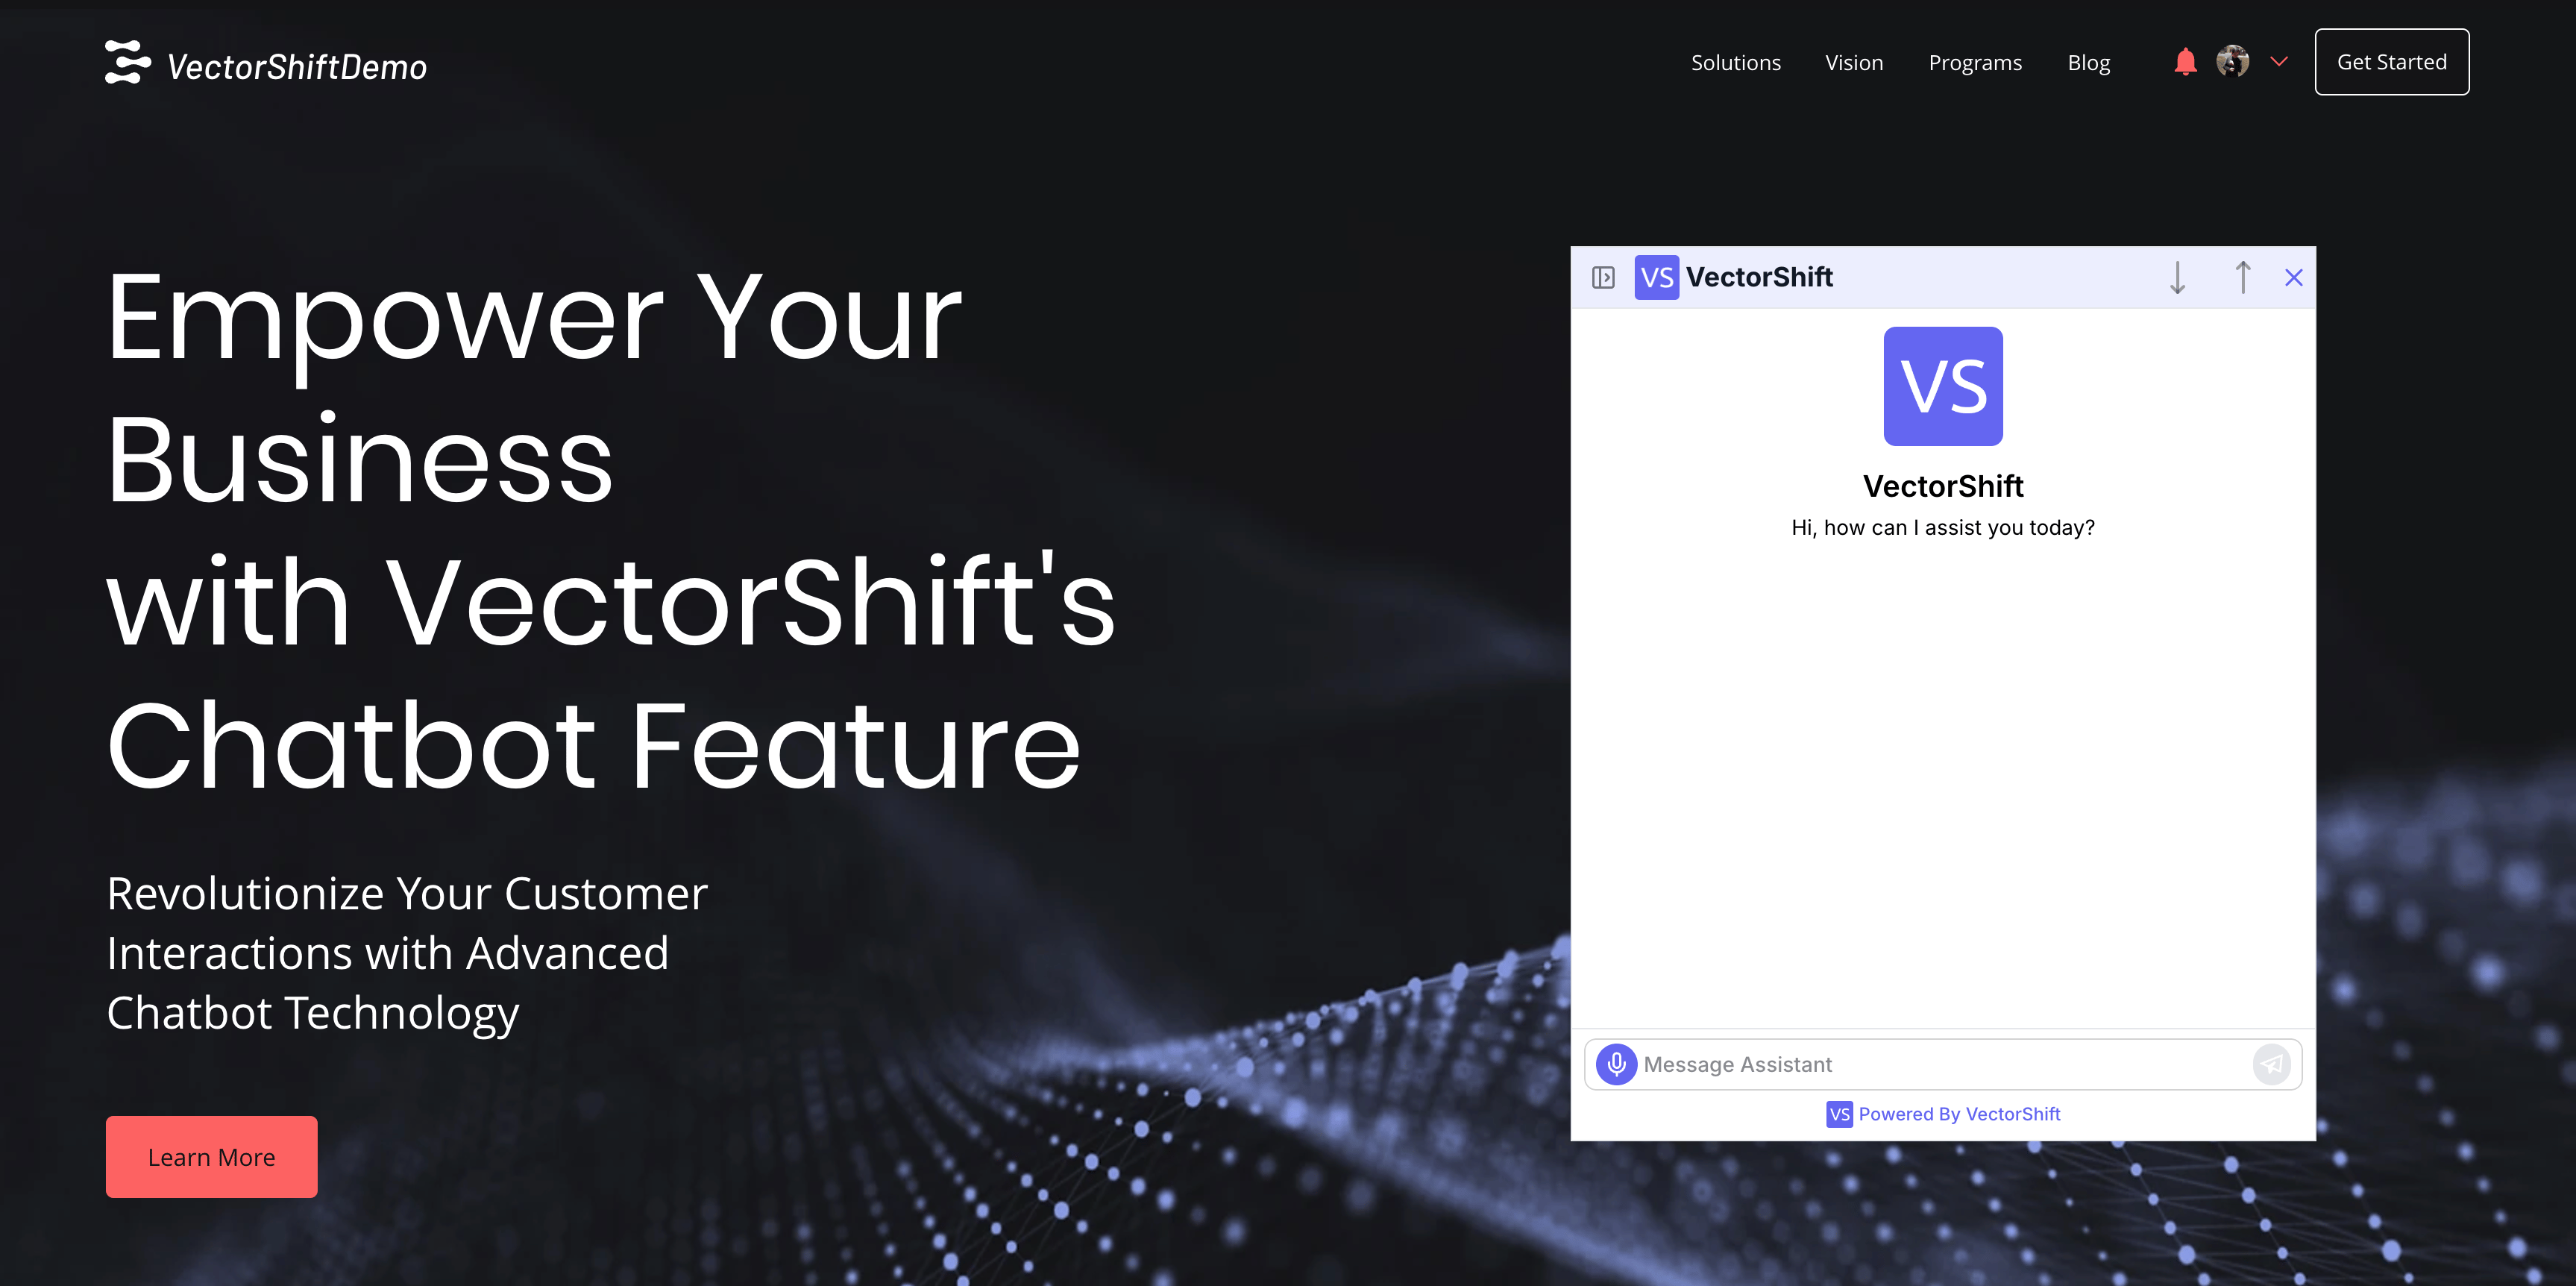
Bubble.io
Step 1. Open the Bubble.io editor
Log into your Bubble.io account and open the app you want to add the chatbot to.Step 2. Add an HTML element in the UI Builder
In the Bubble.io UI Builder, drag an HTML element onto your page.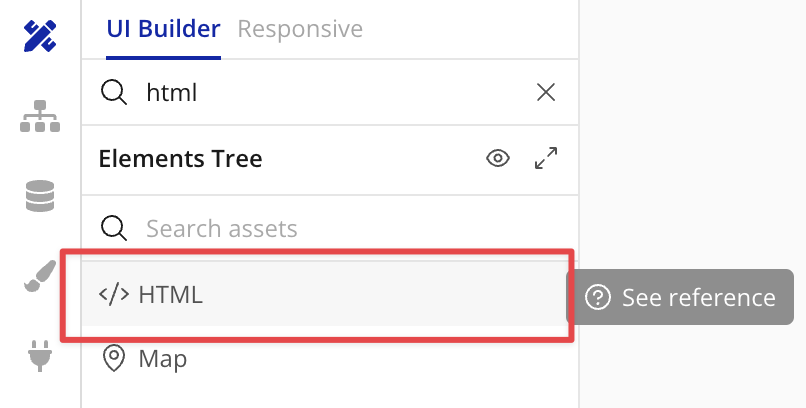
Step 3. Copy the script embed code
Copy the first embed snippet (the script tag) from the Export tab in VectorShift. Bubble.io supports script tags, so this creates a collapsible widget.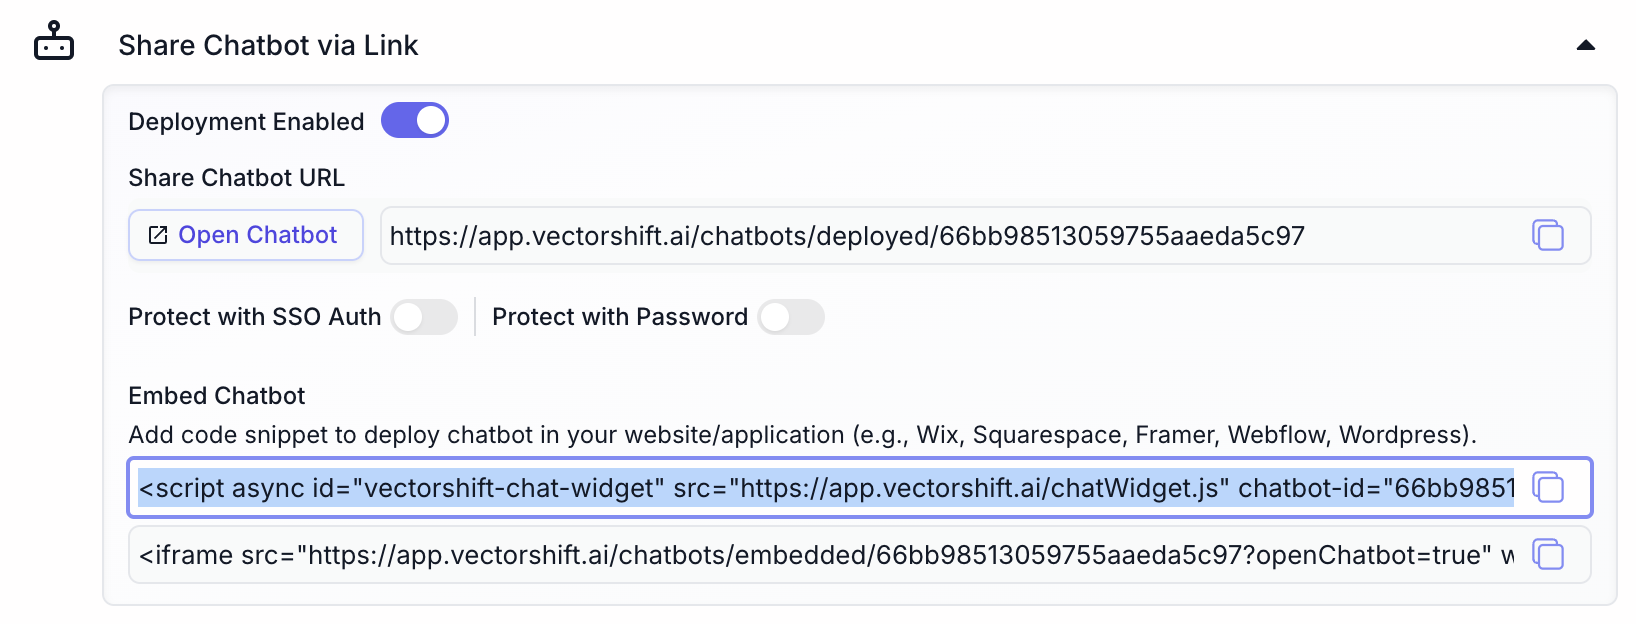
Step 4. Paste the code and enable “Display as an iFrame”
Paste the snippet into the HTML element. Check the Display as an iFrame option in the element settings.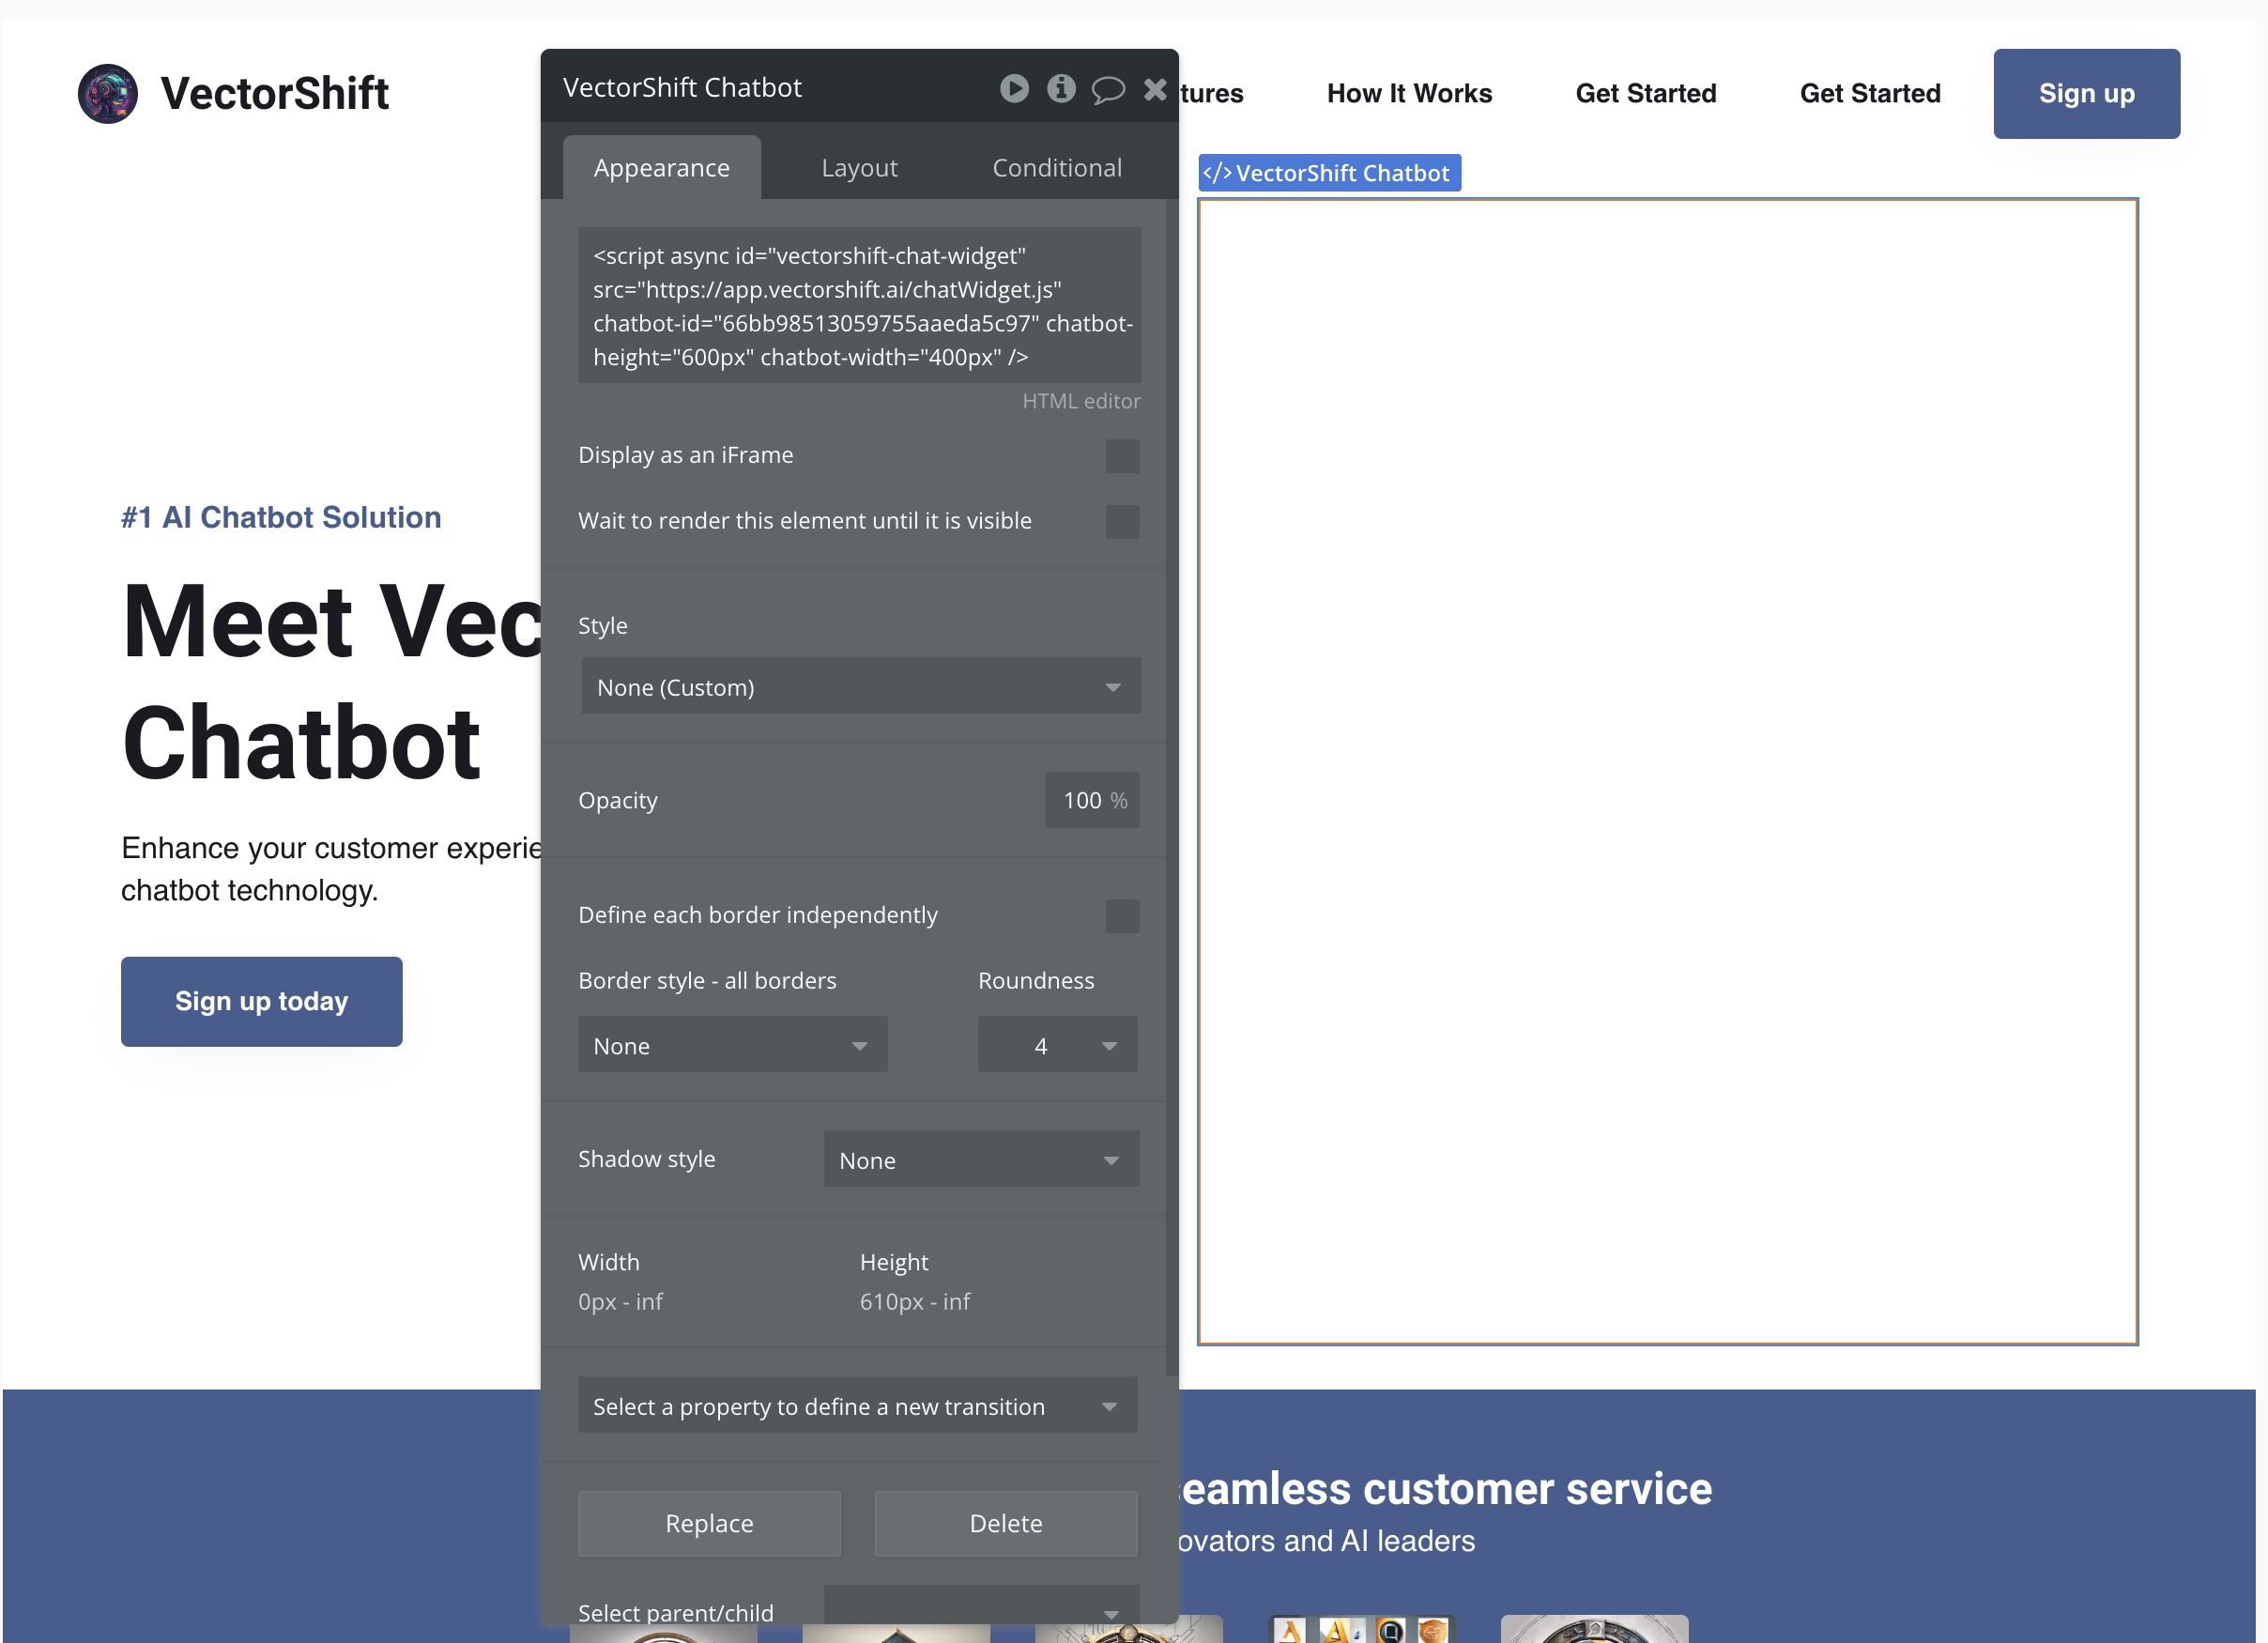
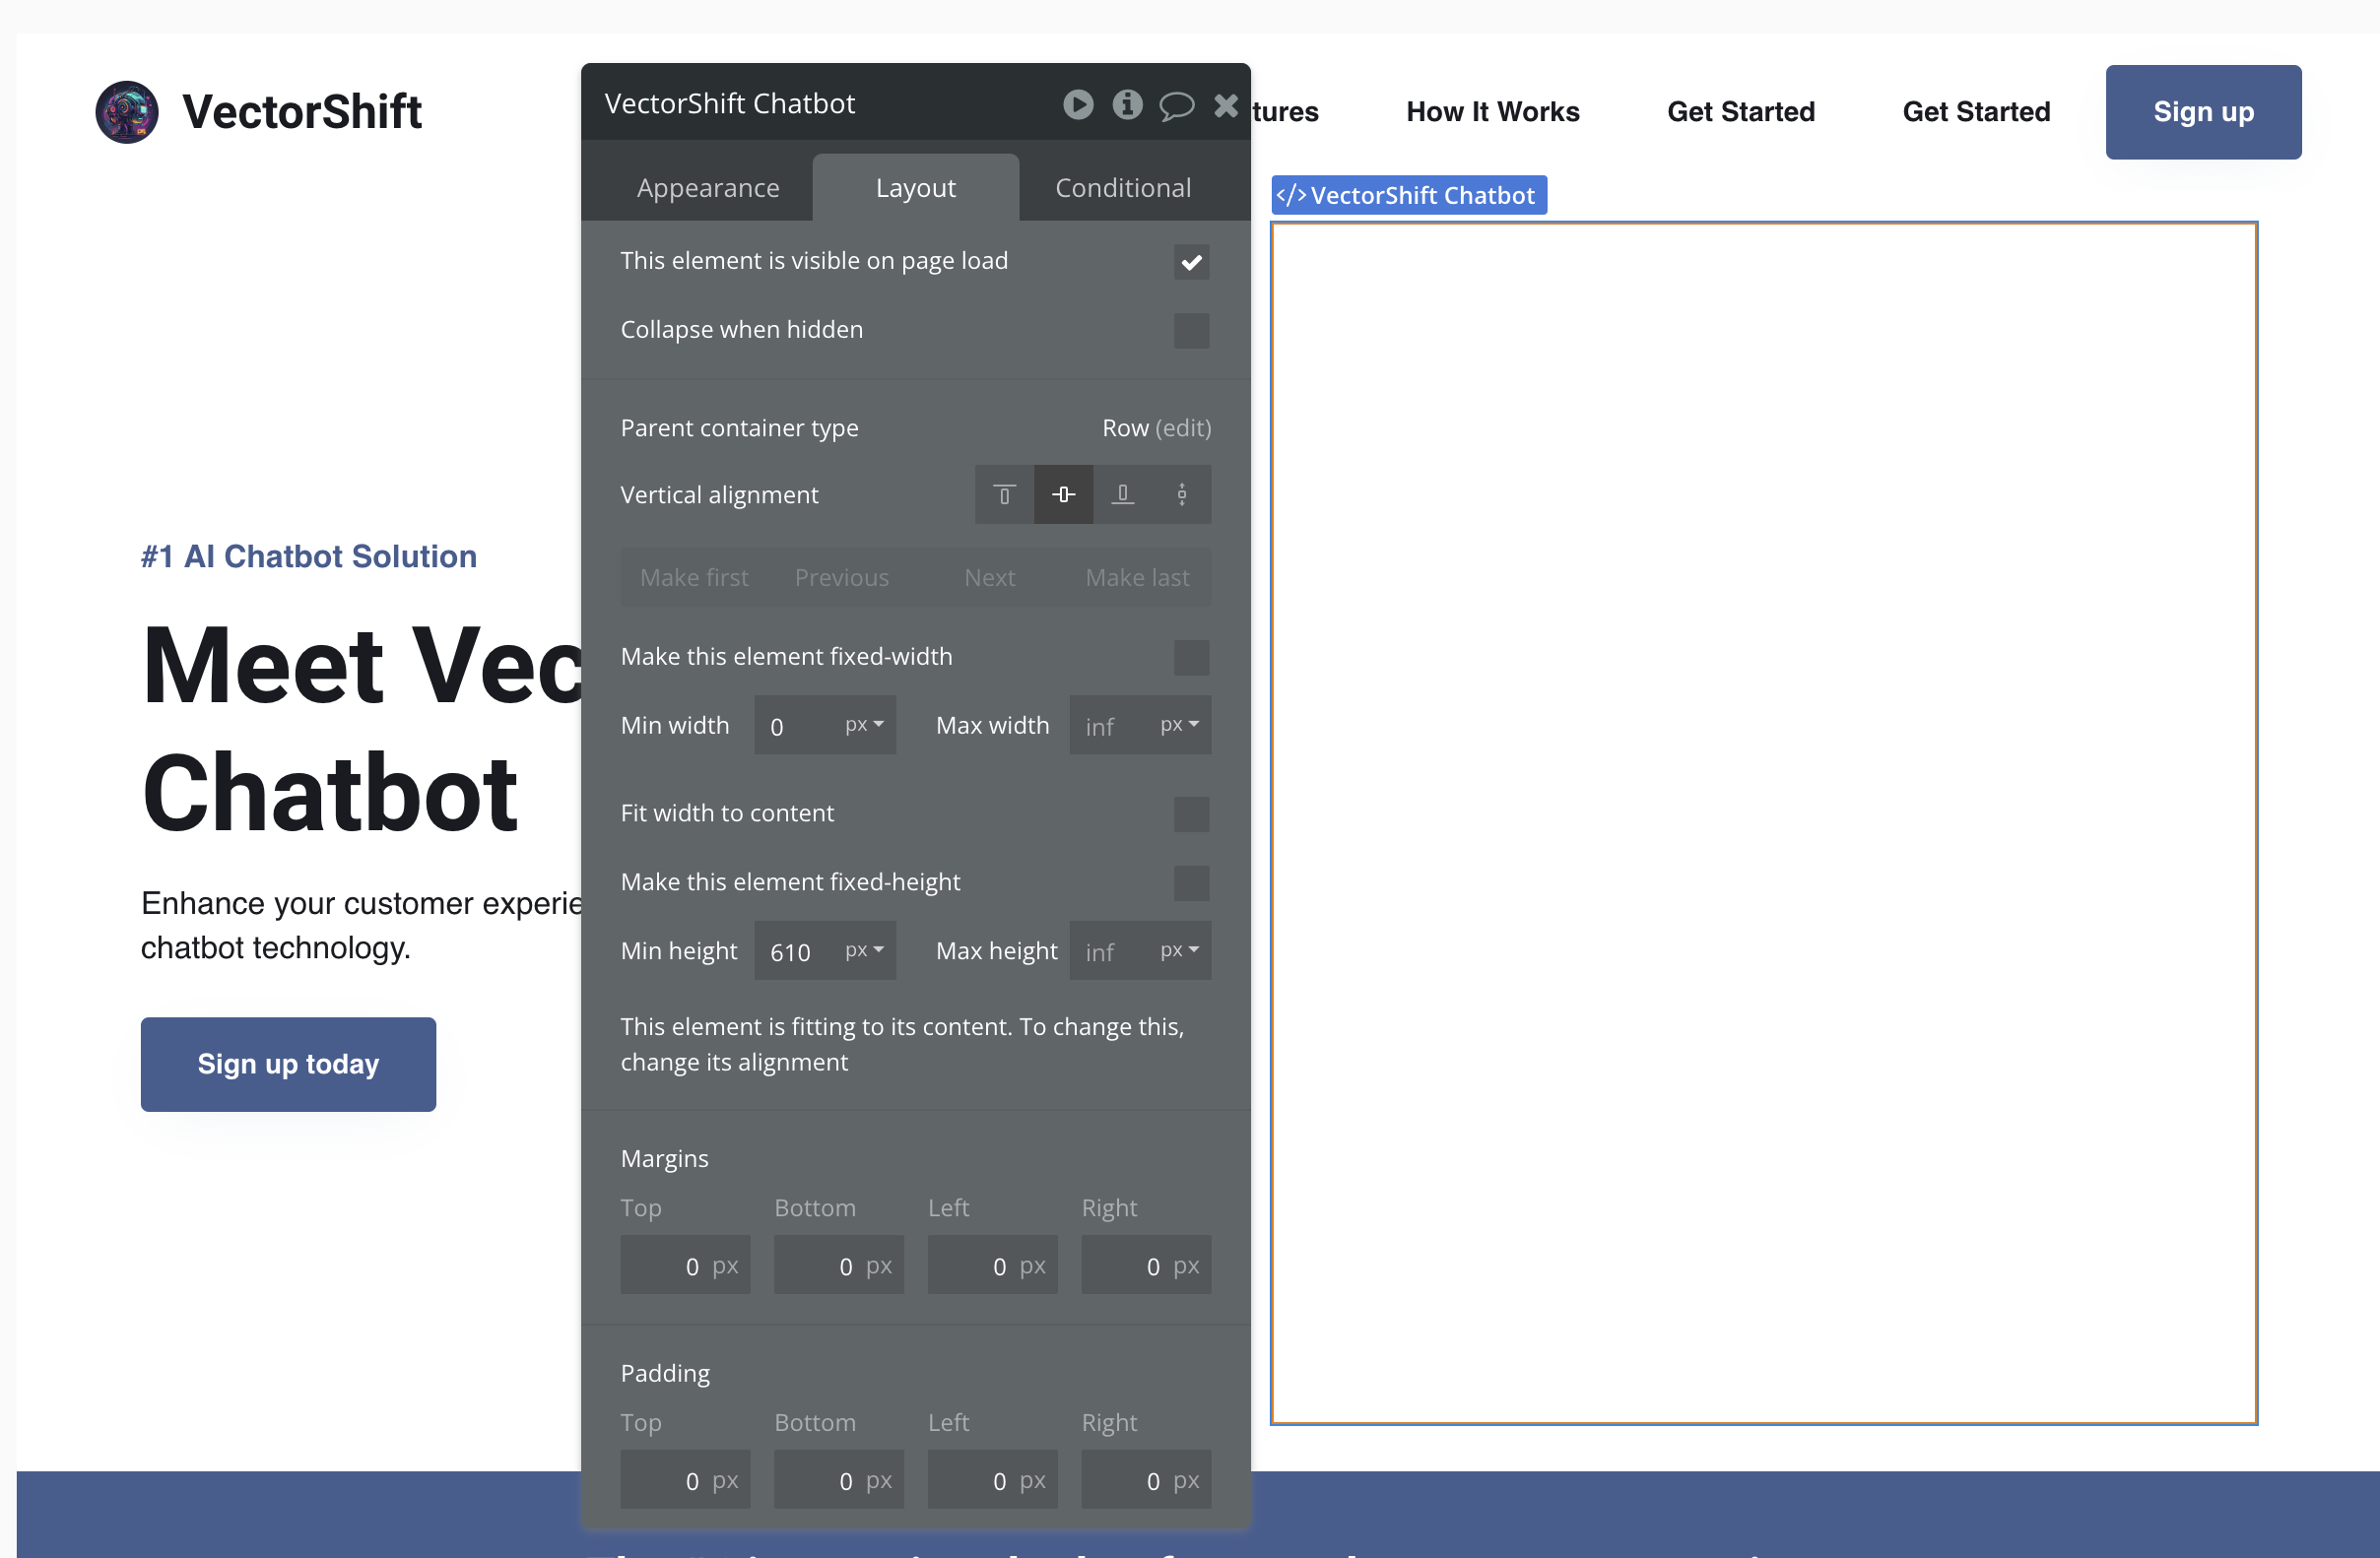
Step 5. Configure the layout
In the Layout tab of the element settings, set the minimum height to610px to ensure the chatbot is fully visible.
Step 6. Publish and test
Click Preview or Deploy to see the chatbot running on your Bubble.io app.
Troubleshooting
- The widget does not appear. Make sure the chatbot is deployed (Deployment Enabled is on). Check your browser’s developer console for script errors.
- The chatbot loads but voice input does not work in the iFrame. Verify that the
allow="clipboard-read; clipboard-write; microphone"attribute is present on the<iframe>tag. - The script tag does not load on Wix. Wix’s free plan blocks external scripts. Switch to the iFrame method.
Next steps
Deploy to Slack
Let your team chat with the bot directly in Slack
Deploy via WhatsApp and SMS
Connect to WhatsApp or SMS through Twilio