Setting a portal as the default view for members
The most seamless option: make the portal the first thing specific members see when they log in. Instead of landing in the full VectorShift workspace and navigating to the portal, they open directly into it — no extra steps required. This is managed from Settings > User View under the My Organization section of the left sidebar.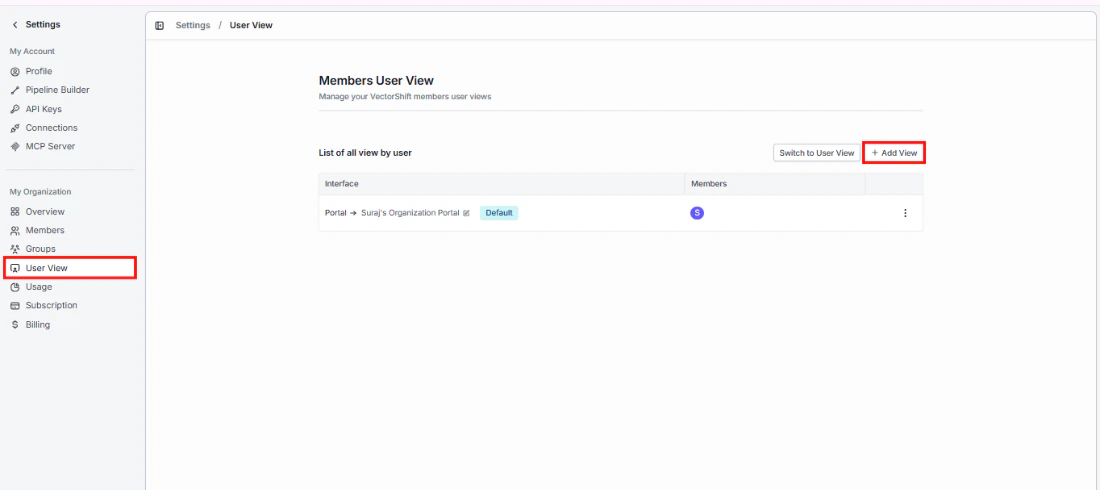
Step 1: Interface
Choose Portals, then select the portal you want to assign. Portals already assigned to other users show an “Already selected” label.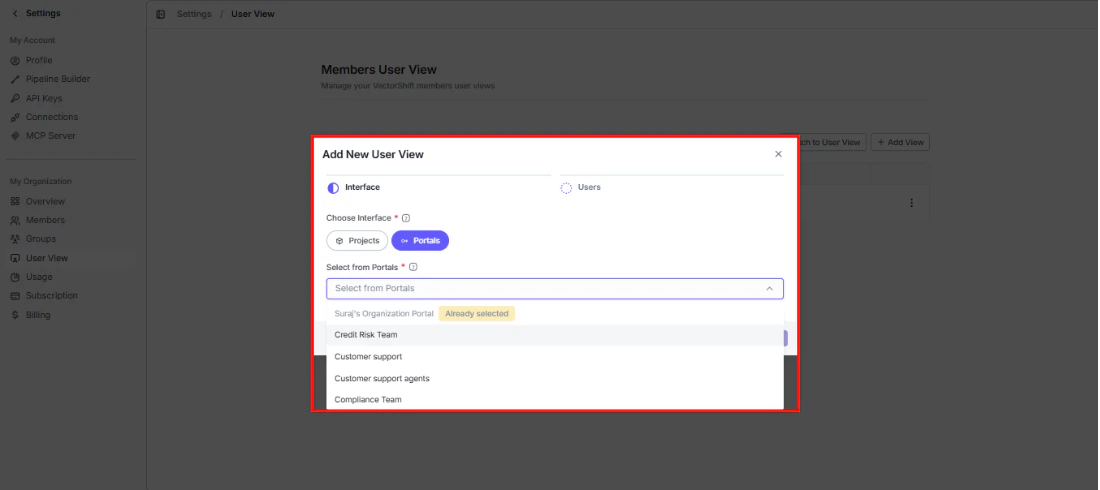
Step 2: Users
Add one or more members by email. If a member is already assigned to another view, you will see a “User already assigned” warning.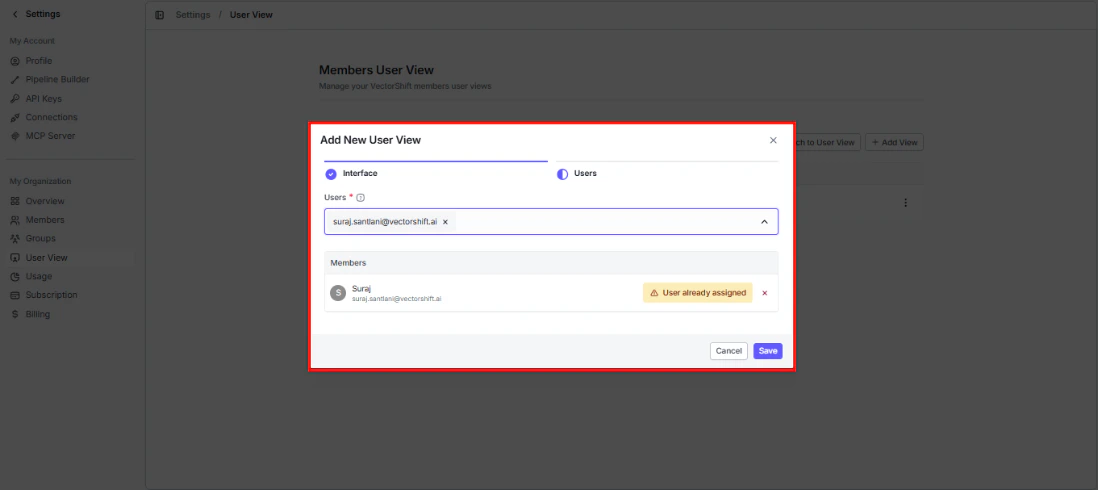
app.vectorshift.ai and lands directly in their assigned portal, no navigation needed:
Portal URL
Every portal gets a unique URL in the formathttps://app.vectorshift.ai/portals/deployed/[portal-id]. Copy it from the top of the preview panel in the editor and share it directly with anyone who needs access.
Click Open Portal to preview the live portal in a new browser tab.
Embed portal
Want the portal to live inside your own website or app? Click Embed Portal to get an iframe snippet you can paste anywhere.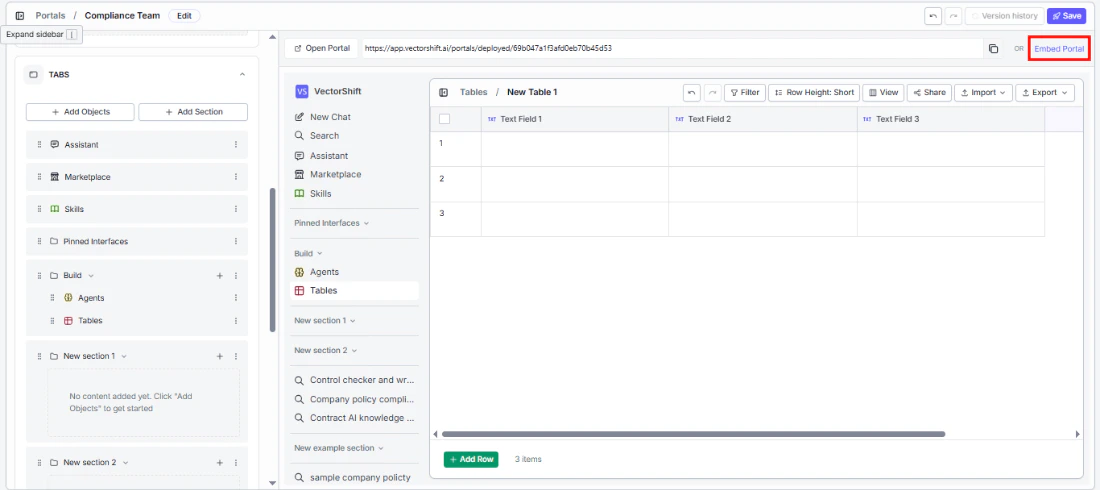
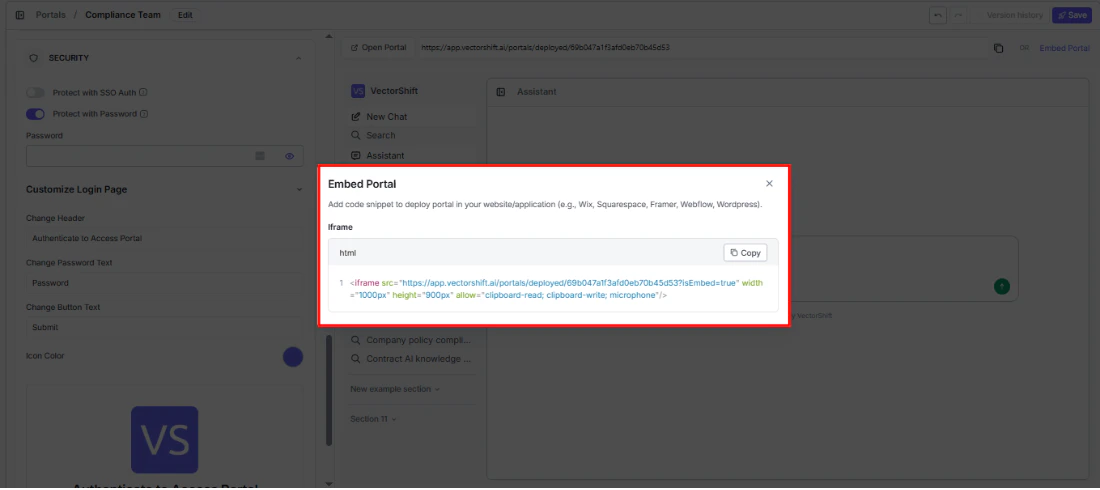
clipboard-read, clipboard-write, and microphone permissions, a default size of 1000x900px, and the portal URL with ?isEmbed=true appended. Click Copy to grab it.
Works with Wix, Squarespace, Framer, Webflow, WordPress, and any platform that supports iframes.
If you are embedding in an environment with a strict Content Security Policy, make sure
clipboard-read, clipboard-write, and microphone permissions are allowed.Share
Give specific people access to your portal with defined roles. From the Portals list, click the three-dot menu on a portal and select Share.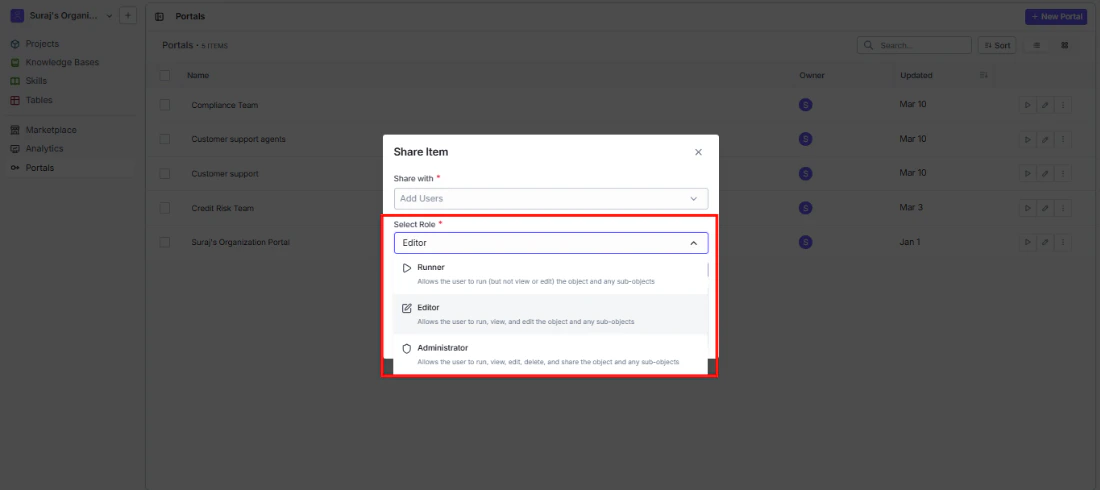
- Runner: Can use the portal but cannot view or edit its configuration.
- Editor: Can use, view, and edit the portal and its contents.
- Administrator: Full control — can use, view, edit, delete, and share the portal.
Publish to Marketplace
Turn your portal into a reusable template that others in your organization (or all VectorShift users) can discover and deploy. From the Portals list, click the three-dot menu and select Publish to Marketplace.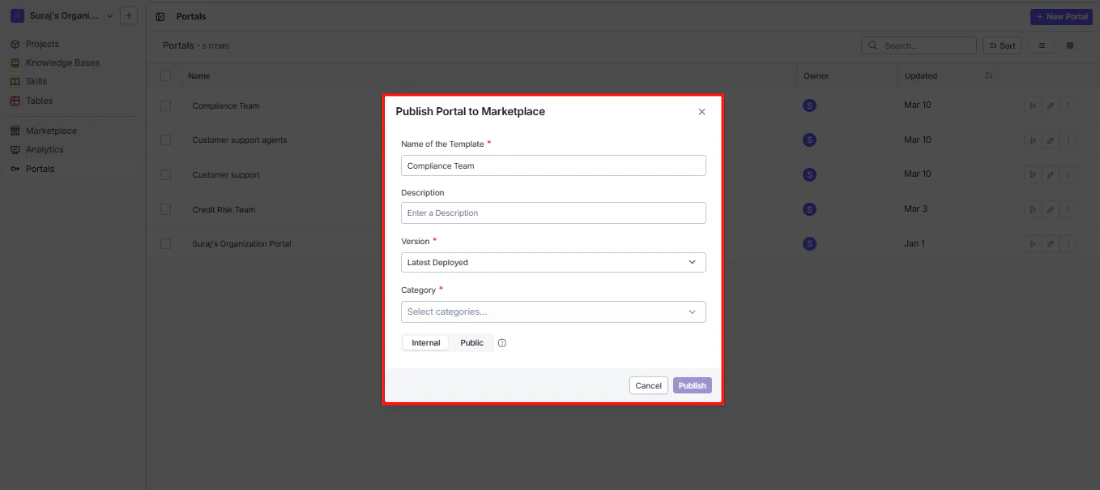
- Name of the Template: Pre-filled with the portal name — edit if you want a different display name.
- Description: Explain the use case and any setup steps so others can get value quickly.
- Version: Choose which version to publish. Defaults to “Latest Deployed.”
- Category: Select one or more categories to help users find your template.
- Internal / Public: Keep it within your organization or make it available to all VectorShift users.