-
Action: Select the trigger action/event
-
Account: Select or connect the Outlook account you want to monitor
-
Configure: Configure the trigger
Node Inputs
In the step 3:- Select Trigger: Select the trigger action/event. This will include options like
Inbox,Spam,Trash,Starred,Unread,Important,Drafts,Sent- Type:
Dropdown
- Type:
Node Parameters
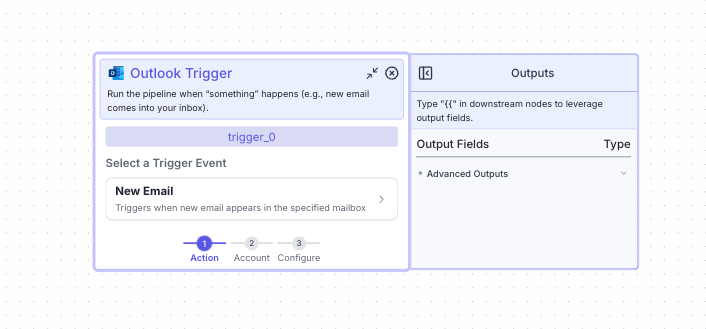
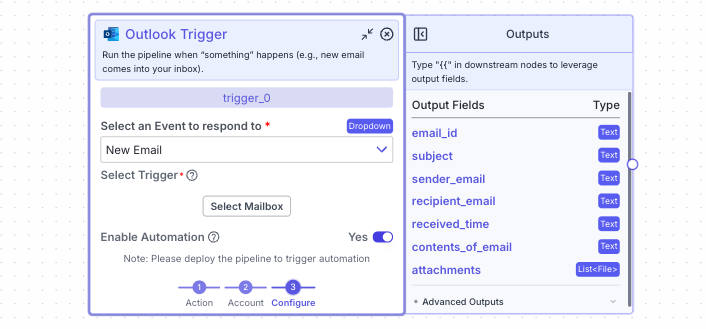
On the face of the node: In the step 1:- Select a Trigger Event: Select the trigger action/event. Currently, the only trigger event is
New Emailwhich triggers when a new email is received in the specified mailbox.- Type:
Select
- Type:
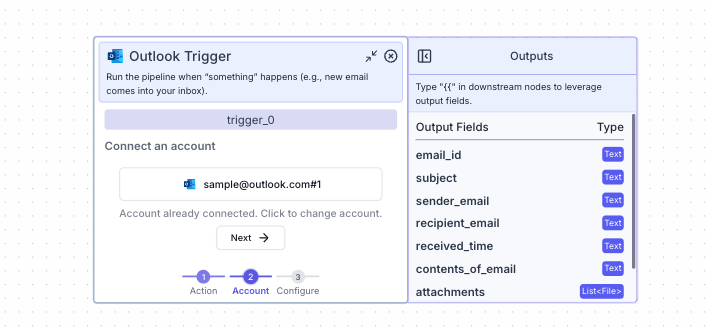
- Connect an Account: Select or connect the Outlook account you want to monitor
- Type:
Select
- Type:
- Select an Event to respond to: Select the trigger action/event. Currently, the only trigger event is
New Emailwhich triggers when a new email triggers in the specified mailbox.- Type:
Select
- Type:
- Enable Automation: Enable the automation to run the pipeline when the trigger event happens.
- Type:
Toggle
- Type:
Node Outputs
- email_id: The email id of the email that triggered the pipeline
- Type:
Text - Example usage:
{{trigger_0.email_id}}
- Type:
- subject: The subject of the email that triggered the pipeline
- Type:
Text - Example usage:
{{trigger_0.subject}}
- Type:
- sender_email: The sender email of the email that triggered the pipeline
- Type:
Text - Example usage:
{{trigger_0.sender_email}}
- Type:
- recipient_email: The recipient email of the email that triggered the pipeline
- Type:
Text - Example usage:
{{trigger_0.recipient_email}}
- Type:
- received_time: The date and time the email was received
- Type:
Text - Example usage:
{{trigger_0.received_time}}
- Type:
- contents_of_email: The body of the email that triggered the pipeline
- Type:
Text - Example usage:
{{trigger_0.contents_of_email}}
- Type:
- attachments: The attachments of the email that triggered the pipeline
- Type:
List<File> - Example usage:
{{trigger_0.attachments}}
- Type:
Considerations
- The trigger node will only work if the pipeline is deployed and the
Enable Automationparameter is set totrue. - The parameter email_id is often used in conjunction with the reply gmail action to reply in the same thread.
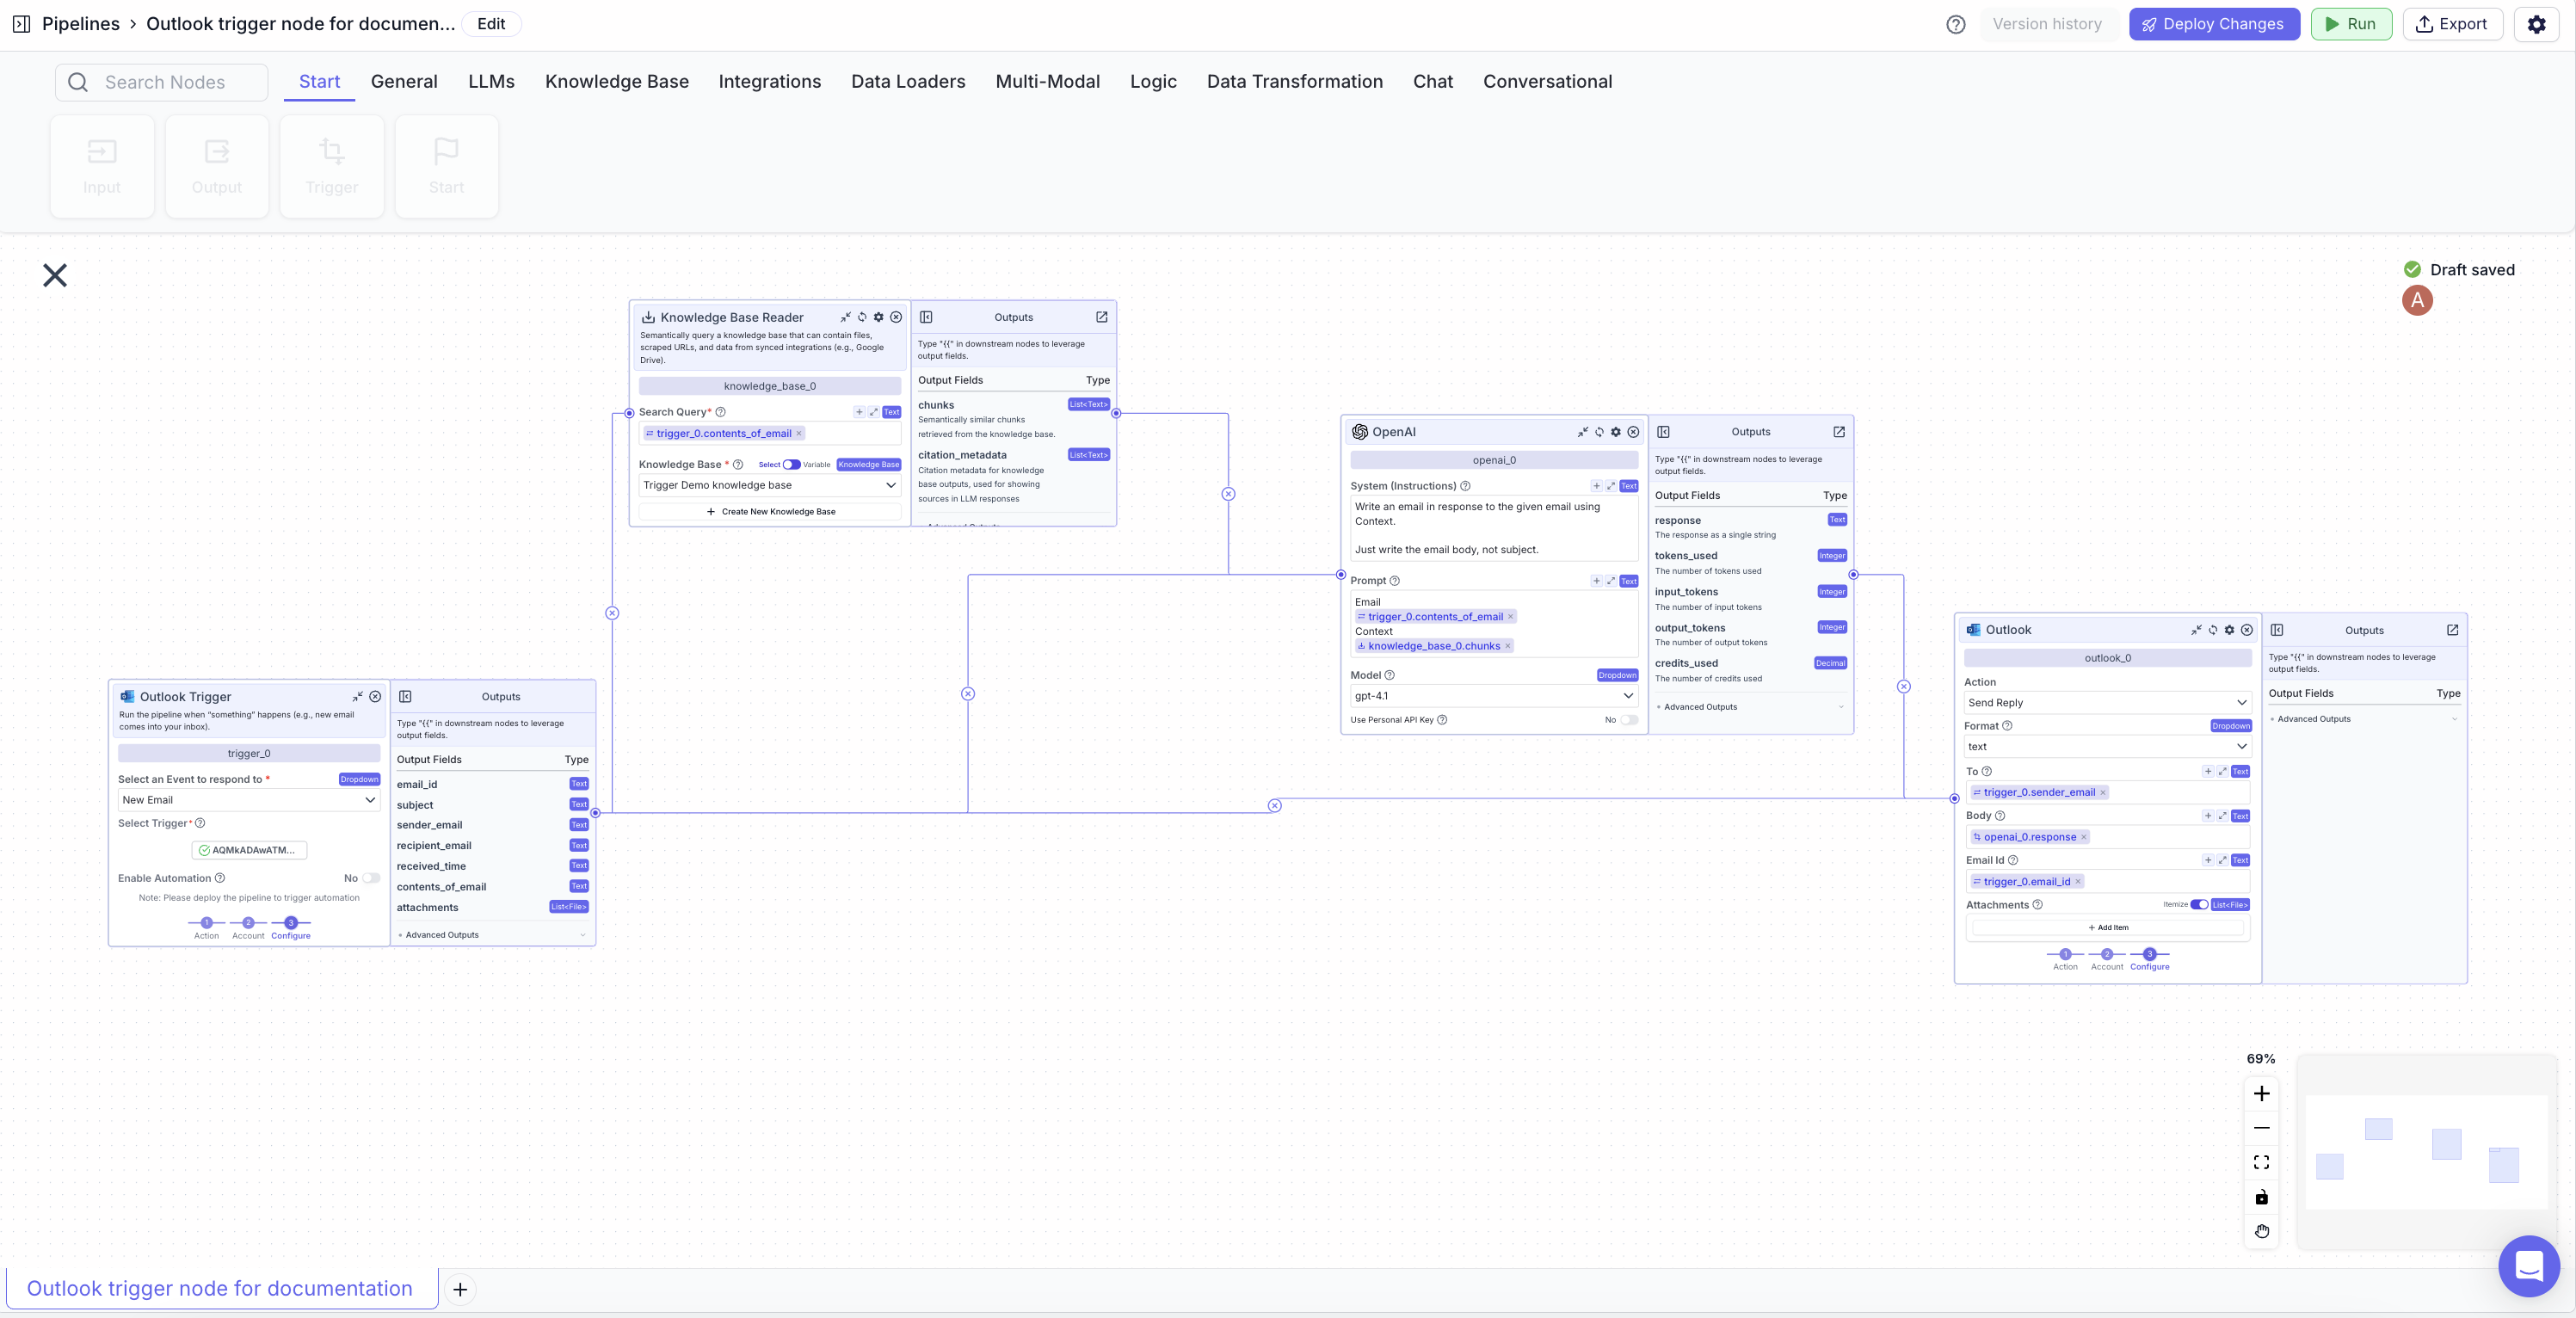
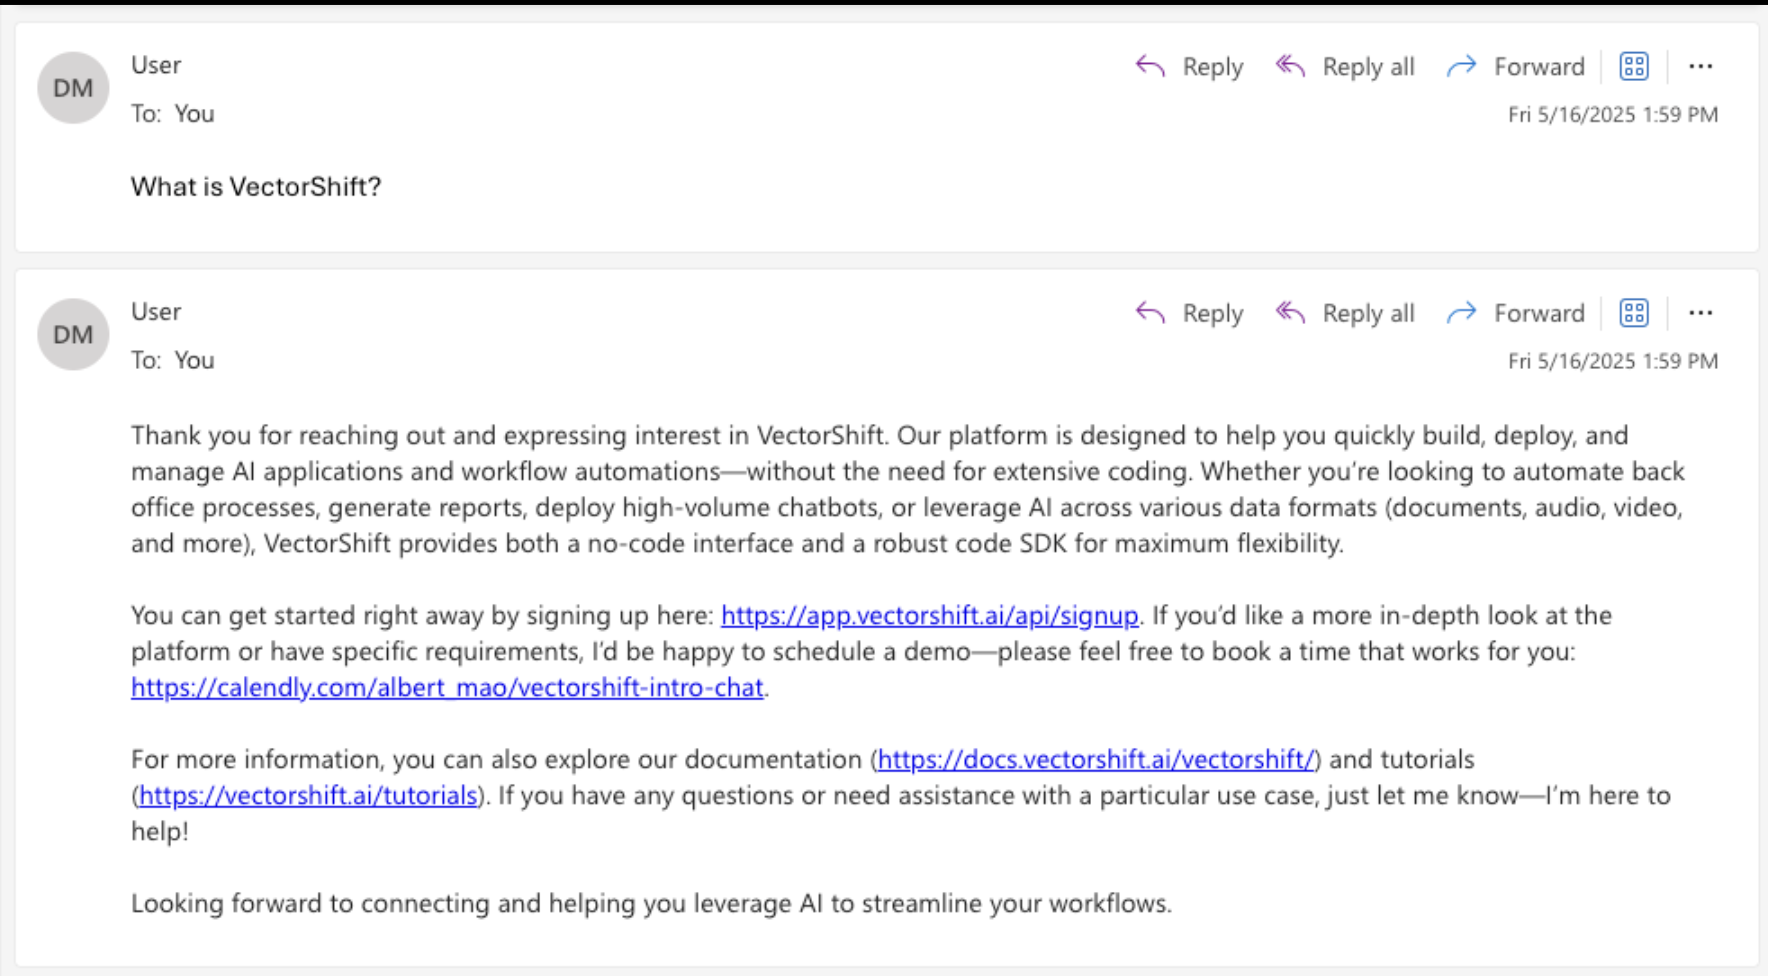
Example
The below example is a pipeline which replies to an email which asks about VectorShift.- Outlook Trigger Node: Triggers the pipeline when a new email arrives
- Trigger Event:
New Email - Enable Automation:
true
- Trigger Event:
- Knowledge Base Node: Contains the information about Vectorshift. Queries the knowledge base using the body of the email.
- Search Query:
{{trigger_0.contents_of_email}} - Knowledge Base:
Trigger Demo Knowledge Base
- Search Query:
- LLM Node: Uses the LLM to generate a response to the email using the context from the knowledge base.
- System (Instruction):
Write an email in response to the given email using Context. Just write the email body, not subject. - Prompt:
Email: {{trigger_0.contents_of_email}} Context: {{knowledge_base_0.context}}
- System (Instruction):
- Outlook Node: Sends the generated email to the sender
- Action:
Send Reply - Body:
{{openai_0.response}} - To:
{{trigger_0.sender_email}} - EmailID:
{{trigger_0.email_id}}
- Action: