> ## Documentation Index
> Fetch the complete documentation index at: https://docs.vectorshift.ai/llms.txt
> Use this file to discover all available pages before exploring further.
# Transformation Node
> Allows for custom node creation
 This node allows you to execute a transformation within a pipeline (custom Python code).
## Node Inputs
Dynamic Inputs defined in the transformation.
## Node Parameters
On the face of the node:
1. Transformation: Select a transformation that you have created (or create a new one)
* Type: `Dropdown`
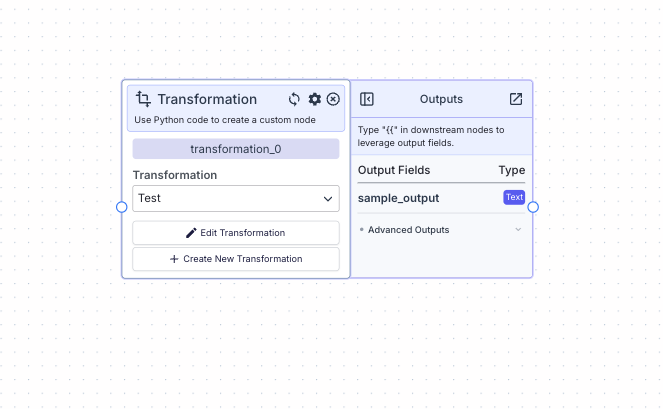
## Node Outputs
Dynamic Outputs defined in the transformation.
## Examples
### Example 1: Using a Transformation to display the date and time in formatted manner
### Transformation
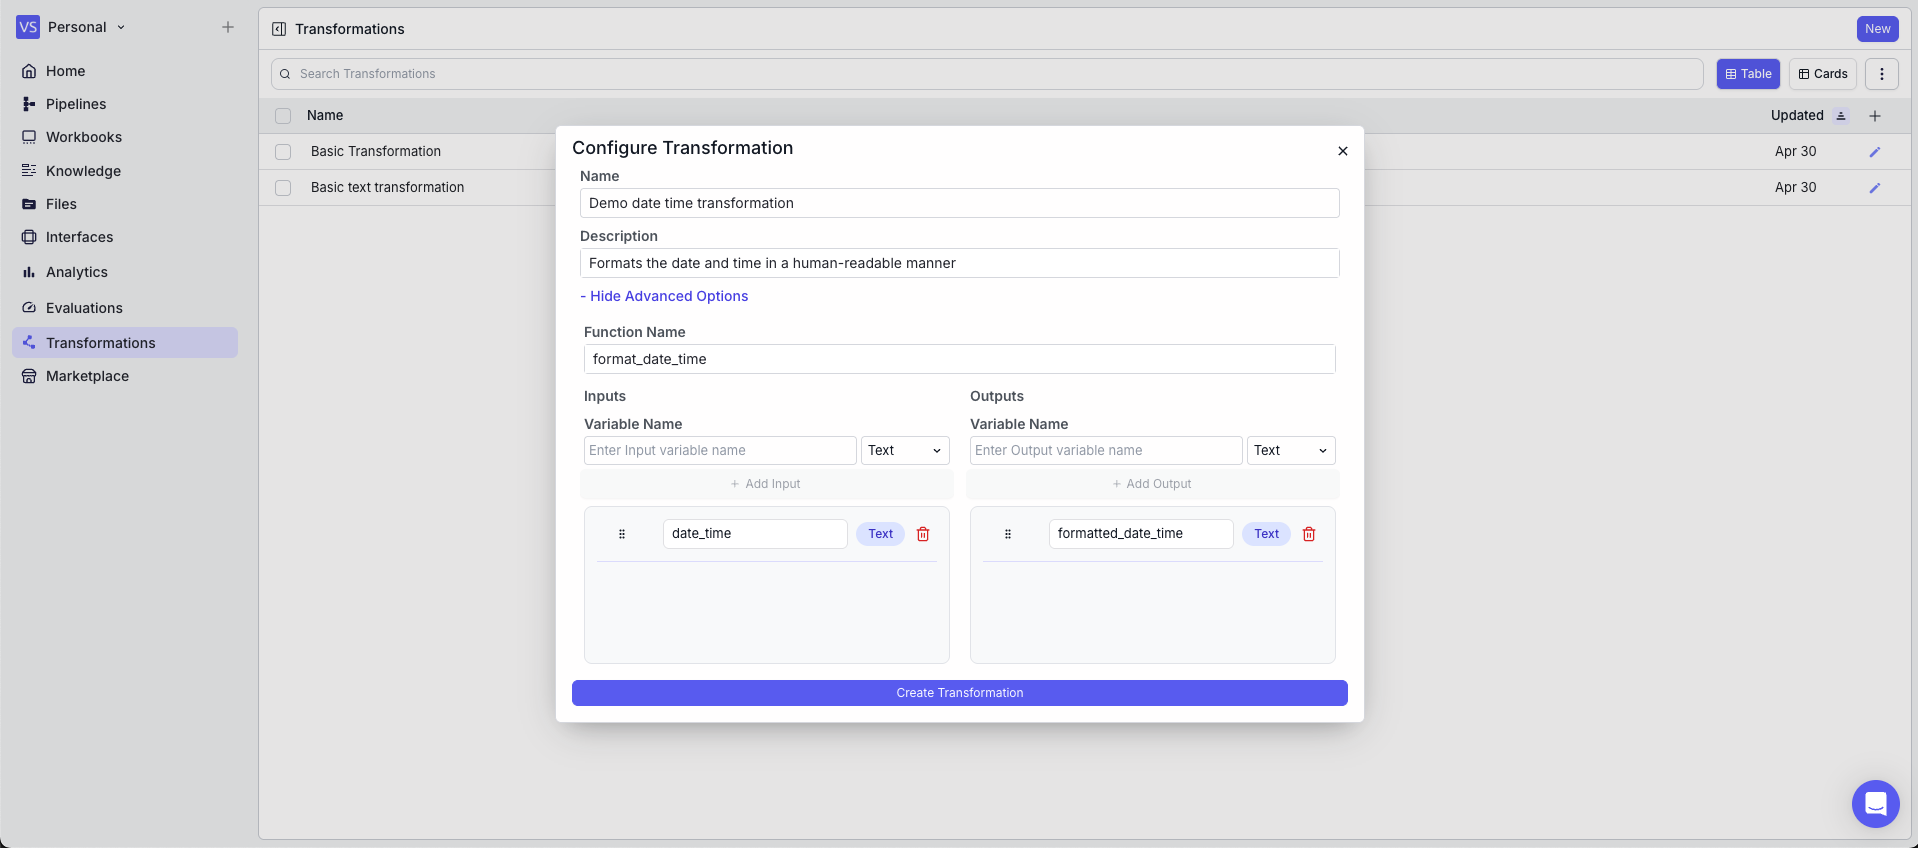
In this example, first we will create a transformation that formats the date and time in a human-readable manner. Create a transformation with the following parameters:
* Function Name: `format_date_time`
* Description: `Formats the date and time in a human-readable manner`
* Inputs: `date_time`
* Outputs: `formatted_date_time`
This node allows you to execute a transformation within a pipeline (custom Python code).
## Node Inputs
Dynamic Inputs defined in the transformation.
## Node Parameters
On the face of the node:
1. Transformation: Select a transformation that you have created (or create a new one)
* Type: `Dropdown`
## Node Outputs
Dynamic Outputs defined in the transformation.
## Examples
### Example 1: Using a Transformation to display the date and time in formatted manner
### Transformation
In this example, first we will create a transformation that formats the date and time in a human-readable manner. Create a transformation with the following parameters:
* Function Name: `format_date_time`
* Description: `Formats the date and time in a human-readable manner`
* Inputs: `date_time`
* Outputs: `formatted_date_time`
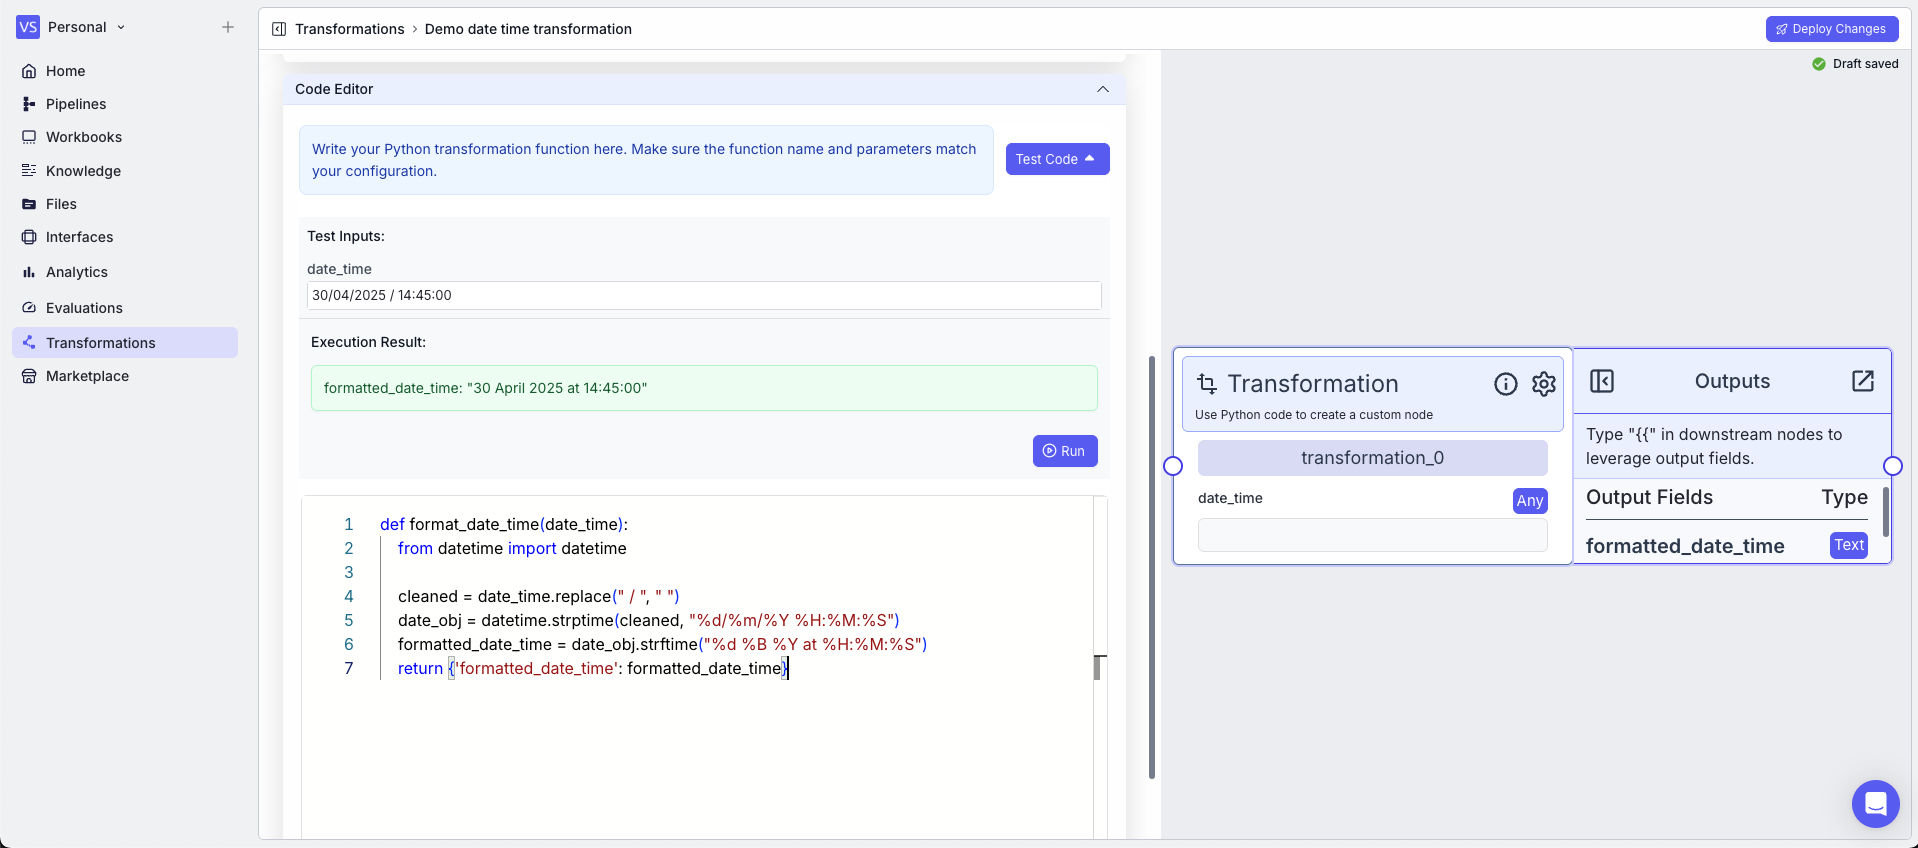
 In the code, the `datetime` module is used to format the date and time.
```python theme={"languages":{}}
def format_date_time(date_time):
from datetime import datetime
cleaned = date_time.replace(" / ", " ")
date_obj = datetime.strptime(cleaned, "%d/%m/%Y %H:%M:%S")
formatted_date_time = date_obj.strftime("%d %B %Y at %H:%M:%S")
return {'formatted_date_time': formatted_date_time}
```
Note: The imports take place in the function definition.
Also, it is a good practice to test the transformation in the editor before deploying the changes. To test the transformation, you can use the `Test Code` button in the top right corner of the editor accordion.
In the code, the `datetime` module is used to format the date and time.
```python theme={"languages":{}}
def format_date_time(date_time):
from datetime import datetime
cleaned = date_time.replace(" / ", " ")
date_obj = datetime.strptime(cleaned, "%d/%m/%Y %H:%M:%S")
formatted_date_time = date_obj.strftime("%d %B %Y at %H:%M:%S")
return {'formatted_date_time': formatted_date_time}
```
Note: The imports take place in the function definition.
Also, it is a good practice to test the transformation in the editor before deploying the changes. To test the transformation, you can use the `Test Code` button in the top right corner of the editor accordion.
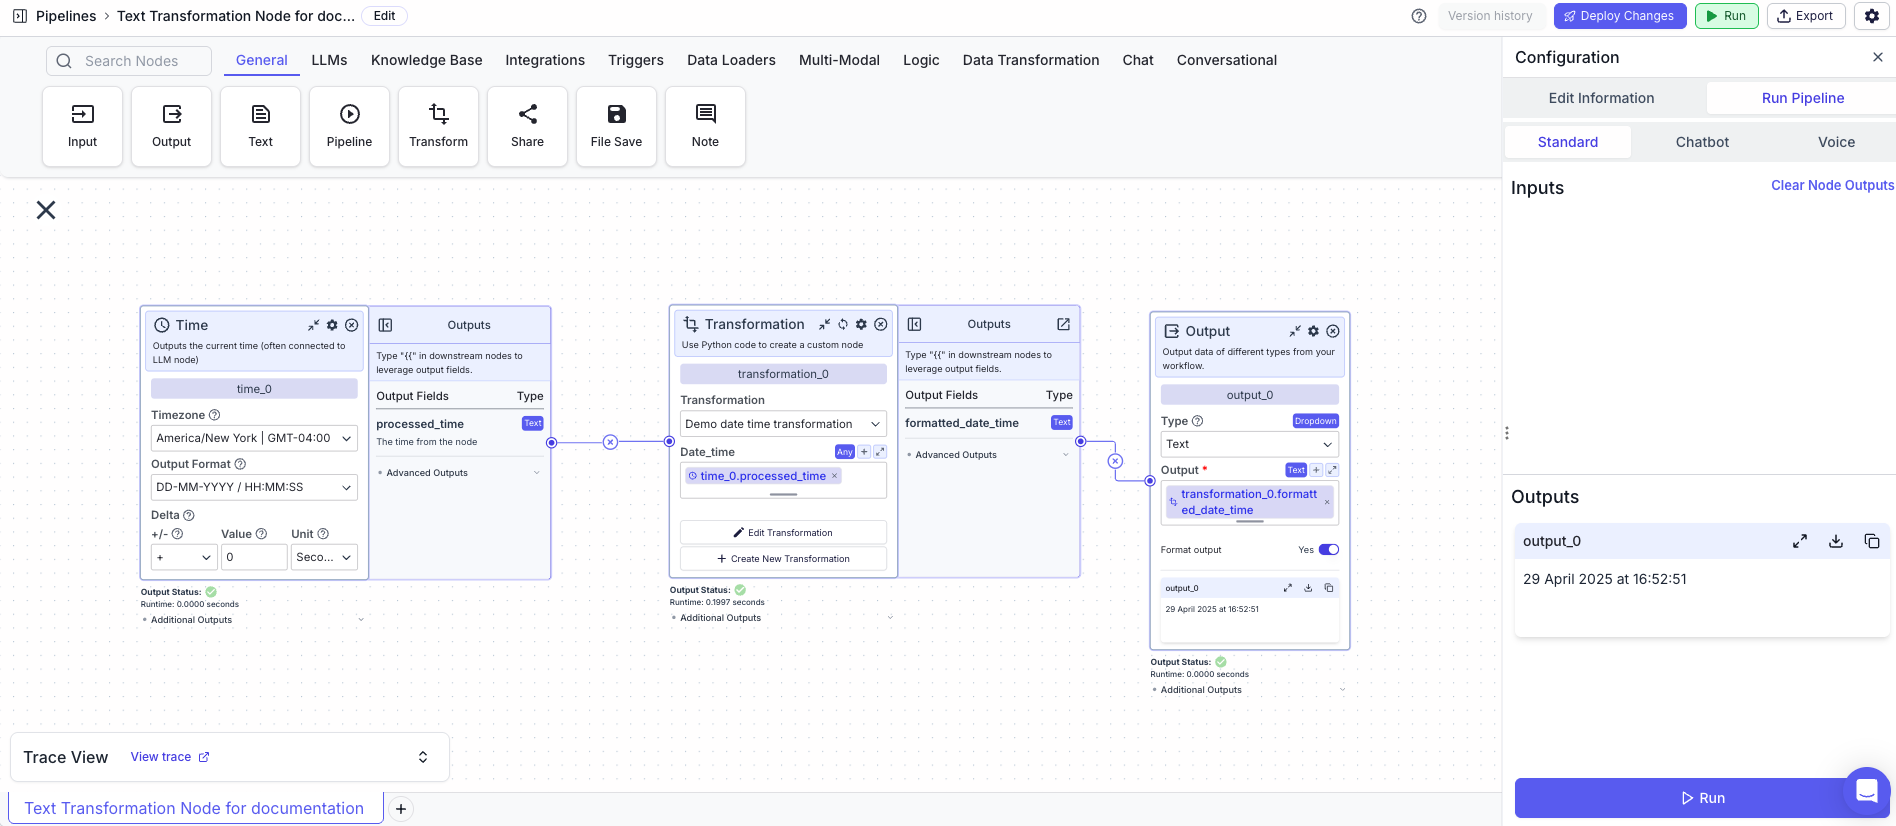
 ### Pipeline
In this example, we will use the transformation in a pipeline.
1. Time Node: Gets the current date and time
2. Transformation Node: Uses the transformation to format the date and time
* Input: `{{time_0.output}}`
* Transformation: `Demo date time transformation`
3. Output Node: Displays the formatted date and time
* Output: `{{transformation_0.formatted_date_time}}`
### Pipeline
In this example, we will use the transformation in a pipeline.
1. Time Node: Gets the current date and time
2. Transformation Node: Uses the transformation to format the date and time
* Input: `{{time_0.output}}`
* Transformation: `Demo date time transformation`
3. Output Node: Displays the formatted date and time
* Output: `{{transformation_0.formatted_date_time}}`
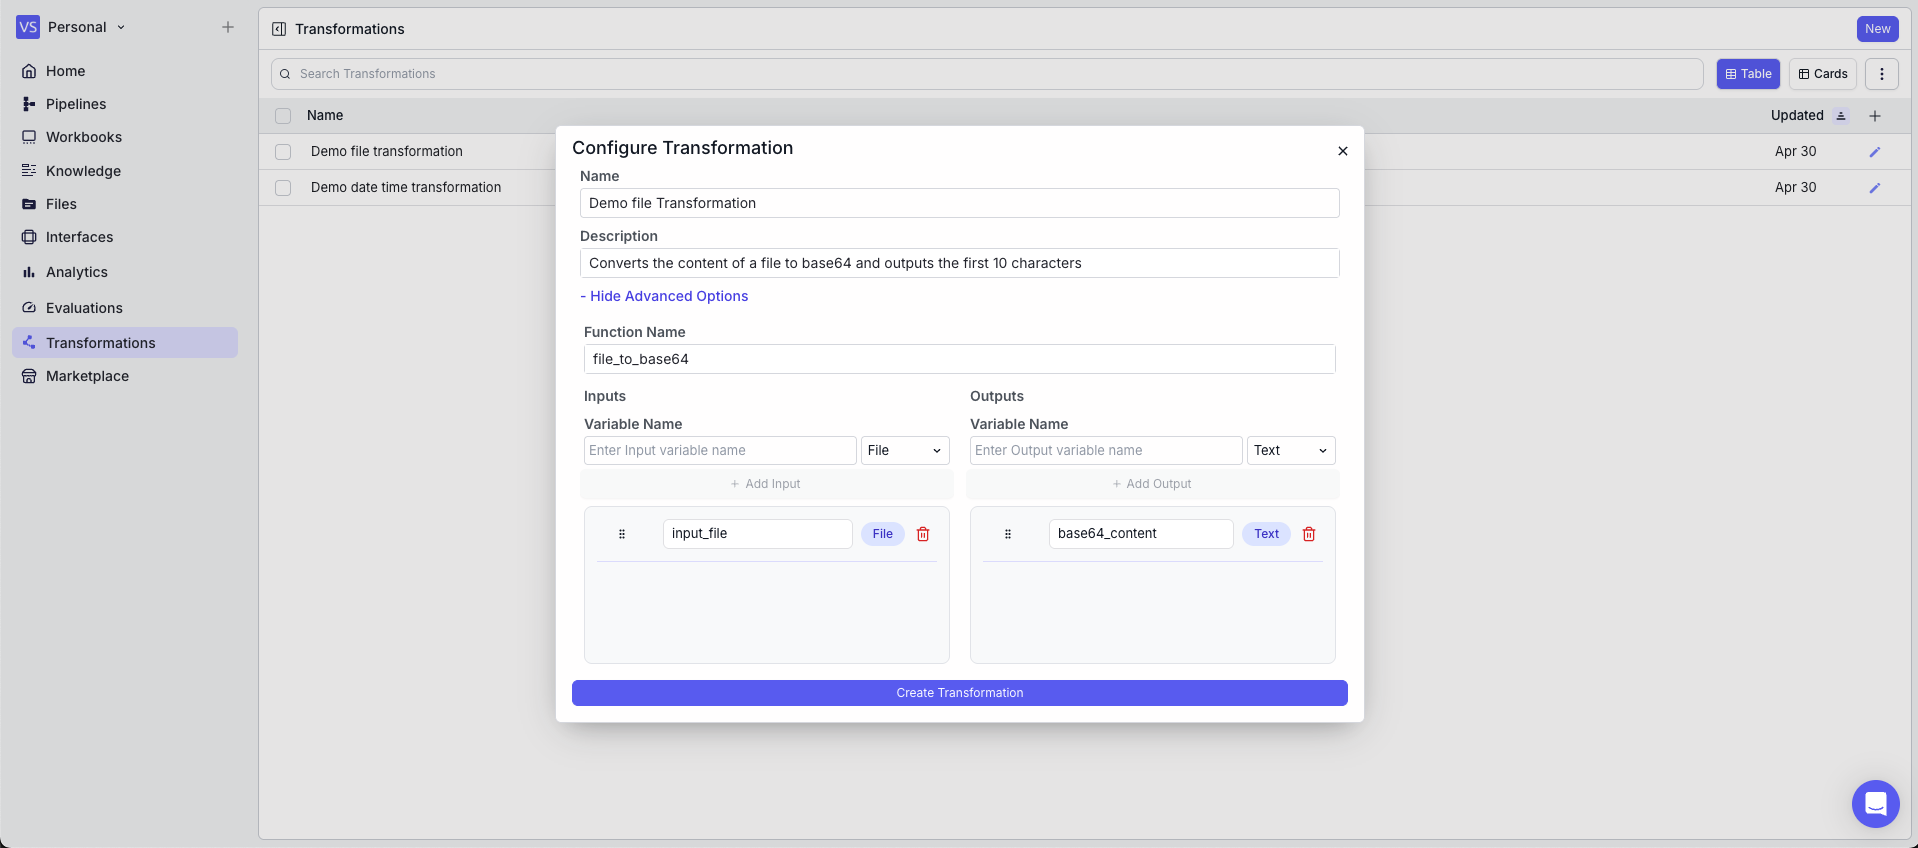
 ### Example 2: Using a Transformation to convert a files content to base64 and output the first 10 characters
### Transformation
In this example, we will create a transformation that converts the content of a file to base64 and outputs the first 10 characters. Create a transformation with the following parameters:
* Function Name: `file_to_base64`
* Description: `Converts the content of a file to base64 and outputs the first 10 characters`
* Inputs: `input_file`
* Outputs: `base64_content`
### Example 2: Using a Transformation to convert a files content to base64 and output the first 10 characters
### Transformation
In this example, we will create a transformation that converts the content of a file to base64 and outputs the first 10 characters. Create a transformation with the following parameters:
* Function Name: `file_to_base64`
* Description: `Converts the content of a file to base64 and outputs the first 10 characters`
* Inputs: `input_file`
* Outputs: `base64_content`
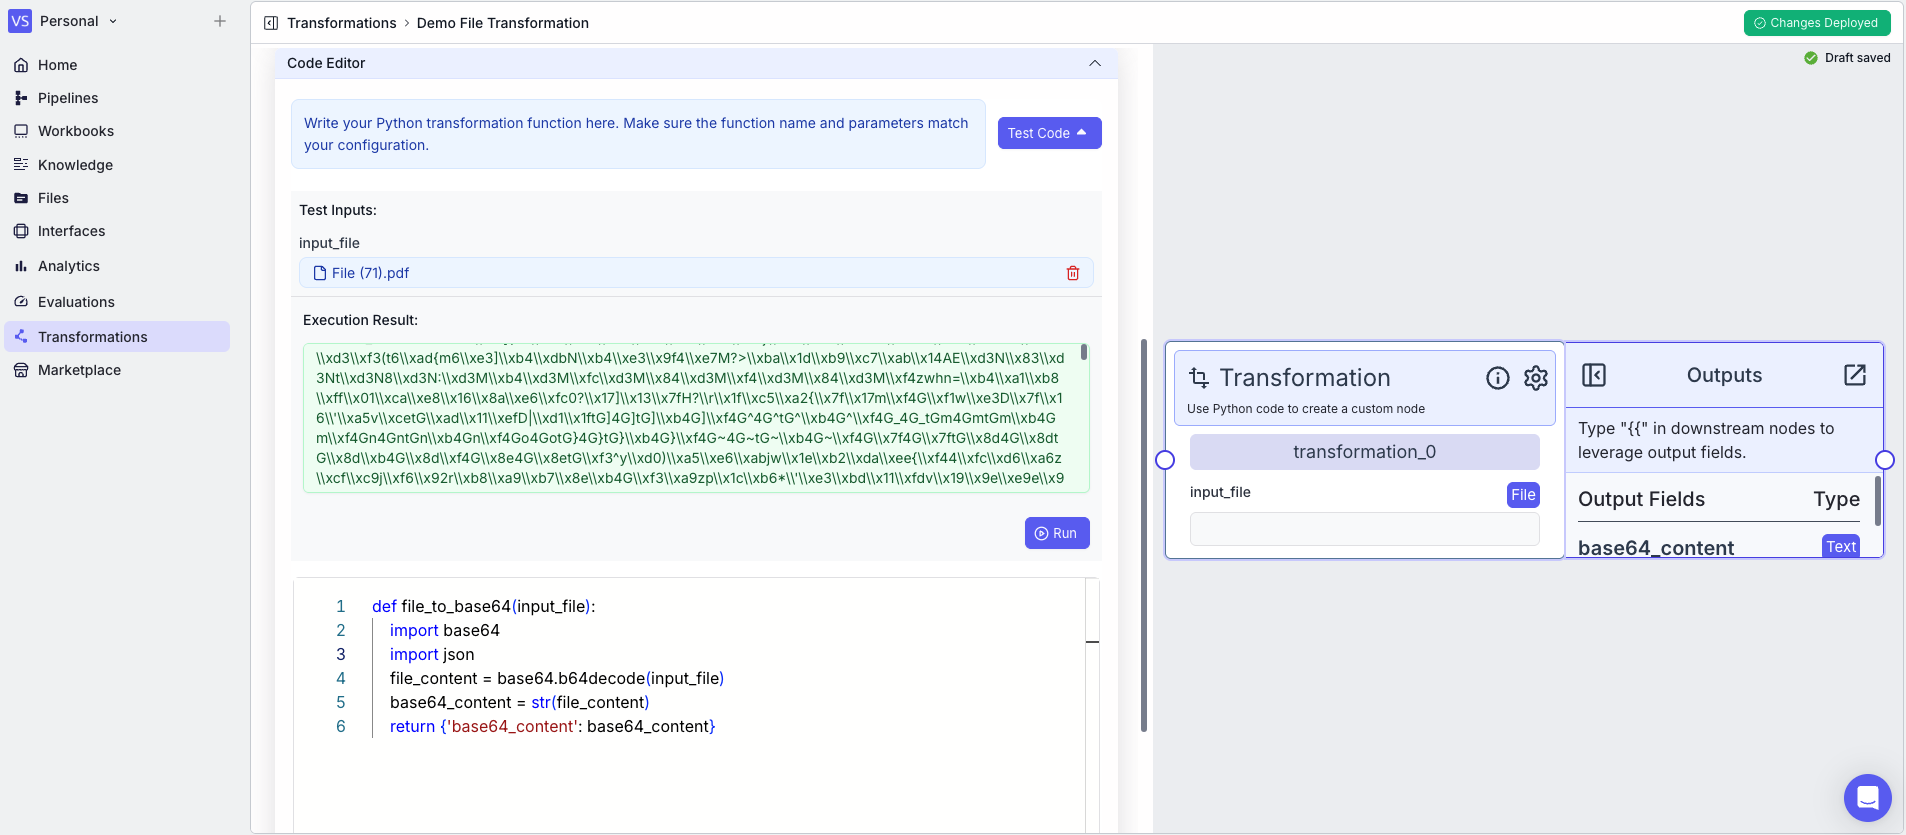
 In the code, the `base64` module is used to convert the content of a file to base64.
```python theme={"languages":{}}
def file_to_base64(input_file):
import base64
import json
file_content = base64.b64decode(input_file['content'])
base64_content = str(file_content)
return {'base64_content': base64_content}
```
Also, it is a good practice to test the transformation in the editor before deploying the changes. To test the transformation, you can use the `Test Code` button in the top right corner of the editor accordion.
In the code, the `base64` module is used to convert the content of a file to base64.
```python theme={"languages":{}}
def file_to_base64(input_file):
import base64
import json
file_content = base64.b64decode(input_file['content'])
base64_content = str(file_content)
return {'base64_content': base64_content}
```
Also, it is a good practice to test the transformation in the editor before deploying the changes. To test the transformation, you can use the `Test Code` button in the top right corner of the editor accordion.
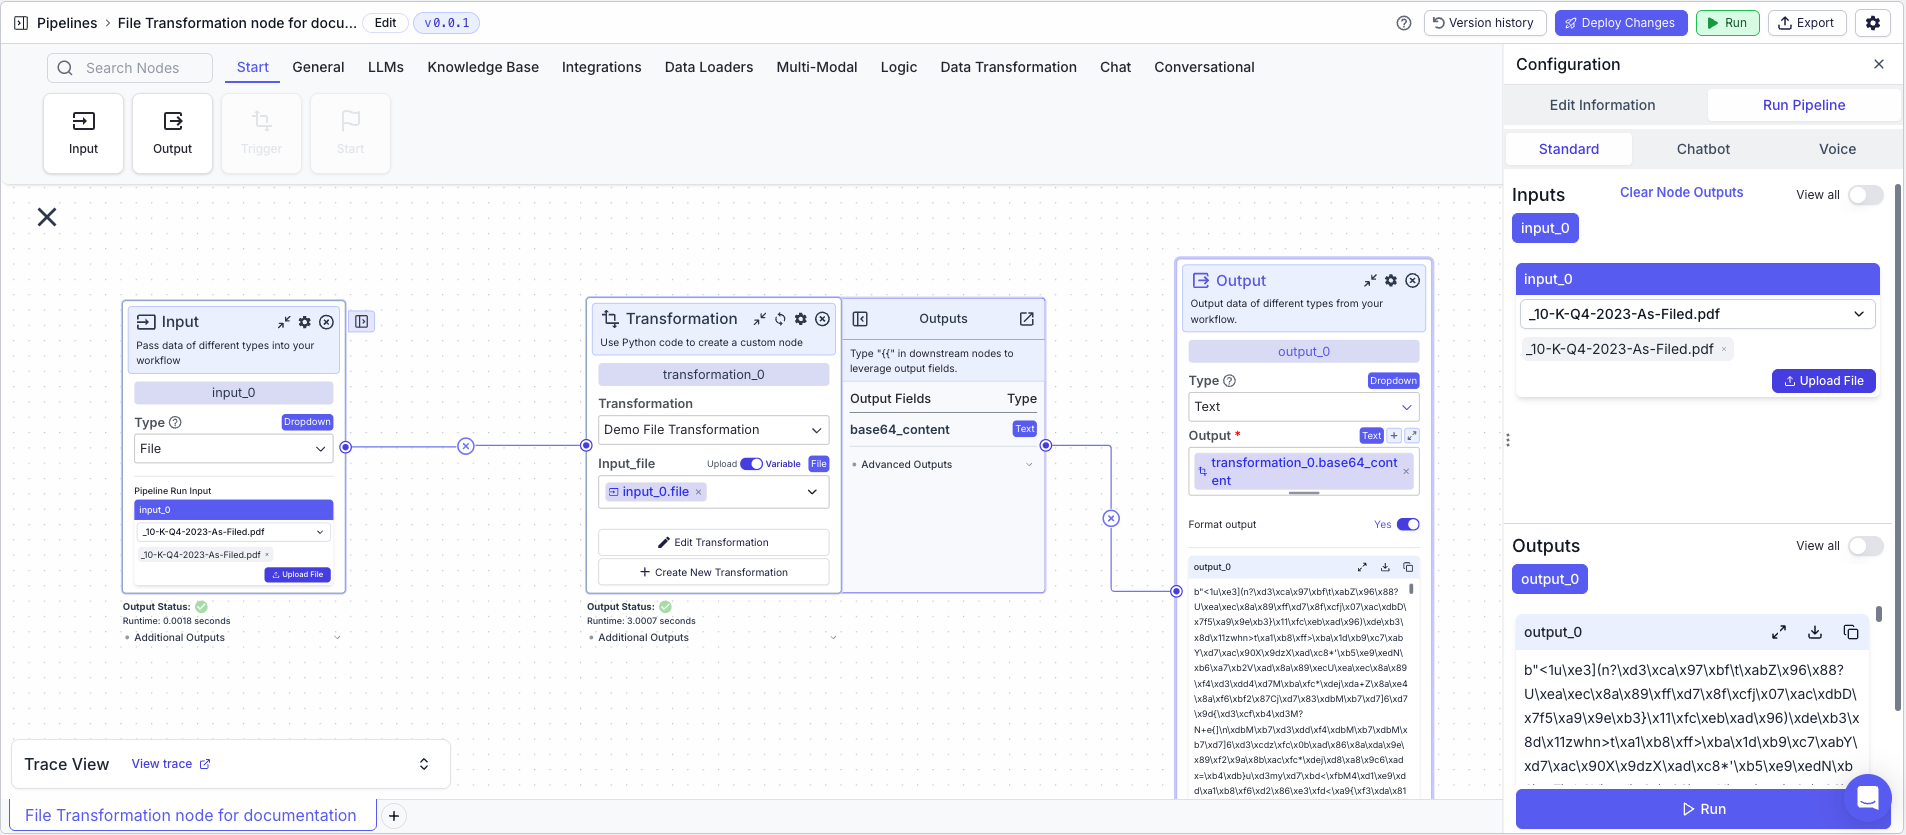
 ### Pipeline
In this example, we will use the transformation in a pipeline.
1. Input Node: takes a file as input
2. Transformation Node: Uses the transformation to convert the content of a file to base64
* Input\_file: `{{input_0.file}}`
* Transformation: `Demo File Transformation`
3. Output Node: Displays the base64 content of the file
* Output: `{{transformation_0.base64_content}}`
### Pipeline
In this example, we will use the transformation in a pipeline.
1. Input Node: takes a file as input
2. Transformation Node: Uses the transformation to convert the content of a file to base64
* Input\_file: `{{input_0.file}}`
* Transformation: `Demo File Transformation`
3. Output Node: Displays the base64 content of the file
* Output: `{{transformation_0.base64_content}}`