> ## Documentation Index
> Fetch the complete documentation index at: https://docs.vectorshift.ai/llms.txt
> Use this file to discover all available pages before exploring further.
# Voicebots
> Interact with your workflows in real-time using voice
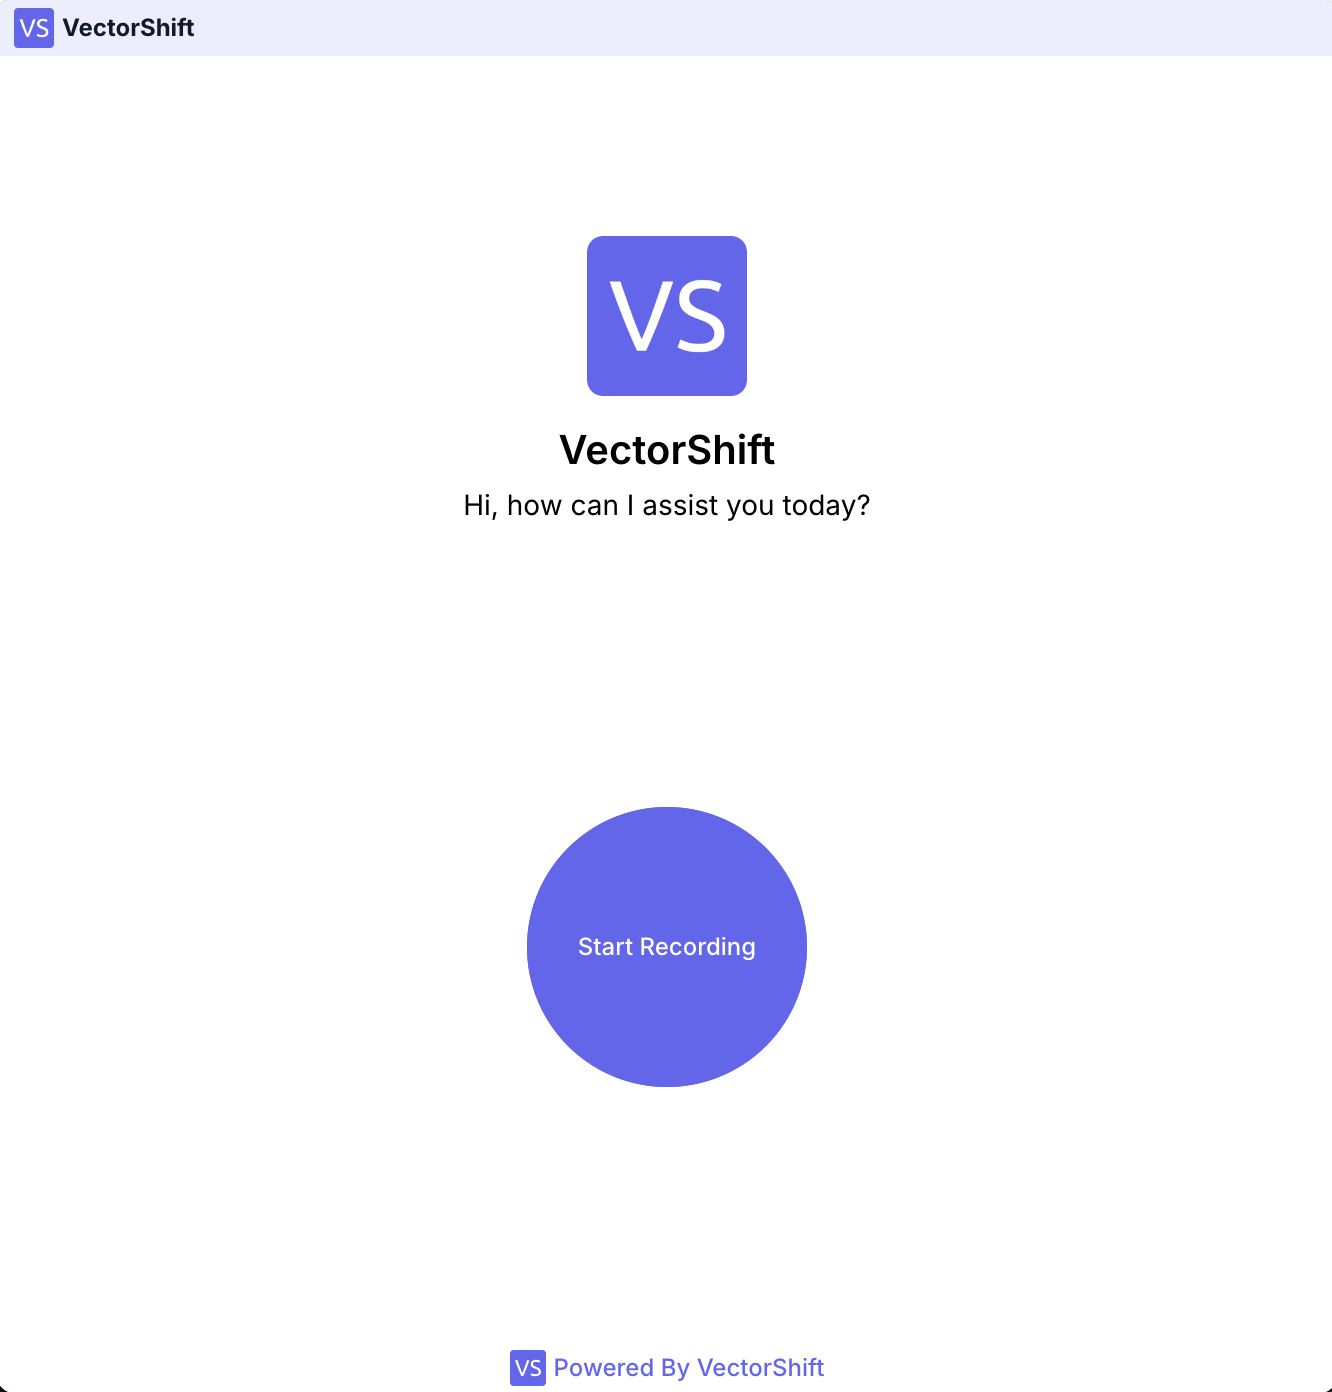
Voicebots are AI-powered virtual agents that can engage in voice conversations with users.
They combine speech recognition, natural language processing, and text-to-speech technologies to provide automated voice interactions.
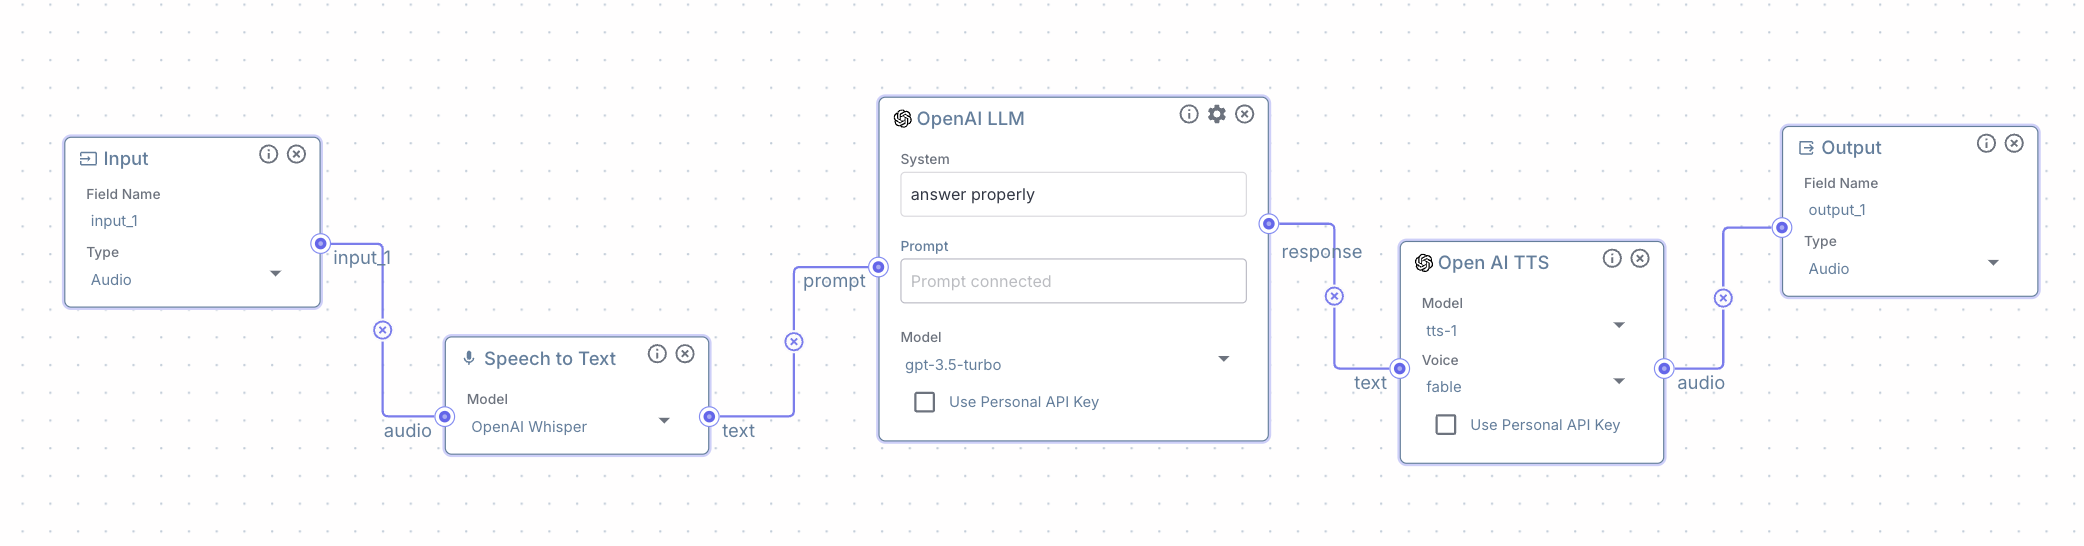
Only workflows with audio input and output can be assigned as voicebot.
 ## Create a new Voicebot
To create a new voicebot, take the following steps:
1. Go to the "Voicebots" menu, and click "New" on the top-right side of the window.
2. Name your voicebot and select a workflow to work on. You can only choose a workflow with audio input and output.
3. Customize your voicebot UI.
## Configuration
## Create a new Voicebot
To create a new voicebot, take the following steps:
1. Go to the "Voicebots" menu, and click "New" on the top-right side of the window.
2. Name your voicebot and select a workflow to work on. You can only choose a workflow with audio input and output.
3. Customize your voicebot UI.
## Configuration
 ### Workflow
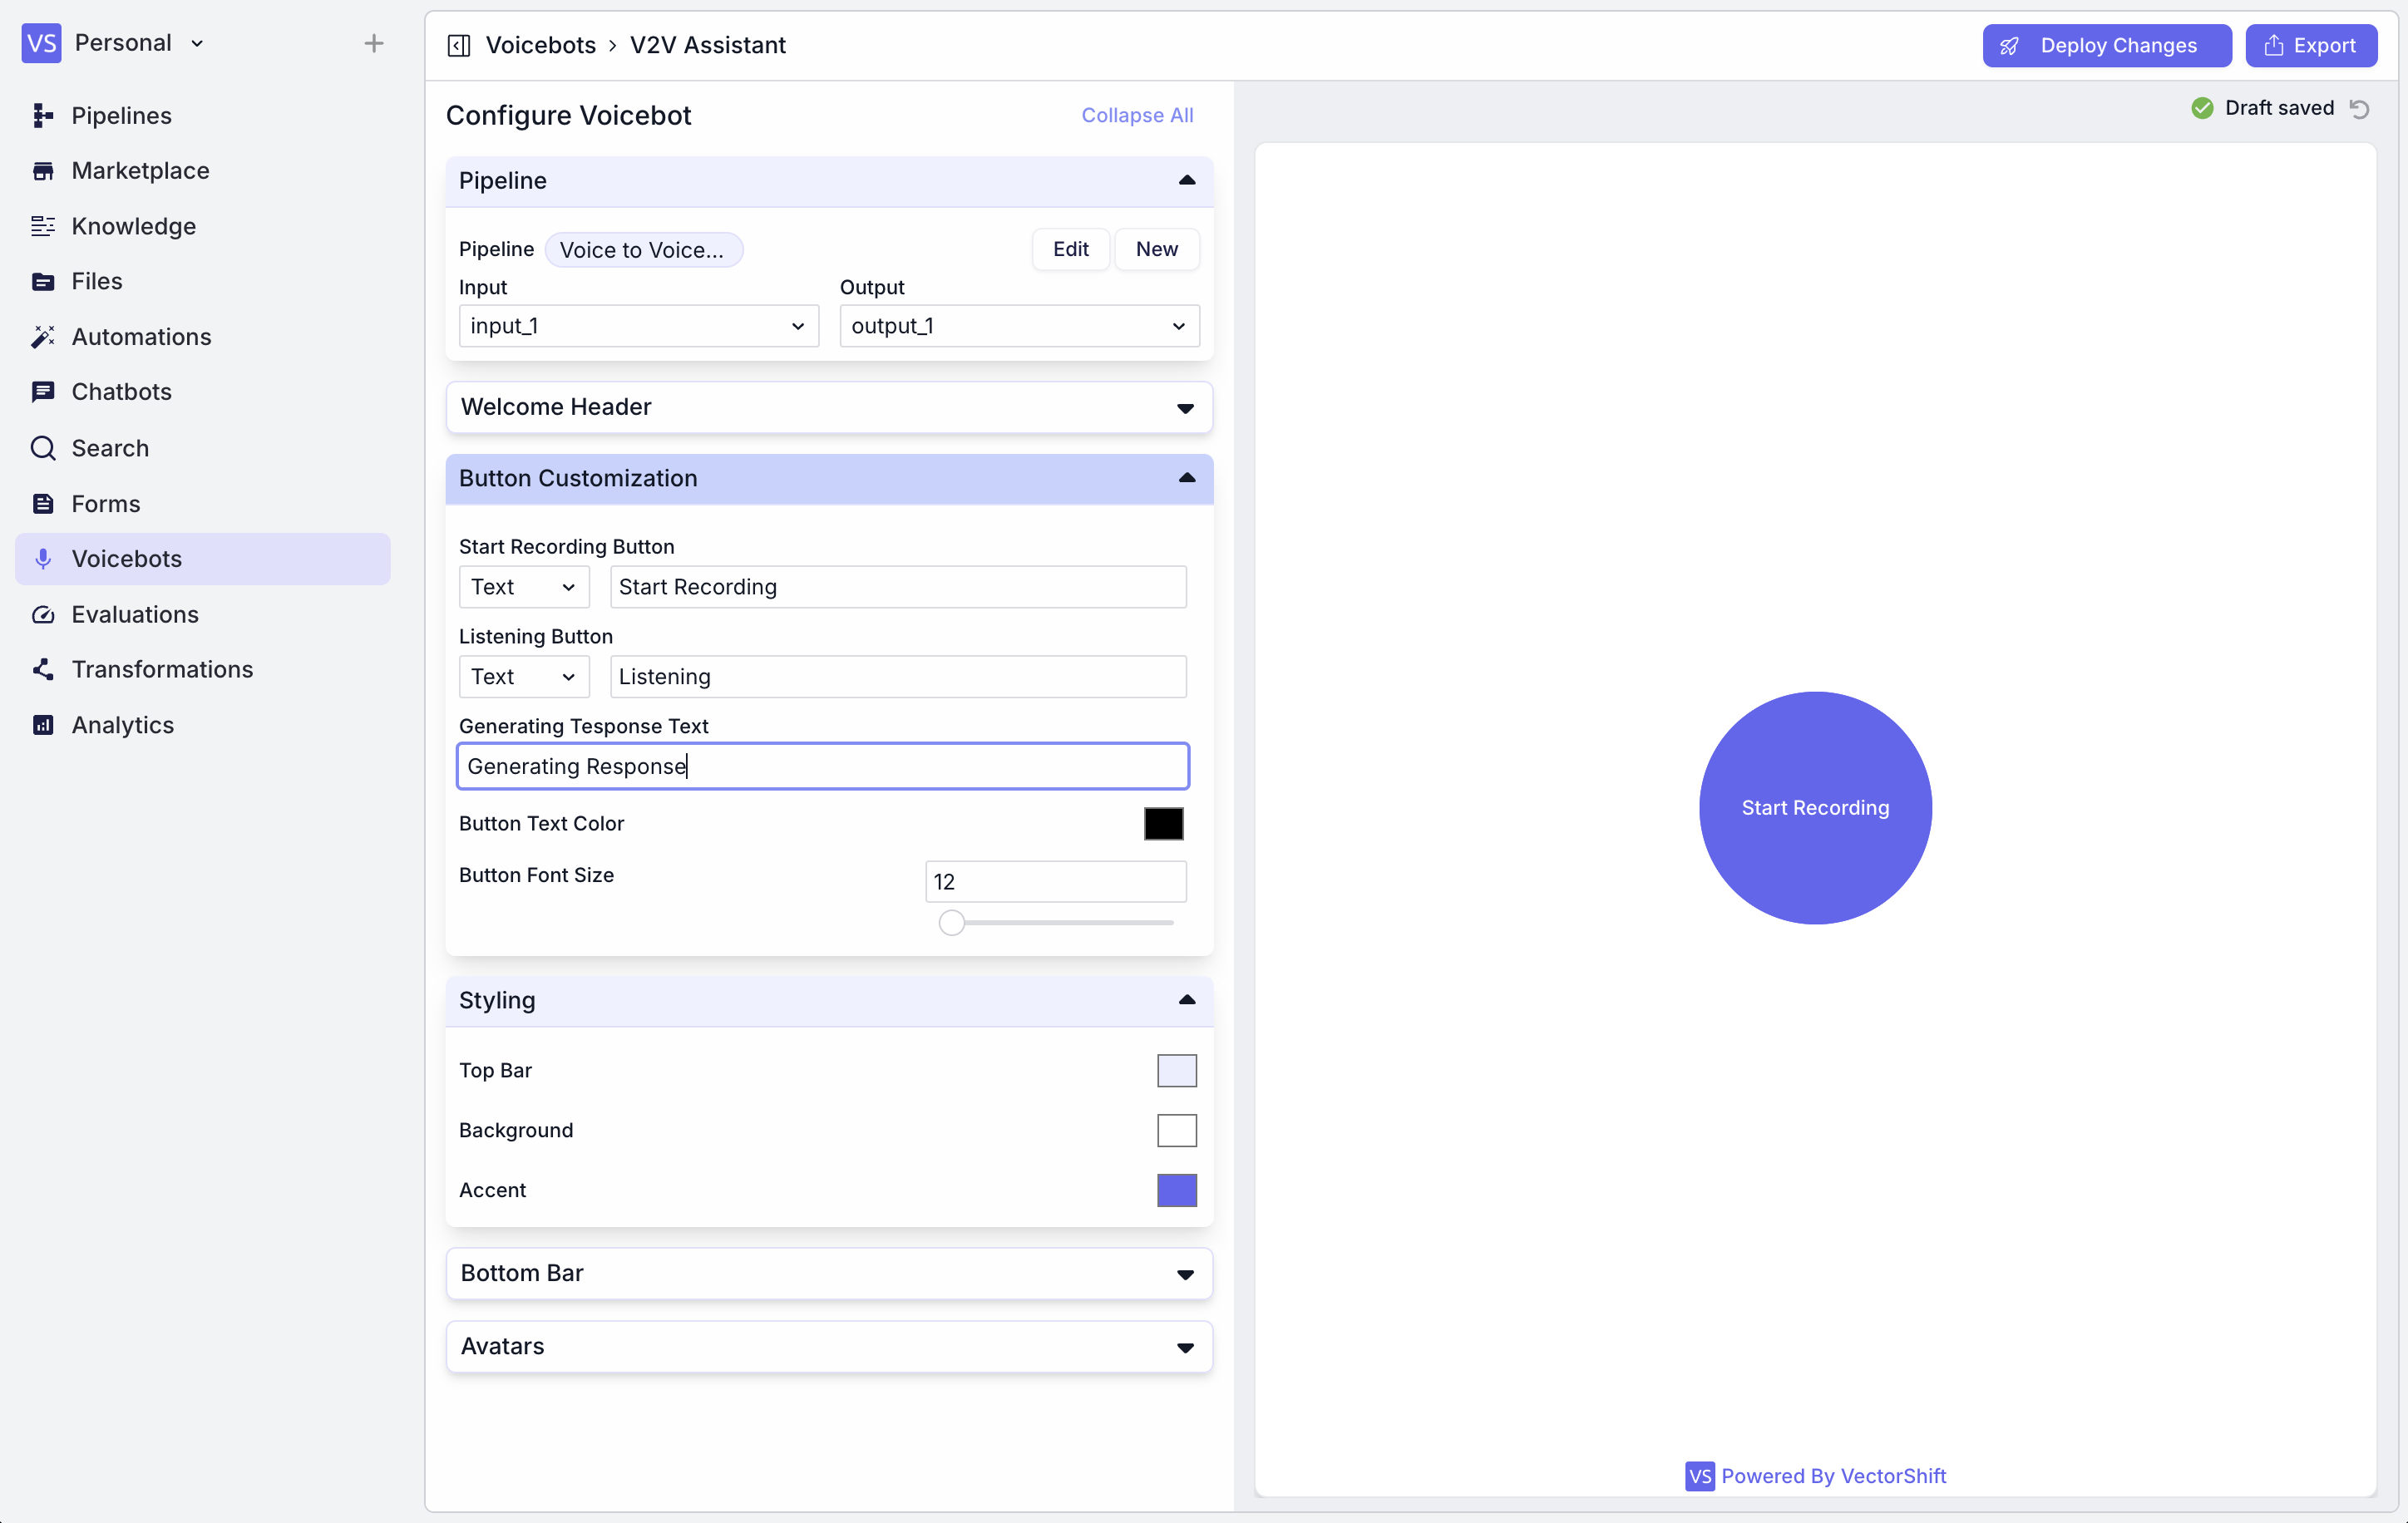
The workflow settings allow you to configure the input and output for your voicebot:
* **Workflow:** Choose a workflow to make it a Voicebot. Only a workflow with audio input/output can be selected.
* **Input:** Select a node from the dropdown to specify the audio input source.
* **Output:** Choose a node from the dropdown to define where the voicebot's responses will be directed.
### Welcome Header
The Welcome Header section lets you customize the initial appearance and message of your voicebot:
* **Show Top Bar:** Enable this to display a top bar in the voicebot interface.
* **Show Welcome Header:** Toggle this to show or hide the welcome message.
* **Show Close Icon:** Enable this to allow users to close the voicebot.
* **Display Image Size:** Adjust the slider to set the size of any displayed images.
### Welcome Header
The Welcome Header section lets you customize the initial appearance and message of your voicebot:
* **Display Name:** Enter the name of your voicebot.
* **Display Description:** Set a welcome message or brief instruction.
* **Font Styles:** Choose between normal or other styles for the name and description.
* **Display Description Alignment:** Set the alignment of the description text.
* **Font Sizes:** Adjust the font sizes for the display name and description.
* **Font Weights:** Set the boldness of the fonts for the name and description.
* **Font Colors:** Select colors for the display name and description text.
### Buttons
In the Button Customization section, you can tailor the appearance and text of various interactive elements in your voicebot interface:
* **Start Recording Button:** You can customize the text that appears on the button users click to begin speaking.
* **Listening Button:** This button's text is displayed while the voicebot is actively listening to the user's speech.
* **Generating Response Text:** This field allows you to set the text that appears while the voicebot is processing the user's input and formulating a response.
* **Button Text Color:** Choose the color of the text on your buttons.
* **Button Font Size:** Adjust the size of the text on your buttons.
### Styling
The Styling section lets you customize the overall look of your voicebot interface. You can set colors for three main elements:
* **Top Bar:** Currently set to white.
* **Background:** Also set to white.
* **Accent:** Set to a purple shade, which is used for highlights and interactive elements.
### Bottom Bar
The Bottom Bar section allows you to add and customize a footer for your voicebot interface:
* **Powered by VectorShift:** You can choose to display "Powered by VectorShift" in the bottom bar by checking this box.
* **Bottom Bar Text:** Enter any additional text you want to appear in the bottom bar.
* **Bottom Bar Redirect URL:** If you want the bottom bar to be clickable and lead to a specific webpage, enter the URL here.
* **Bottom Bar Icon URL:** You can add an icon to the bottom bar by providing a URL to the image file.
### Avatars
* **Assistant Image URL:** Enter the URL of the image you want to use as your voicebot's avatar.
* **Launcher URL:** This field is for specifying an image to be used as the launcher icon for your voicebot.
## Export
### Workflow
The workflow settings allow you to configure the input and output for your voicebot:
* **Workflow:** Choose a workflow to make it a Voicebot. Only a workflow with audio input/output can be selected.
* **Input:** Select a node from the dropdown to specify the audio input source.
* **Output:** Choose a node from the dropdown to define where the voicebot's responses will be directed.
### Welcome Header
The Welcome Header section lets you customize the initial appearance and message of your voicebot:
* **Show Top Bar:** Enable this to display a top bar in the voicebot interface.
* **Show Welcome Header:** Toggle this to show or hide the welcome message.
* **Show Close Icon:** Enable this to allow users to close the voicebot.
* **Display Image Size:** Adjust the slider to set the size of any displayed images.
### Welcome Header
The Welcome Header section lets you customize the initial appearance and message of your voicebot:
* **Display Name:** Enter the name of your voicebot.
* **Display Description:** Set a welcome message or brief instruction.
* **Font Styles:** Choose between normal or other styles for the name and description.
* **Display Description Alignment:** Set the alignment of the description text.
* **Font Sizes:** Adjust the font sizes for the display name and description.
* **Font Weights:** Set the boldness of the fonts for the name and description.
* **Font Colors:** Select colors for the display name and description text.
### Buttons
In the Button Customization section, you can tailor the appearance and text of various interactive elements in your voicebot interface:
* **Start Recording Button:** You can customize the text that appears on the button users click to begin speaking.
* **Listening Button:** This button's text is displayed while the voicebot is actively listening to the user's speech.
* **Generating Response Text:** This field allows you to set the text that appears while the voicebot is processing the user's input and formulating a response.
* **Button Text Color:** Choose the color of the text on your buttons.
* **Button Font Size:** Adjust the size of the text on your buttons.
### Styling
The Styling section lets you customize the overall look of your voicebot interface. You can set colors for three main elements:
* **Top Bar:** Currently set to white.
* **Background:** Also set to white.
* **Accent:** Set to a purple shade, which is used for highlights and interactive elements.
### Bottom Bar
The Bottom Bar section allows you to add and customize a footer for your voicebot interface:
* **Powered by VectorShift:** You can choose to display "Powered by VectorShift" in the bottom bar by checking this box.
* **Bottom Bar Text:** Enter any additional text you want to appear in the bottom bar.
* **Bottom Bar Redirect URL:** If you want the bottom bar to be clickable and lead to a specific webpage, enter the URL here.
* **Bottom Bar Icon URL:** You can add an icon to the bottom bar by providing a URL to the image file.
### Avatars
* **Assistant Image URL:** Enter the URL of the image you want to use as your voicebot's avatar.
* **Launcher URL:** This field is for specifying an image to be used as the launcher icon for your voicebot.
## Export
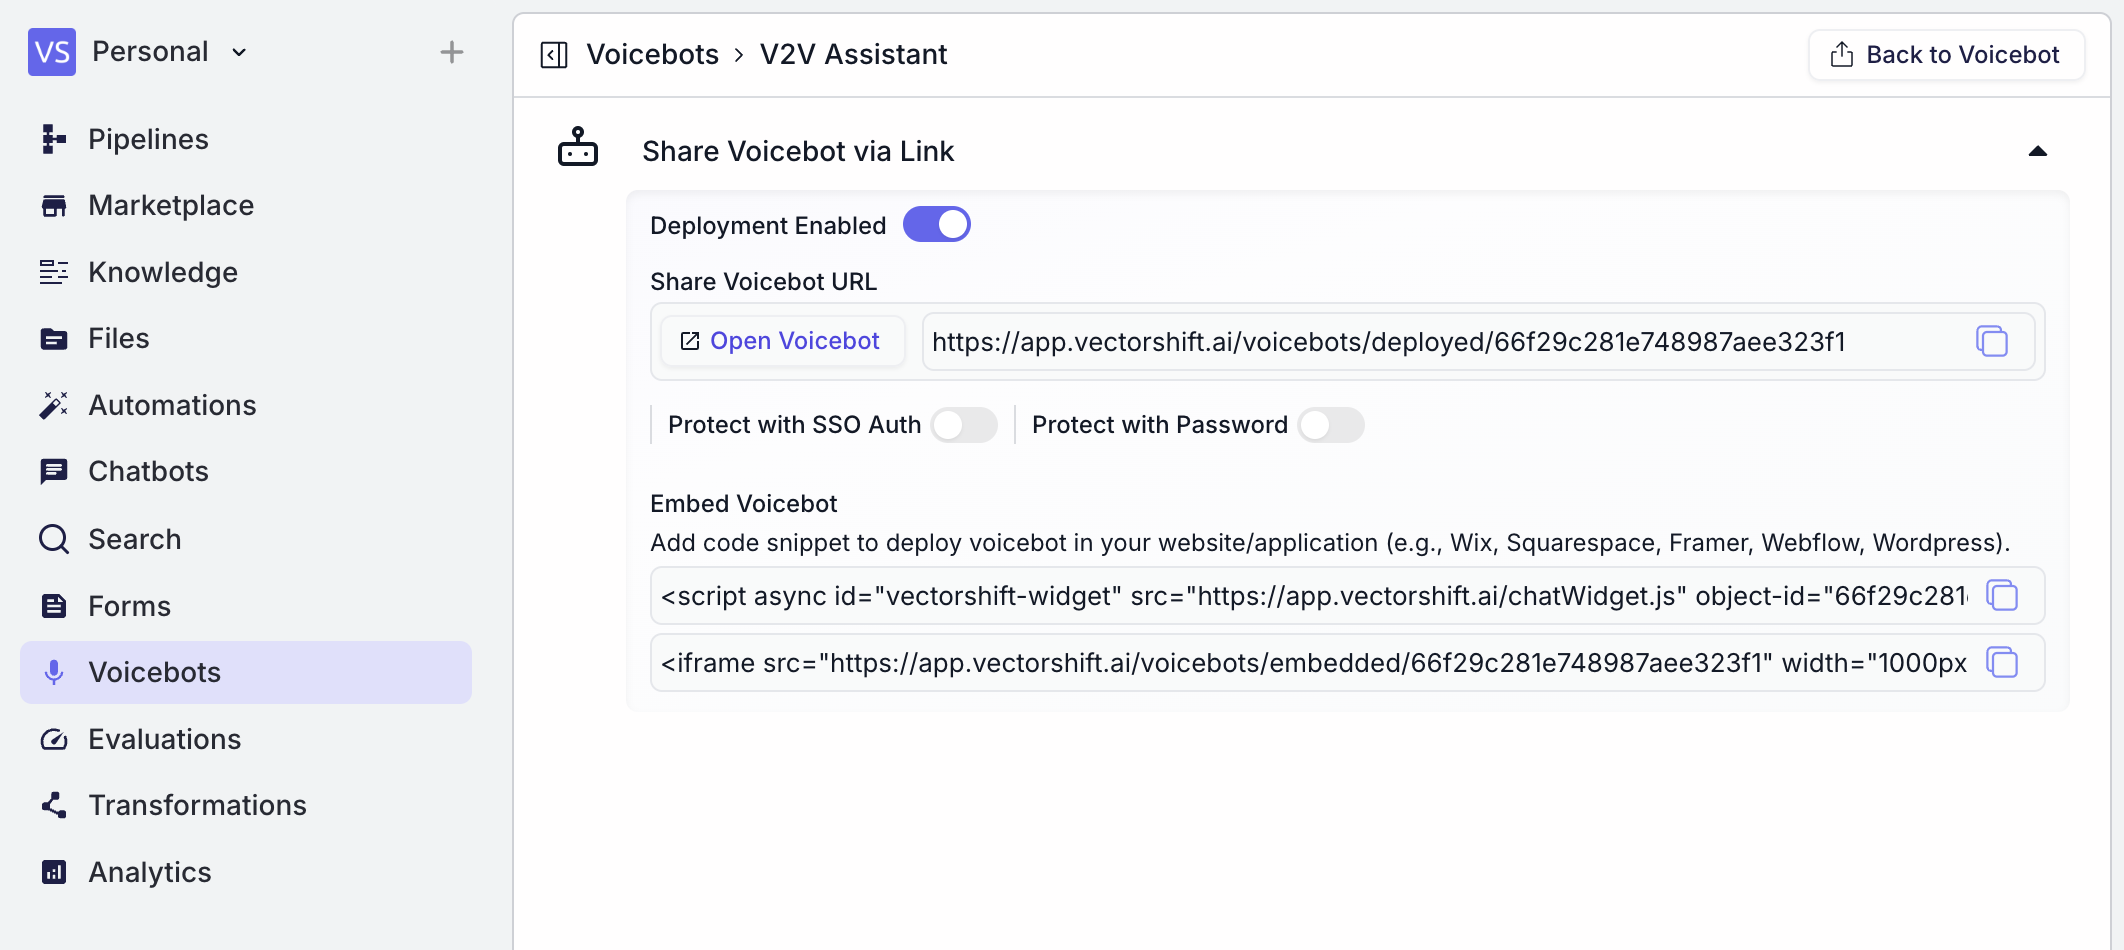 * **Deployment Enabled:** Toggle this switch to activate your voicebot.
* **Share Voicebot URL:** A unique URL is generated for your voicebot. You can click "Open Voicebot" to test it directly. Copy the URL to share it with others.
* **Protect with SSO Auth:** Enable this if you want to restrict access using Single Sign-On authentication.
* **Protect with Password:** Toggle this on to set a password for accessing your voicebot.
### Embedding your Voicebot
You can integrate the voicebot into your website or application using two methods:
1. **Script Embedding:** Use the provided `
* **Deployment Enabled:** Toggle this switch to activate your voicebot.
* **Share Voicebot URL:** A unique URL is generated for your voicebot. You can click "Open Voicebot" to test it directly. Copy the URL to share it with others.
* **Protect with SSO Auth:** Enable this if you want to restrict access using Single Sign-On authentication.
* **Protect with Password:** Toggle this on to set a password for accessing your voicebot.
### Embedding your Voicebot
You can integrate the voicebot into your website or application using two methods:
1. **Script Embedding:** Use the provided `